Printing Parts
Key Concepts
Printing in Printago is the process of sending parts from your library to the print queue, where they are matched with compatible printers and produced automatically. Rather than manually exporting G-code and transferring files to each printer, you configure your print—setting quantities, materials, and printer assignment—and Printago handles slicing, routing, and job management behind the scenes. You can print a single part, bulk-print multiple parts at once, or print entire SKUs. Printago supports three assignment strategies: letting the system pick the next available compatible printer, targeting a specific machine, or routing to a group of printers by tag. This workflow is designed so that scaling from one printer to a hundred requires no change in how you initiate prints.
To learn more about how to add and manage parts, check out Parts Management.
Starting a Print
Single Part Printing
- Navigate to
Products -> Parts - Find your part and click the
Send to Queuebutton - Configure your print settings:
- Set quantity
- Configure OpenSCAD parameters (if applicable)
- Select material (the part's default material may be overridden)
- Priority: Use the toggle button to the left of "Send to Queue" to mark jobs as low priority (optional)
- Choose printer Assignment Method
Queue Priority Options
- Normal Priority (default): Jobs process immediately when printers are available
- Low Priority: Jobs only process when no normal priority jobs are waiting
After queuing, job priority can be adjusted from the Print Queue Management interface.
STL Parts
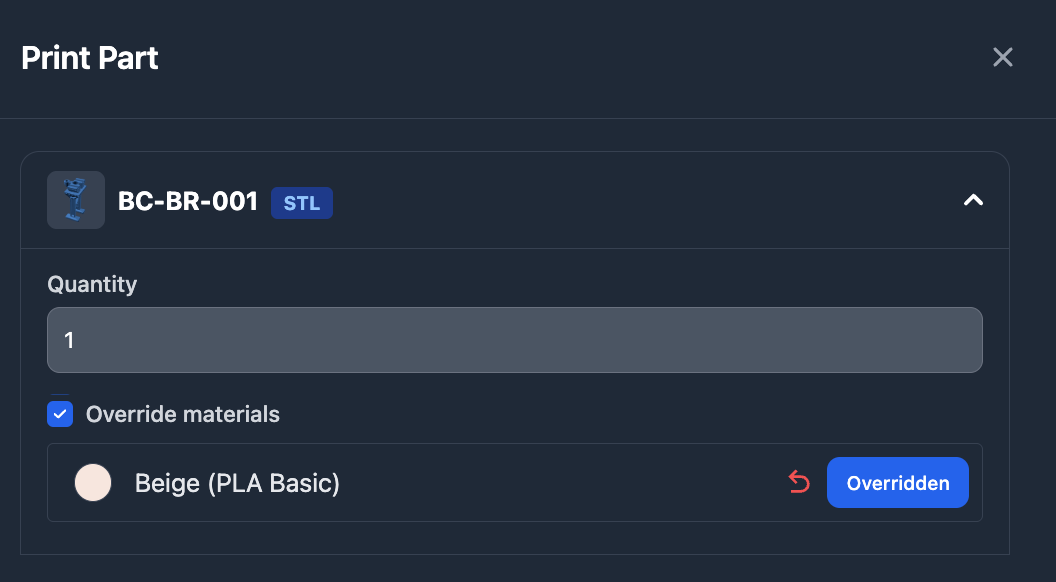
STL parts are ready to print with quantity and material selection.
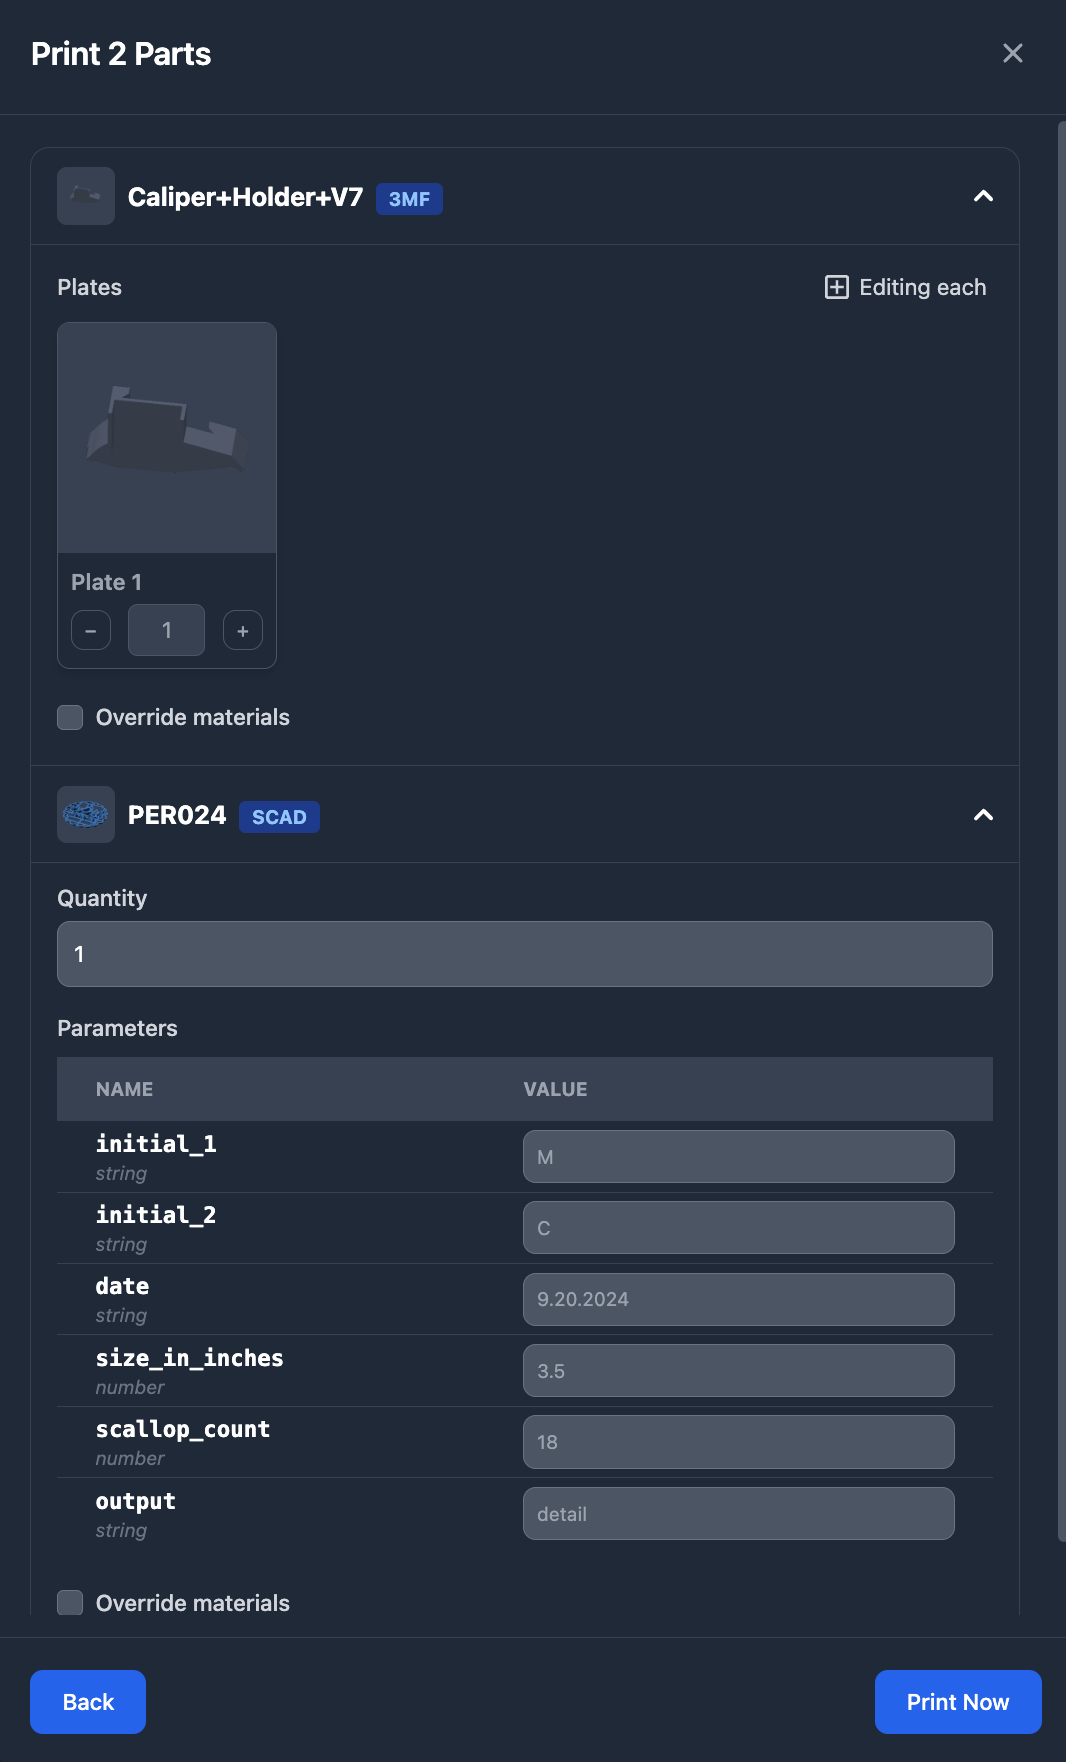
3MF Files
When printing 3MF files:
- Select which build plates to print from the available options
- Toggle between "editing each" and "editing all" modes
- In "editing all" mode, changing one build plate's quantity adjusts all build plates proportionally

OpenSCAD Parts (.scad)
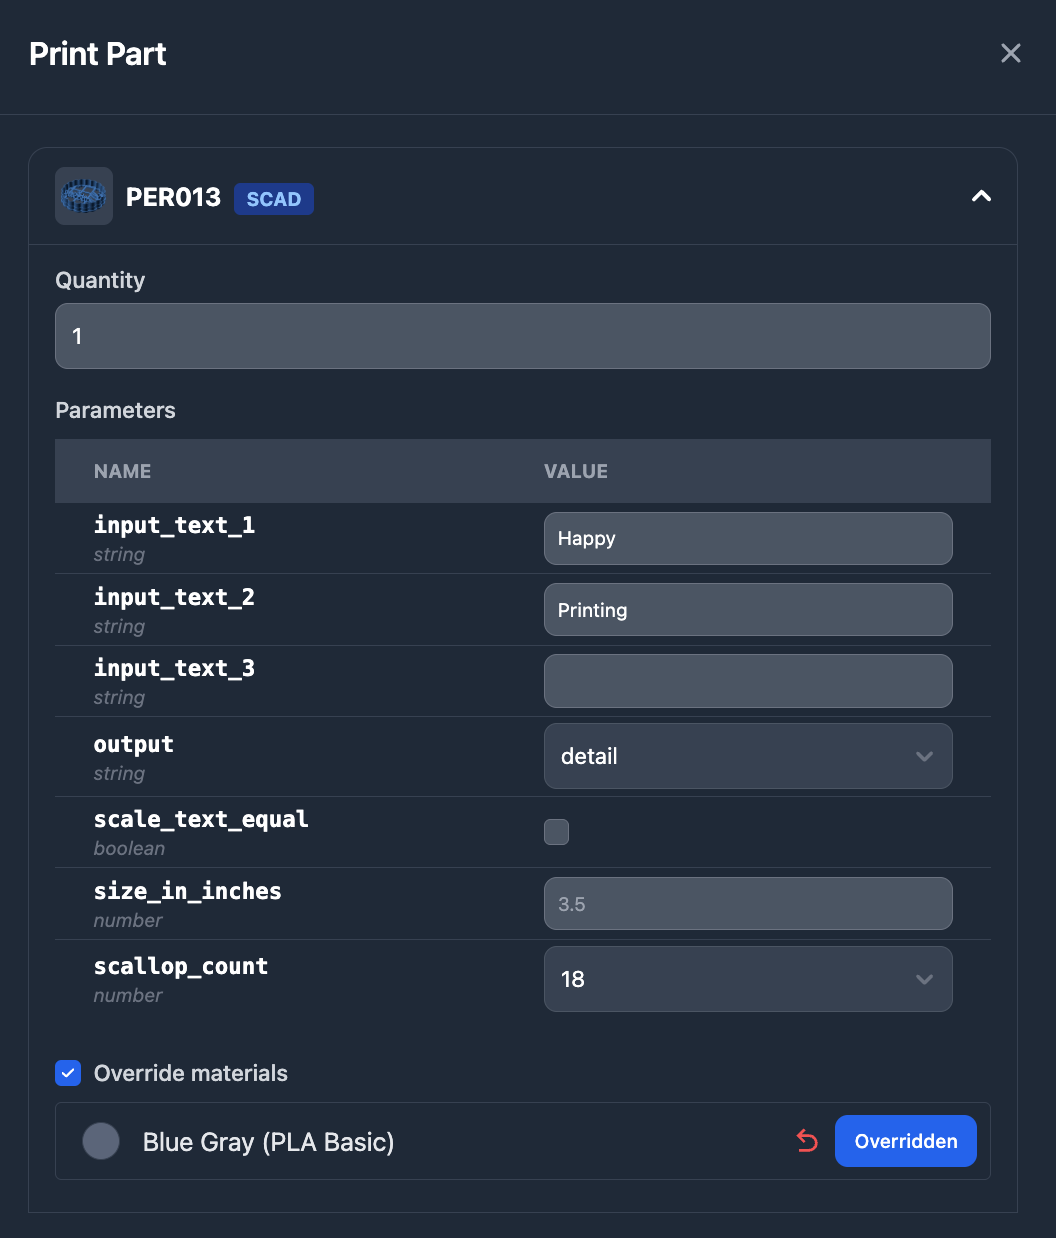
OpenSCAD parts display parameter inputs for customization before printing.
Bulk Printing
You can select multiple parts and print them together:
- Select multiple parts using checkboxes
- Choose
Printfrom the Bulk Actions menu
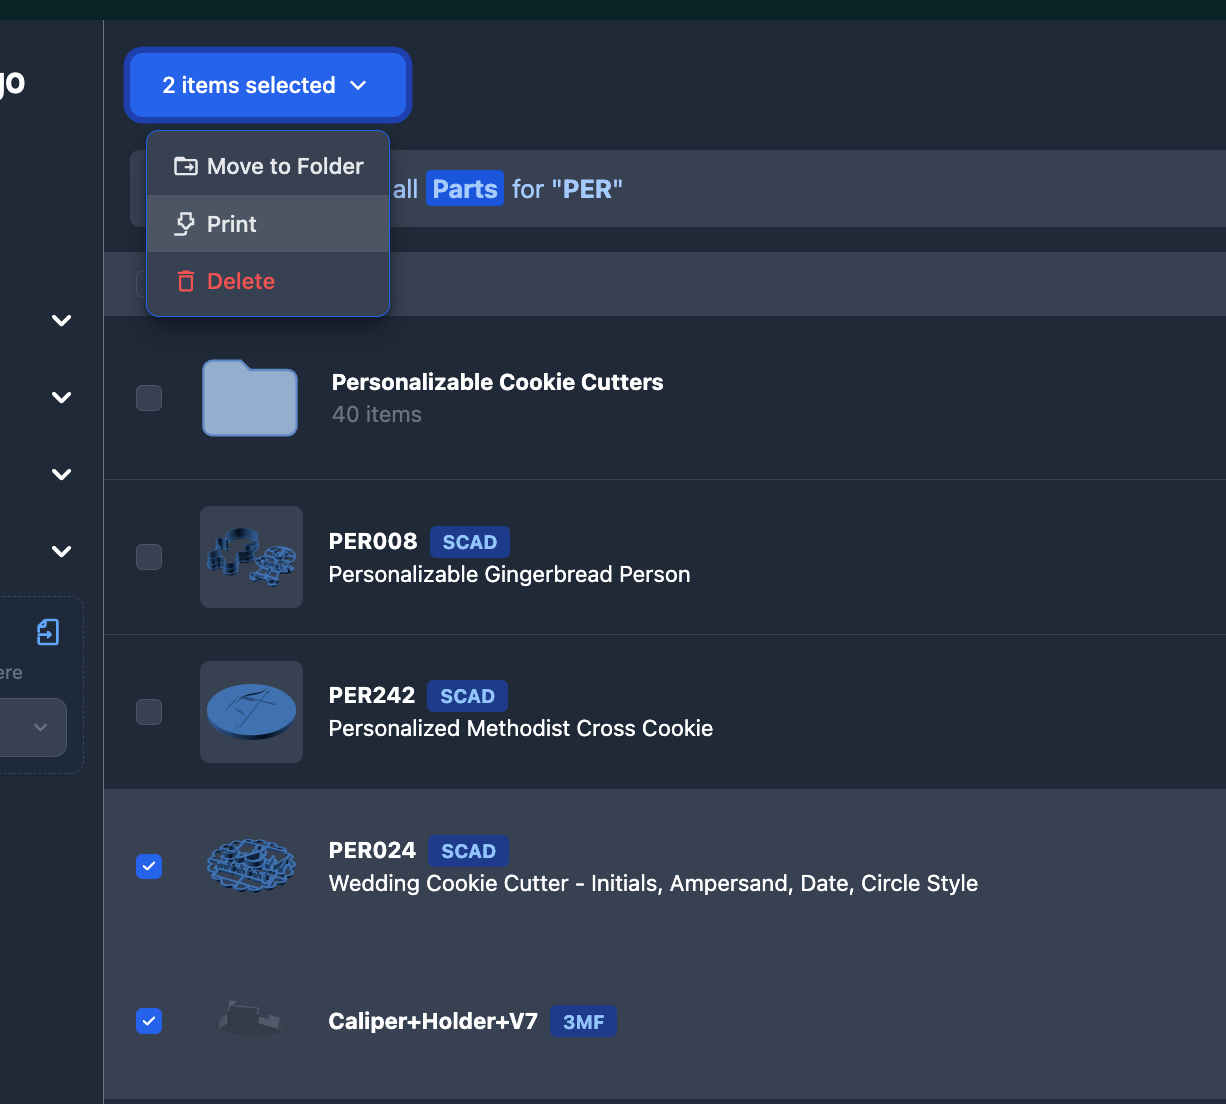
- A dialog opens with each selected part in an accordion format
- Configure each part individually:
- Set quantities
- Adjust parameters
- Select materials
Pick Objects to Print
When a build plate contains more than one object, you don't have to print all of them. In the Print Part dialog, plates with multiple objects show a cube button on the plate image (circled below).

Click it to open a visual picker, then check the objects you want to skip.
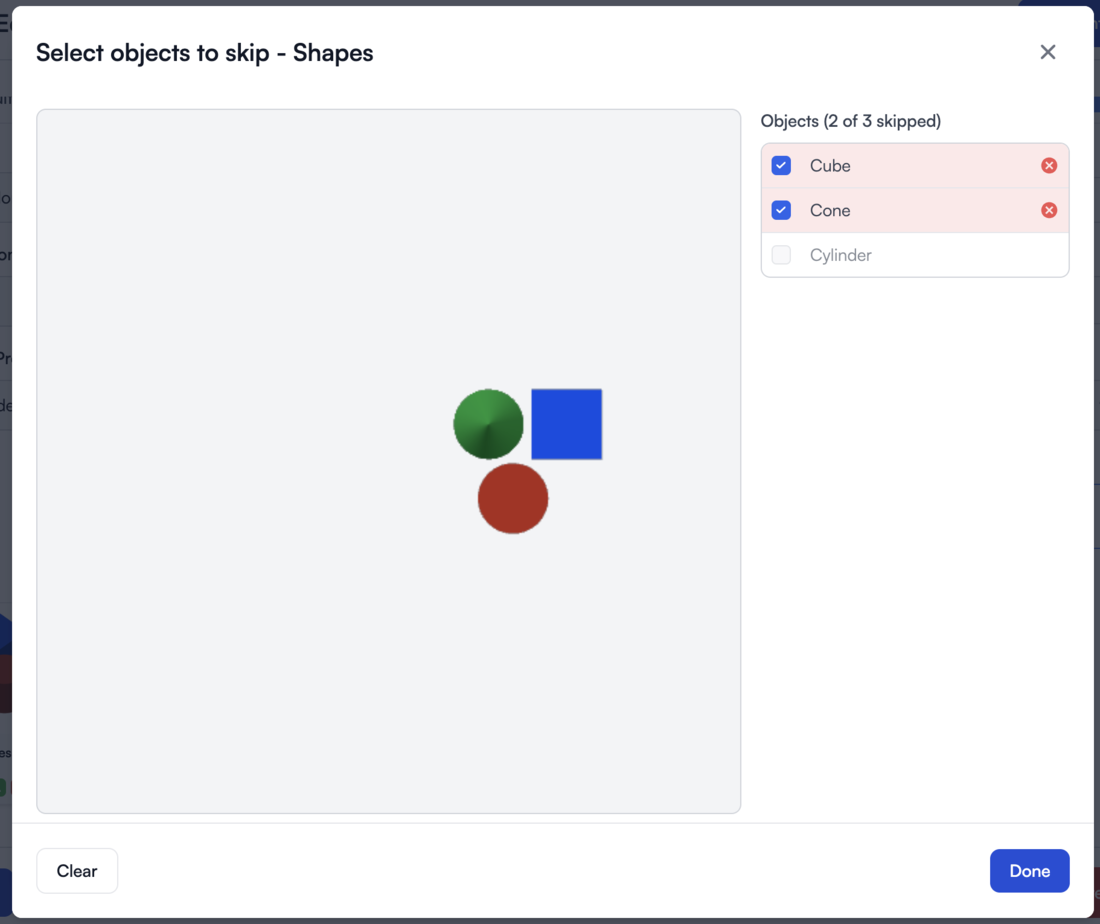
Skipped objects are checked and highlighted in the object list, with a running count in the header (for example, "2 of 3 skipped"). At least one object must remain selected to print. Use Clear to reset your selection, then Done to apply it.
Back on the plate, the cube button shows a badge with the number of objects you're skipping.
When you skip objects before printing, Printago optimizes the plate for you. For a project 3MF that Printago slices, it re-slices the plate with the skipped objects excluded, so their models and toolpaths are left out of the print entirely, and the time and material estimates reflect exactly what you chose to keep. For a file that already contains sliced gcode, Printago prints that gcode as-is and can't drop the geometry; on Bambu Lab printers the skipped objects are cancelled automatically as the print begins instead.
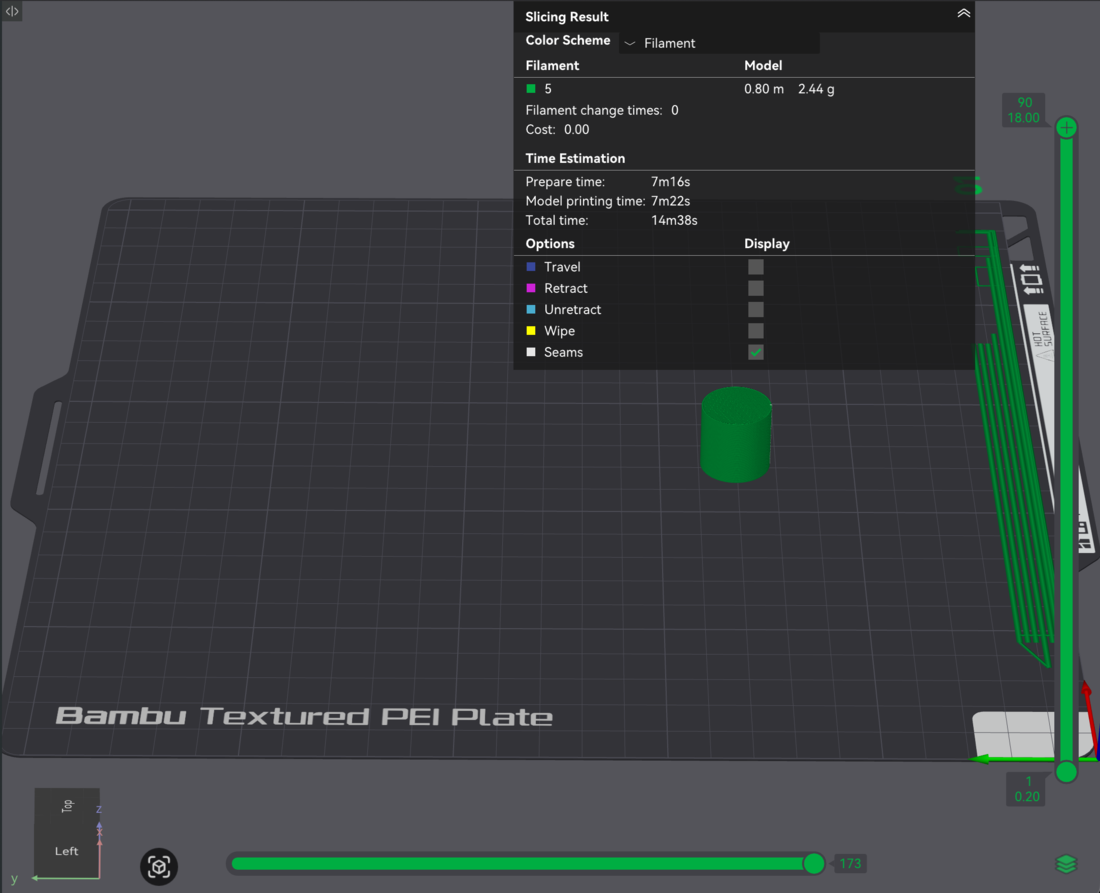
Here is the same "Shapes" plate sliced both ways. Skipping the cube and cone leaves just the cylinder, which takes this print from over five hours down to about fifteen minutes:

If a plate has multiple objects but the picker only shows one, make sure they're separate objects in your slicer (not combined or merged into a single object). Objects that are joined in the slicer are treated as one object here.
If they are already separate objects and you still don't see them, use Reprocess Metadata on the file at the top of the part screen to re-extract the object information. This is needed for any file uploaded before June 5, 2026, since object detection was added on that date.
How a skip is applied depends on whether Printago slices the file. For a project 3MF, Printago re-slices the plate to exclude the objects, which works on any printer. For a pre-sliced 3MF (one that already contains gcode) and for skipping during a running print (from the printer's Skip Objects tab), the objects are cancelled on the printer, which is available on Bambu Lab printers.
| File type | Printer | Pre-print skip | Runtime skip |
|---|---|---|---|
| Project 3MF (Printago slices it) | Bambu Lab | ✅ | ✅ |
| Non-Bambu | ✅ | ❌ | |
| Pre-sliced 3MF (already has gcode) | Bambu Lab | ✅ | ✅ |
| Non-Bambu | ❌ | ❌ |
Material Usage for Skipped Objects
Skipping an object never inflates your material usage records. Printago tracks exactly how much filament each object consumed, so the usage recorded when the print finishes reflects what was actually printed:
- Skipped before slicing (project 3MF): the object is never in the gcode, so it contributes nothing. Time and material estimates already exclude it.
- Skipped at print start (pre-sliced 3MF on Bambu Lab): the object never prints, so none of its filament is counted.
- Skipped during the print: the object's filament is counted up to and including the layer where you skipped it, and nothing after. If you skip an object on layer 14, layers 1 through 14 of that object count, layers 15 onward do not.
This works no matter where the skip comes from: the Skip Objects tab in Printago, the printer's own touchscreen, or the Bambu Handy app. Shared material like purge and prime towers still counts, since the printer uses it either way.
The adjusted numbers flow through everywhere material usage appears: print history, material usage notifications, and cost calculations.
Custom Print Job Labels
You can edit a job's label right in the Print Part modal:
- The overall label defaults to the part name. It's editable for STL and other single-file parts.
- For 3MF files with plates, each plate name is editable inline. The resulting queue label is
<label> - <plate name>.
The same label and a plateLabels field are available on the build API for programmatic use.
Per-Print Multi-Material Mapping
Multi-color prints honor the per-print material assignment even when the physical filament is loaded into different slots than the slicer expected. Printago remaps the slicer's slots to wherever the filament actually lives on the printer, so you don't have to rearrange spools to match a file.
For how material matching across multiple slots works in general, see Multi-Color 3MF Matching.
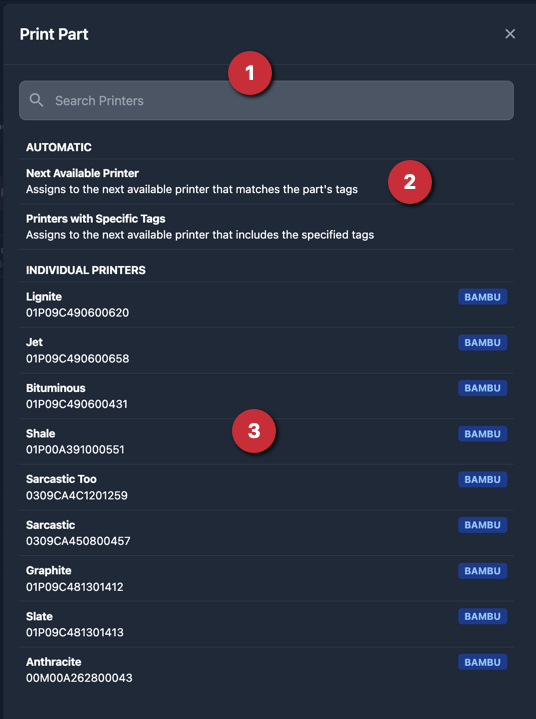
Printer Assignment
When starting a print, you can target specific printers or let Printago handle printer selection automatically. Every print job enters the Print Queue, and starts when matching printers become available.
- Search for Individual Printers
- Automatic Assignment
- Individual Printer List
Assignment Methods
Next Available
Lets Printago automatically match jobs to compatible printers based on:
- Material requirements
- Color matching
- Current printer status
Specific Printer
Target an individual printer from your fleet. The job waits in queue until that printer:
- Has required materials loaded
- Is marked Clear & Ready
- Has no active prints
Tagged Printers
Filter available printers using tags to dynamically group printers. For example:
- Target any printers with tag "Production"
- Only use printers tagged both "Upper Floor" and "TexturedPEI"
- Learn more about Printer Tags
State Diagram
The following diagram shows the part printing flow.
Next Steps
After printing parts, they are added to the print queue where they are matched with available printers. For more information about how parts are matched with printers and queue management, see Print Queue Management.