SKU Management
Key Concepts
A SKU (Stock Keeping Unit) in Printago is synonymous with an assembly—a complete, shippable product composed of one or more parts with specific quantities, material configurations, and customization options. While a part represents a single 3D model, a SKU represents the finished product a customer receives. For example, a desk organizer SKU might bundle a base, two dividers, and a lid, each with their own material and quantity settings. SKUs also serve as the link between your production workflow and your e-commerce storefronts: when an order arrives from Shopify or Etsy, Printago matches the order's SKU identifier to your SKU definitions and automatically generates the correct print jobs. If you sell physical products made from 3D-printed parts, SKUs let you define "what to make" once and reuse that definition across manual orders, storefront integrations, and batch production runs.
SKUs are only available to Printago users on a Commercial Account.
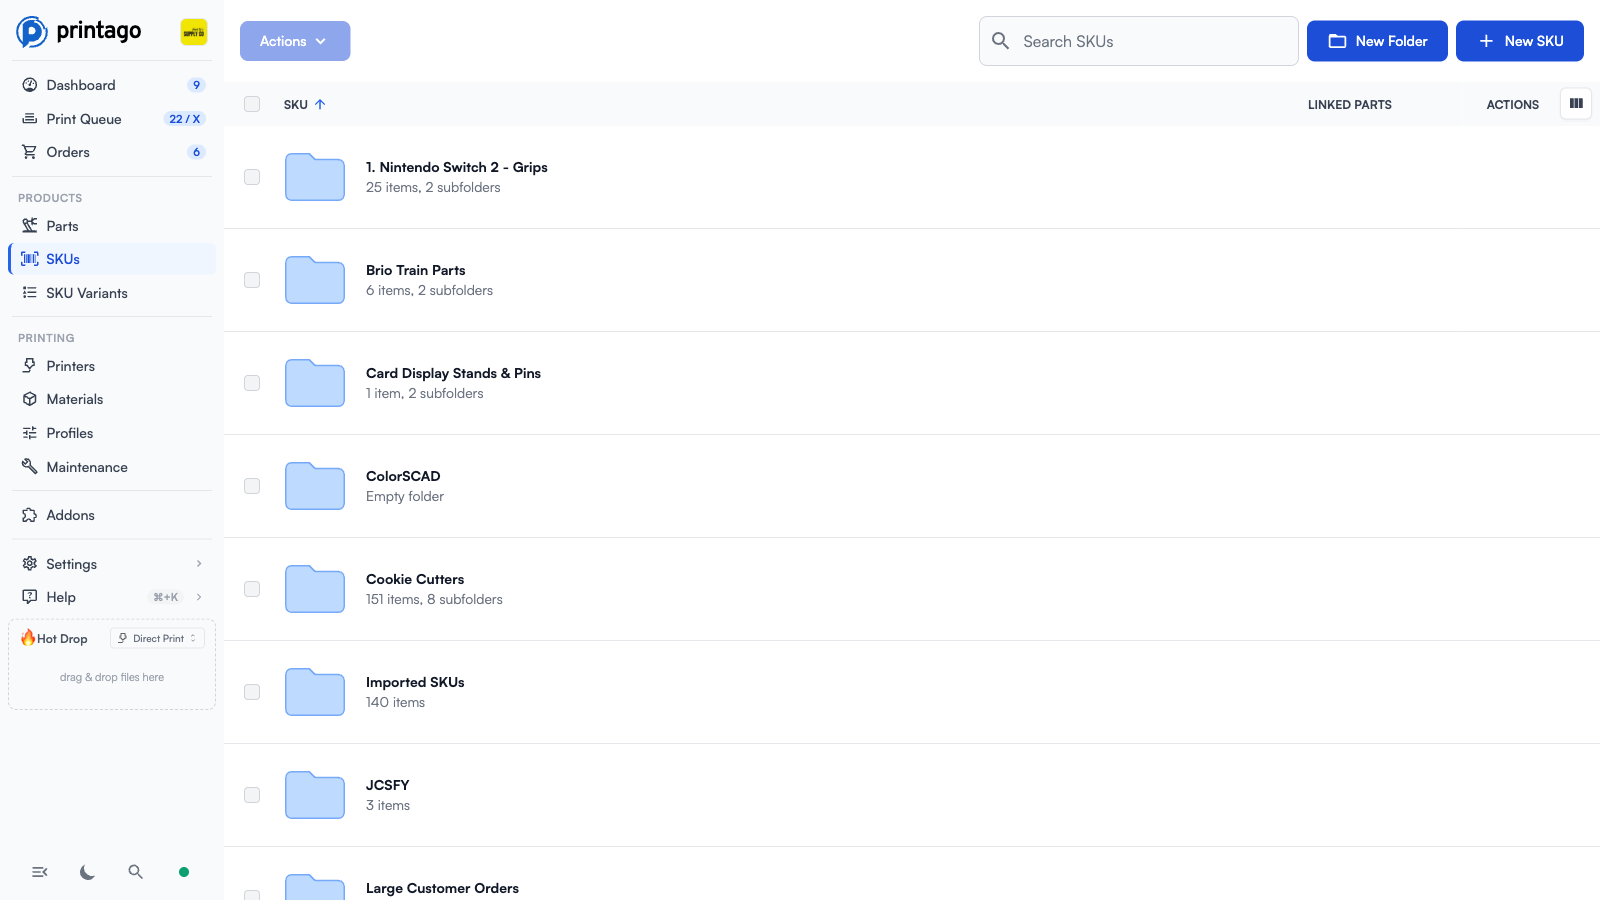
Overview
SKUs are the bridge between your 3D models and your production workflow. While Parts represent individual 3D models, SKUs represent complete products ready for production. SKUs are also what Printago leverages for e-commerce integrations. This could be:
- A single part.
- Multiple parts that make up a complete product
- Build plates from 3MF part files
- Variations of products (like different sizes or colors)
- Customizable products with variable parameters
SKUs are also part of Printago's e-commerce system: Orders are made of SKUs with quantities along with customer information.
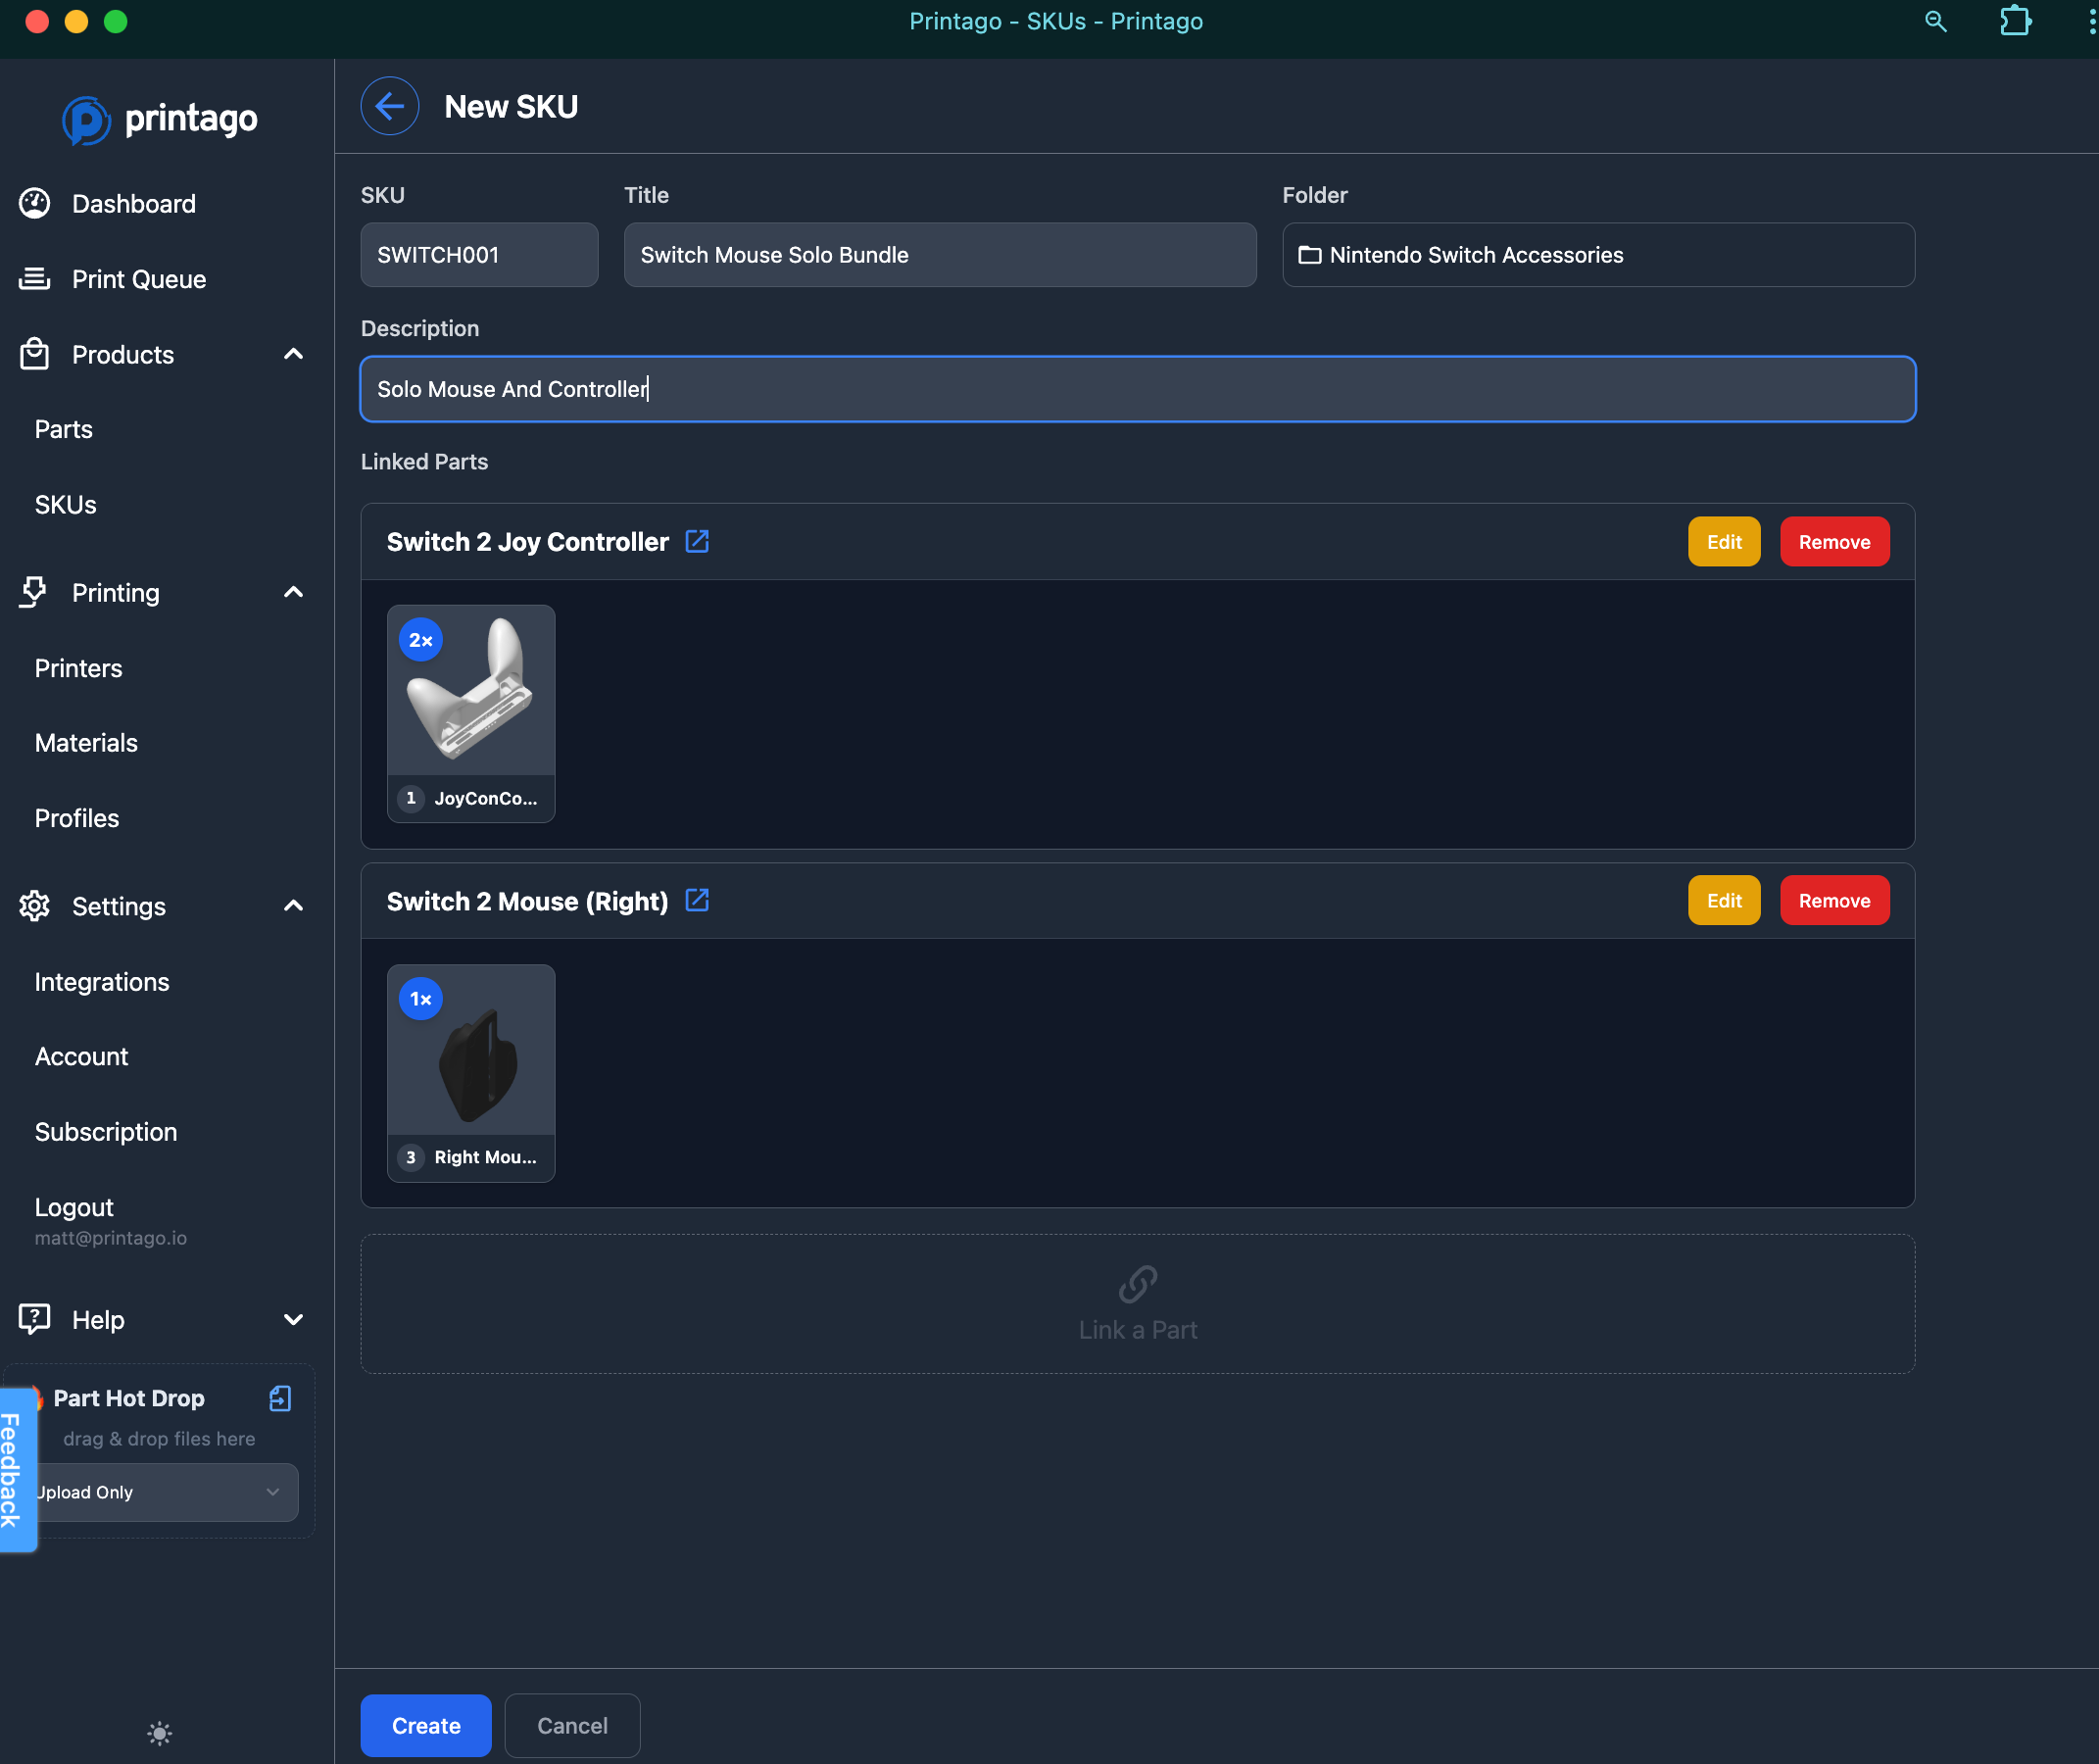
Creating SKUs
You'll need at least one part uploaded to Printago to start. If you haven't added any parts yet, start with Part Management.
Basic SKU Setup
- Navigate to
Products -> SKUs. - Click
+ New SKUin the top right. - Enter a unique SKU value, a Title, and a Description.
- Parts are created in your current folder location (click to change if needed).
- Add one or more parts to your SKU by using the
Linked Partsselector screen.
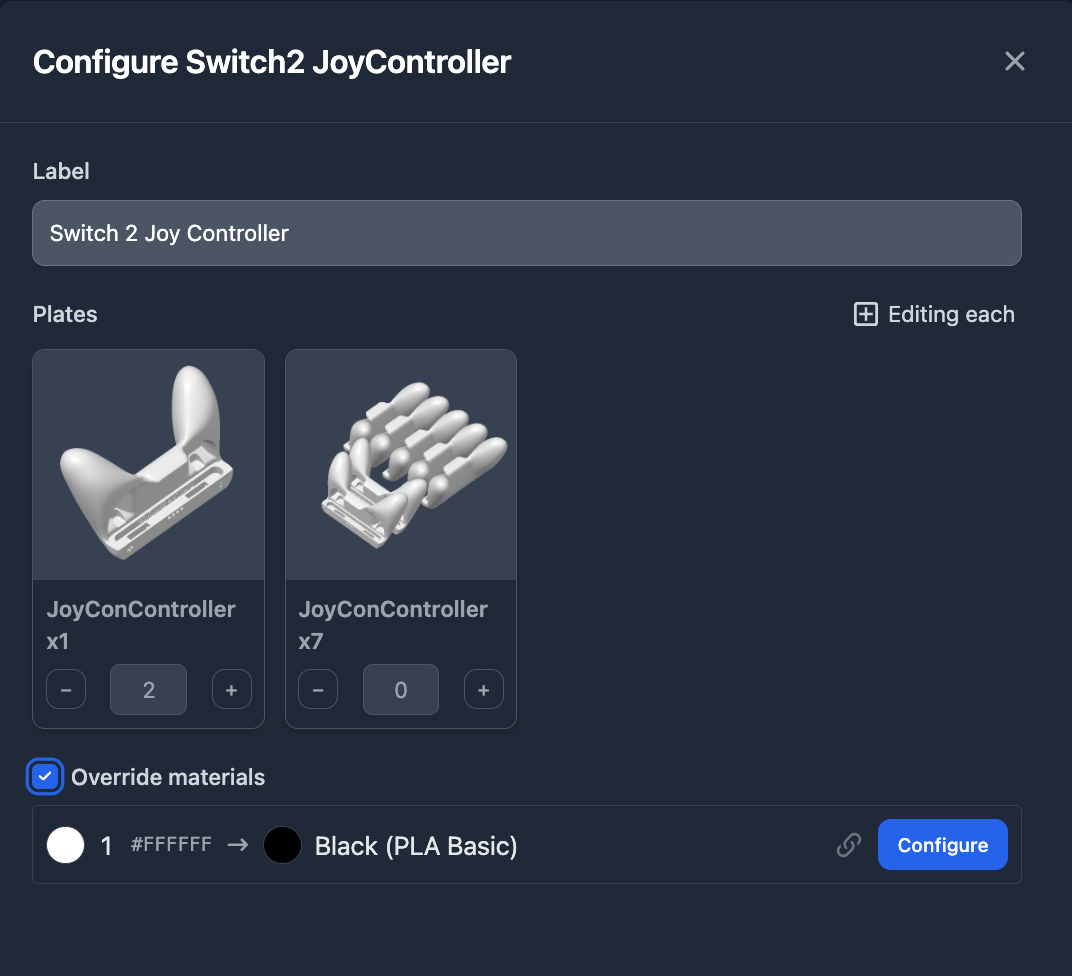
- Set quantity requirements for each part
- Optionally configure material overrides for each part (see Material Overrides section below)
- Click
Create
Material Overrides
By default, parts in SKUs use their original material settings. You can override materials at the SKU level to create variants (like the same part in different colors) without changing the original part.
When materials are overridden, those settings become fixed for that SKU - changing the original part's materials won't affect the overriden parts in the SKU.
Mixing Part Types in SKUs
SKUs may contain mixed file types supported by Printago. OpenSCAD parts that import and manipulate STL models do not need to be added here. They only are added at the Part level.