API Keys
Key Concepts
API keys let external applications authenticate with the Printago API on behalf of your organization. Each key can be scoped to a specific set of permissions, so you can grant integrations only the access they actually need.
- Full Access keys inherit the Store Owner's permissions and can do everything the API supports. Only Store Owners can create Full Access keys.
- Custom Permissions keys are scoped to a specific set of roles and/or individual permissions. The key can never do more than the permissions you assign to it — and you can only assign permissions that you yourself hold. This prevents privilege escalation: a Viewer cannot create an Admin-level API key.
- IP Allowlists restrict which IP addresses or CIDR ranges are allowed to use a key. Requests from any other IP are rejected, even if the key is otherwise valid. This is a strong defense-in-depth measure for production integrations.
- Managed keys are created automatically by integrations (such as Shopify). They cannot be edited or deleted manually — they are managed by the integration that created them and are removed when the integration is disconnected.
You can only assign permissions to an API key that you yourself have. If you hold the Viewer role, you cannot create a key with Admin permissions. Store Owners are the only exception — they can assign any permission.
Managing API Keys
Viewing Your Keys
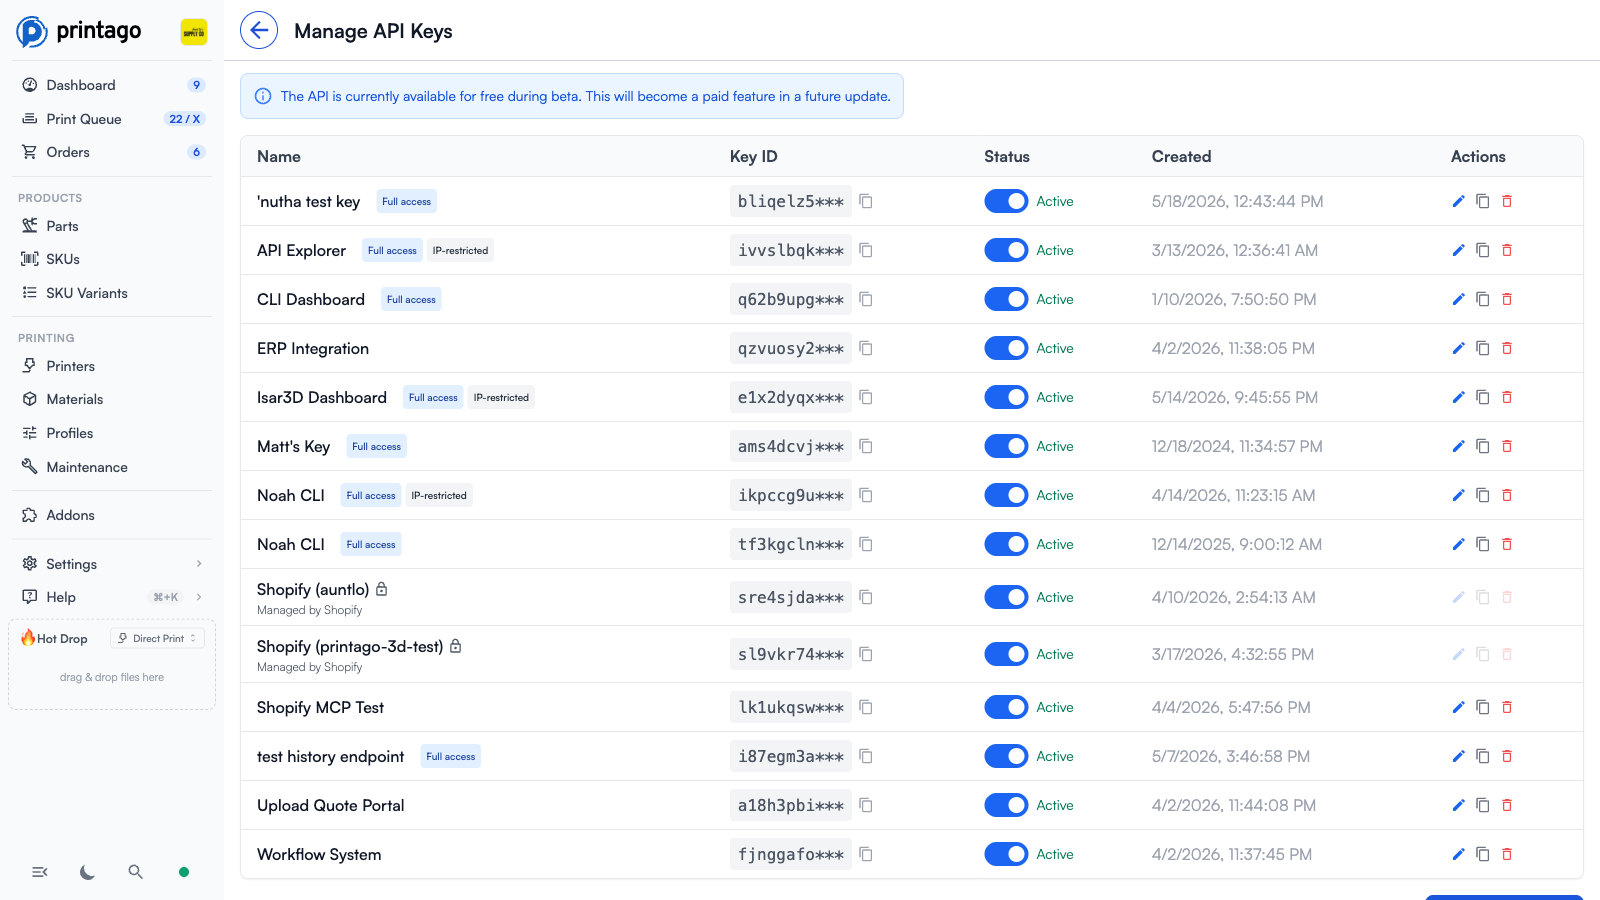
Navigate to API Keys from the sidebar under Settings. The key list shows:
- Name — the label you gave the key
- Key ID — the key's identifier (the secret key itself is only shown once, at creation)
- Status — whether the key is currently active
- Created — when the key was created
- Badges — "Full access" for keys with full permissions; "IP-restricted" if an IP allowlist is configured; "Managed by [Service]" for integration-managed keys
Creating a Key
- Click Create API Key
- Enter a descriptive Name (e.g. "Home Assistant", "Production Script")
- Choose an Access Level:
- Custom Permissions — select specific roles and/or individual permissions
- Full Access — grants all permissions (Store Owner only)
- Optionally configure an IP Allowlist — enter one IP address or CIDR range per line (e.g.
192.168.1.0/24,203.0.113.42) - Click Create API Key
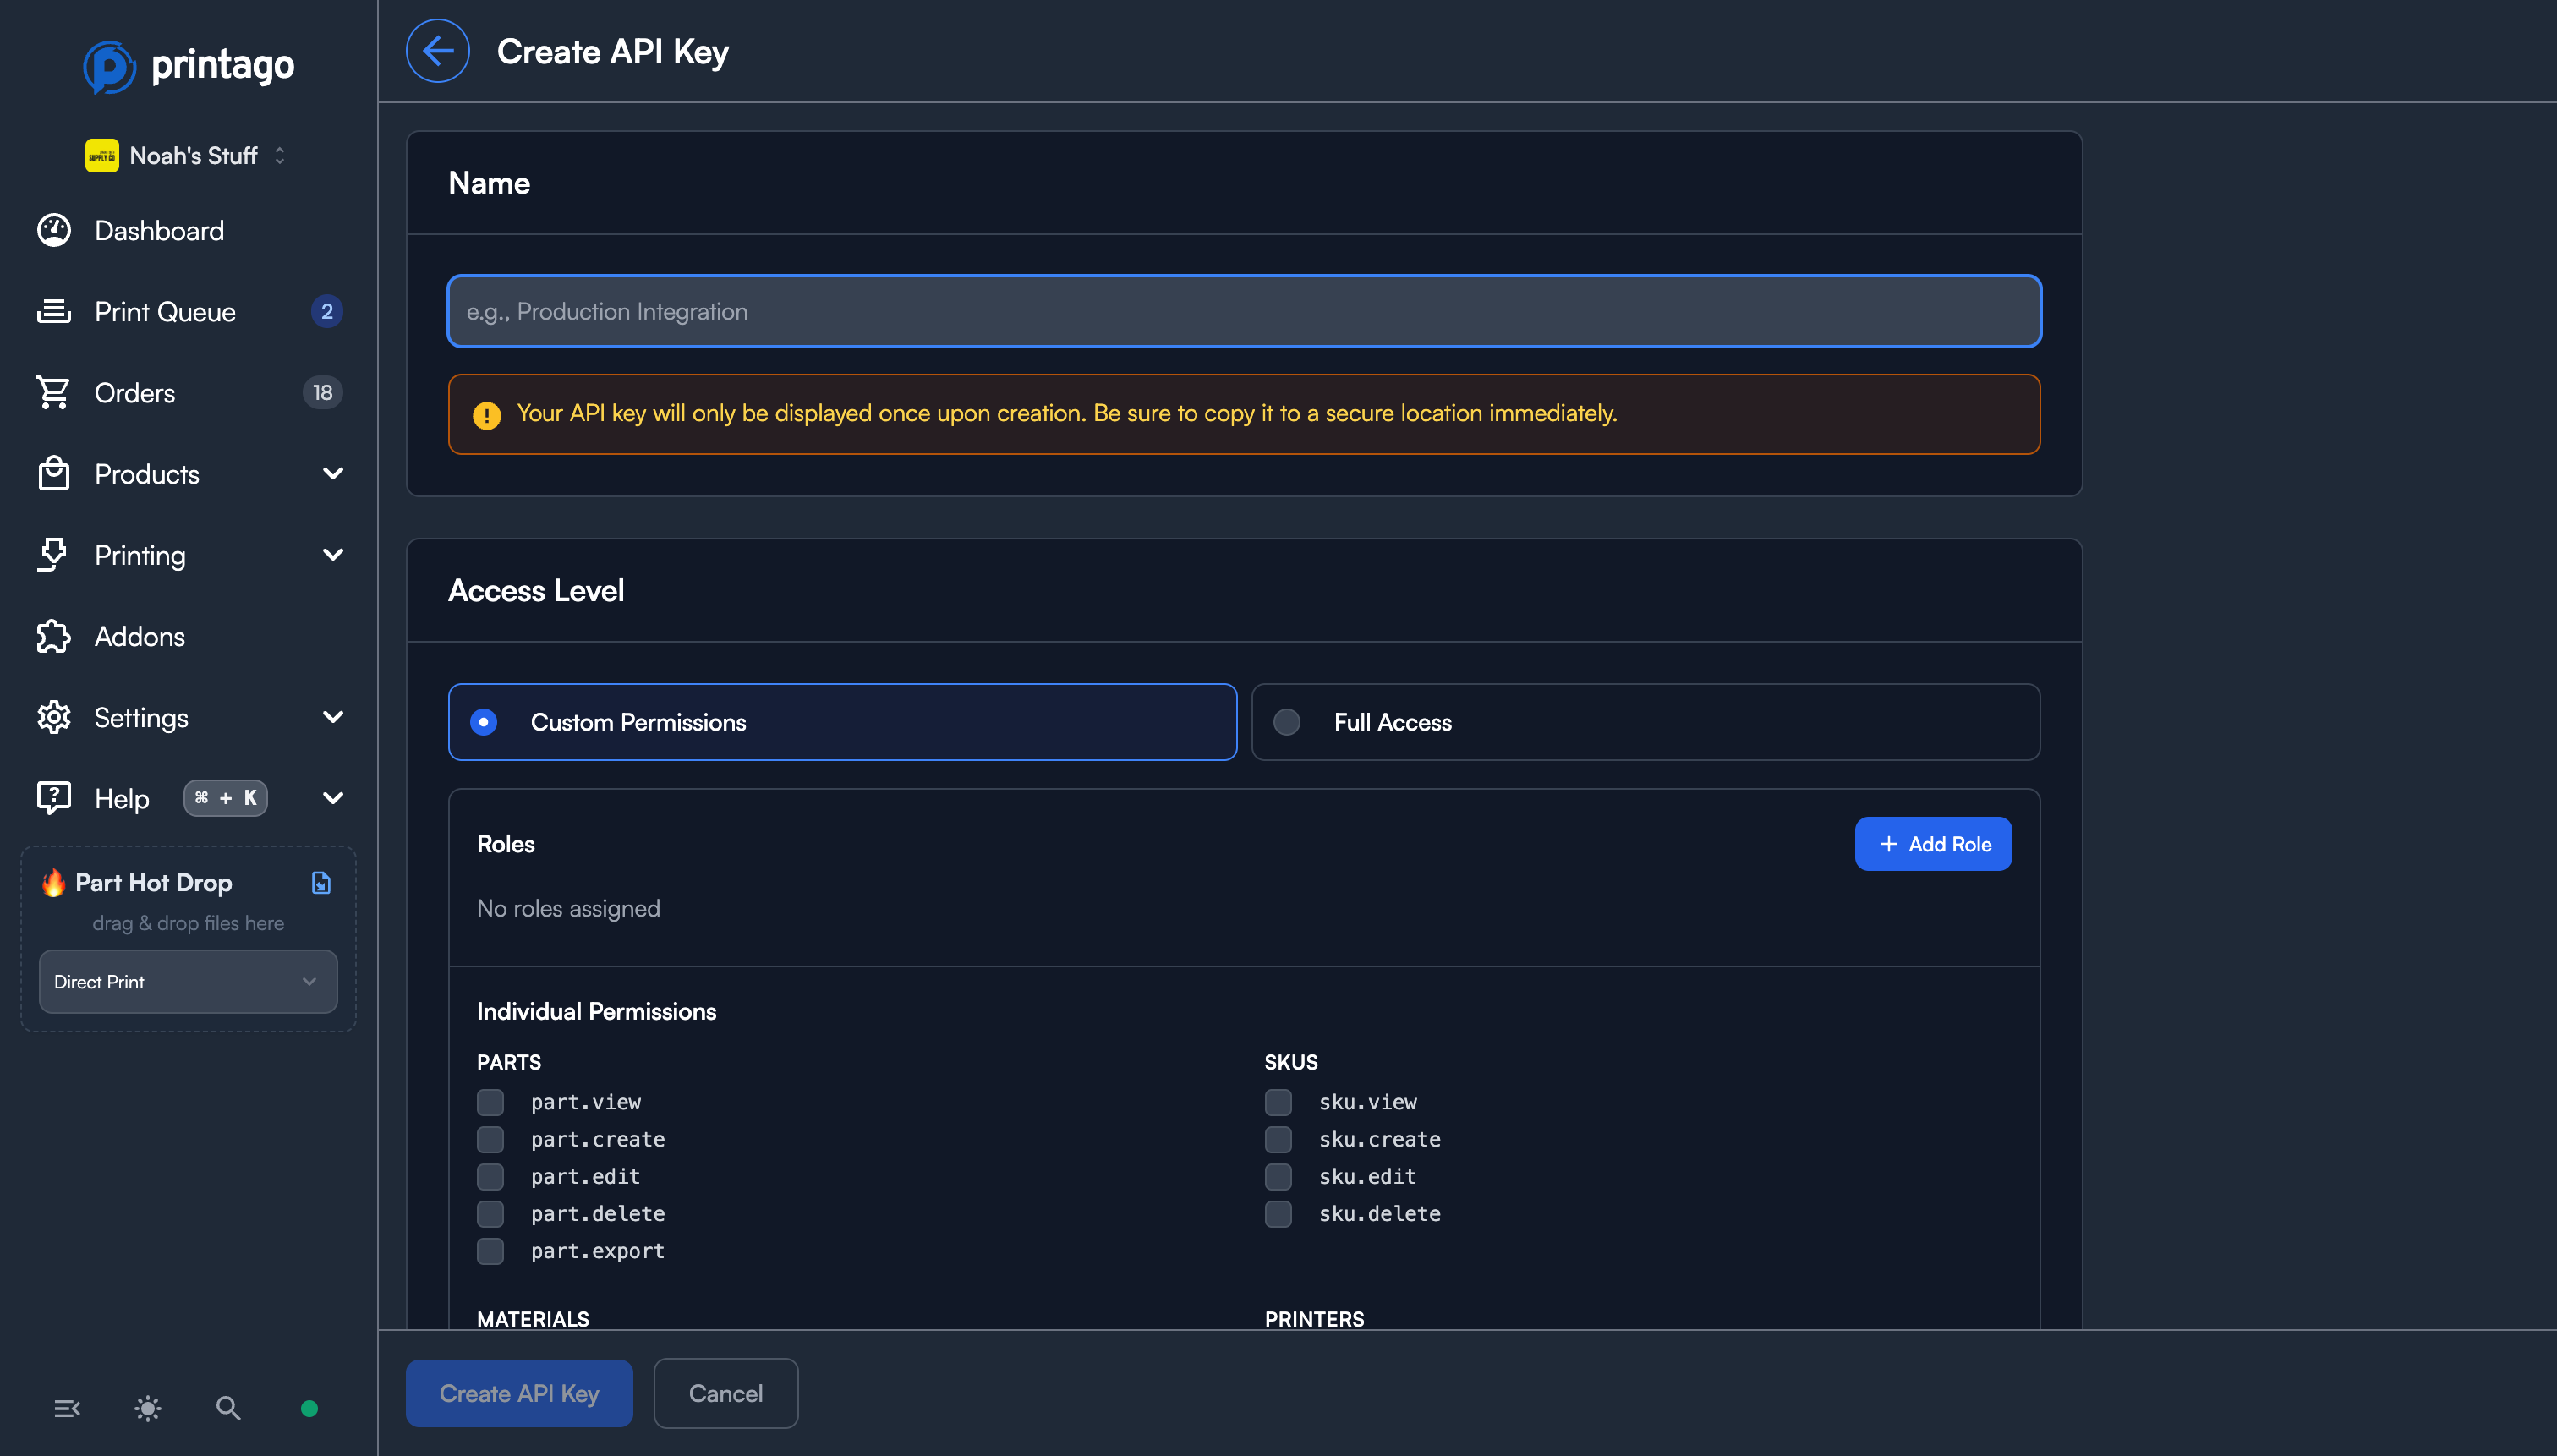
Your API key is only displayed once upon creation. Copy it immediately and store it in a secure location. It cannot be retrieved later.
Editing a Key
Click the edit icon on any key row to change its name, permissions, roles, IP allowlist, or active status. Managed keys (created by integrations like Shopify) cannot be edited.
Deactivating vs. Deleting
- Toggle status — temporarily disable a key without deleting it. Useful for troubleshooting or temporary maintenance.
- Delete — permanently revoke the key. This cannot be undone. Any integration using this key will immediately lose access.
IP Allowlists
When an IP allowlist is configured on a key, only REST API requests originating from those addresses are accepted. All other requests are rejected with a 403 error.
- Supports IPv4 and IPv6 addresses
- Supports CIDR notation for ranges (e.g.
10.0.0.0/8,2001:db8::/32) - A single IP address is treated as a
/32(IPv4) or/128(IPv6) range - Leave the allowlist empty to allow requests from any IP
IP allowlists apply to REST API requests only. MQTT connections authenticated with an API key currently do not enforce IP restrictions.
This is recommended for production integrations where the calling server has a known, static IP address.
Related Topics
- Authentication & Quotas — required headers, rate limits, and MQTT access
- Examples — code samples in cURL, JavaScript, and Python
- Roles & Permissions List — full reference of all permissions you can assign to a key
Need help with API keys? Join our Discord community for support!