Audit Log
The Audit Log provides a chronological record of all significant actions taken within your organization — who did what, when, from where, and what changed. Use it to investigate incidents, verify compliance, and understand how your team and systems interact with Printago.
Audit logging is currently in beta and available for free on all commercial accounts. It will become a paid feature in a future update.
Setup
Audit logs require a commercial account and must be explicitly enabled:
- Go to Addons and find Audit Logs under Organization Management
- Click Activate Free During Beta to activate the addon
- Click Enable Audit Logs to start recording changes
Once enabled, all create, update, and delete actions are automatically logged — including system-level events like printer commands. You can disable logging at any time from the overflow menu (⋮ → Settings) on the Audit Logs page. Disabling stops new logs from being written but does not delete existing logs.
Enabling or disabling audit logs requires the audit.logs.configure permission (included in the Admin role by default).
Availability
- Plan requirement — Commercial accounts only
- Addon — Requires the Audit Logs addon to be activated
- Permission to view — Requires the
audit.log.viewpermission (included in the Admin role by default) - Permission to configure — Requires the
audit.logs.configurepermission (included in the Admin role by default) - Retention — Logs are retained for 30 days and automatically cleaned up after that
What's Tracked
Every auditable operation records:
- What happened — action type, detailed action, and field-level changes
- Who did it — the actor type and identity (see Actor Types below)
- When it occurred
- Request context — IP address, user agent, correlation ID, and optional reason
Action Types
| Action | Description |
|---|---|
create | Single entity created |
update | Single entity updated |
delete | Single entity deleted |
bulk_create | Multiple entities created in one operation |
bulk_update | Multiple entities updated in one operation |
bulk_delete | Multiple entities deleted in one operation |
Actor Types
Each log entry records who or what performed the action:
| Actor Type | Description |
|---|---|
| User | A team member acting through the web UI or other client |
| API | A direct API call using an API key |
| Webhook | An action triggered by a webhook integration |
| System | An internal system operation (e.g. printer commands, state changes) |
| Scheduler | An action triggered by a scheduled job |
Detailed Actions
In addition to the general action type, each log entry includes a detailed action that describes the specific operation — for example, printJob.retry, printerSlot.assign, build.v2.create, or order.create. You can filter by detailed action to quickly find a specific type of change.
Navigating the Audit Log
Open the audit log from Audit Logs in the sidebar.

The page shows a table of log entries sorted newest-first, with columns for Time, Actor, Action, Entity Type, and Entity ID. Entries are paginated with Newer and Older buttons at the bottom.
Toolbar
The toolbar at the top of the page provides:
- Filters — Toggle the filter bar (shows a badge with the number of active filters)
- Clear all — Reset all active filters (appears when filters are applied)
- Refresh — Re-fetch the current page of logs
- ⋮ (overflow menu) — Access Export JSON to download the current filtered results, or Settings to enable/disable audit logging
Filtering
Click Filters to expand the filter bar with these options:

| Filter | Description |
|---|---|
| Action | Filter by action type — select from create, update, delete, bulk_create, bulk_update, or bulk_delete |
| Detailed Action | Search for a specific detailed action (e.g. order.create, printerCommand.stop). Type to search or pick from suggestions |
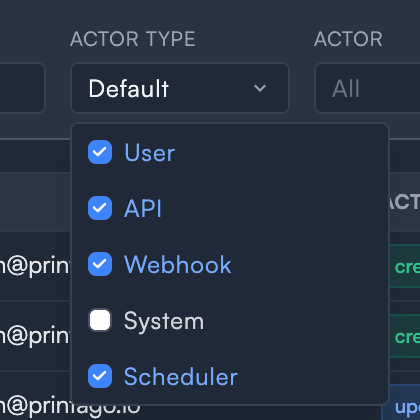
| Actor Type | Choose which actor types to include — User, API, Webhook, System, and Scheduler. By default, all except System are selected |
| Actor | Search by actor email address or actor ID |
| Entity Type | Filter to a specific entity type (e.g. Printers, PrintJobs, Orders) |
| Entity ID | Search for a specific entity by its ID — works for both single and bulk operations |
| From / To | Set a date range to narrow results to a specific time window |
Text filters (Detailed Action, Actor, Entity Type, Entity ID) apply when you press Enter or click away from the field. Active filters show a count badge on the Filters button. Click Clear all to reset.
System Events
By default, the Actor Type filter excludes System events to reduce noise. Check System in the Actor Type dropdown to see system-level activity such as:
- Printer commands (
printerCommand.stop,printerCommand.refresh-slot) - Printer state changes (
printer.online,printer.offline) - Other automated internal operations
This is useful for debugging printer connectivity issues or understanding automated behavior in your account.

Correlation Grouping
When a single request triggers multiple changes (for example, assigning a printer slot that also updates the related print job), those entries share a correlation ID and are grouped together. The primary entry appears in the table row with a count indicator (e.g. "(2)"), and you can expand it to see all related entries.
Viewing Details
Click any row to expand it and see the full context:
- Request context — IP address, user agent, API key ID (masked), impersonation info, reason, and correlation ID
- Field changes — a table showing exactly which fields changed, with old and new values side by side
- Correlated entries — for grouped operations, each related entry with its own action, timestamp, and field changes
- Entity IDs — for bulk operations, the full list of affected entity IDs
- Metadata — additional key-value pairs attached to the operation
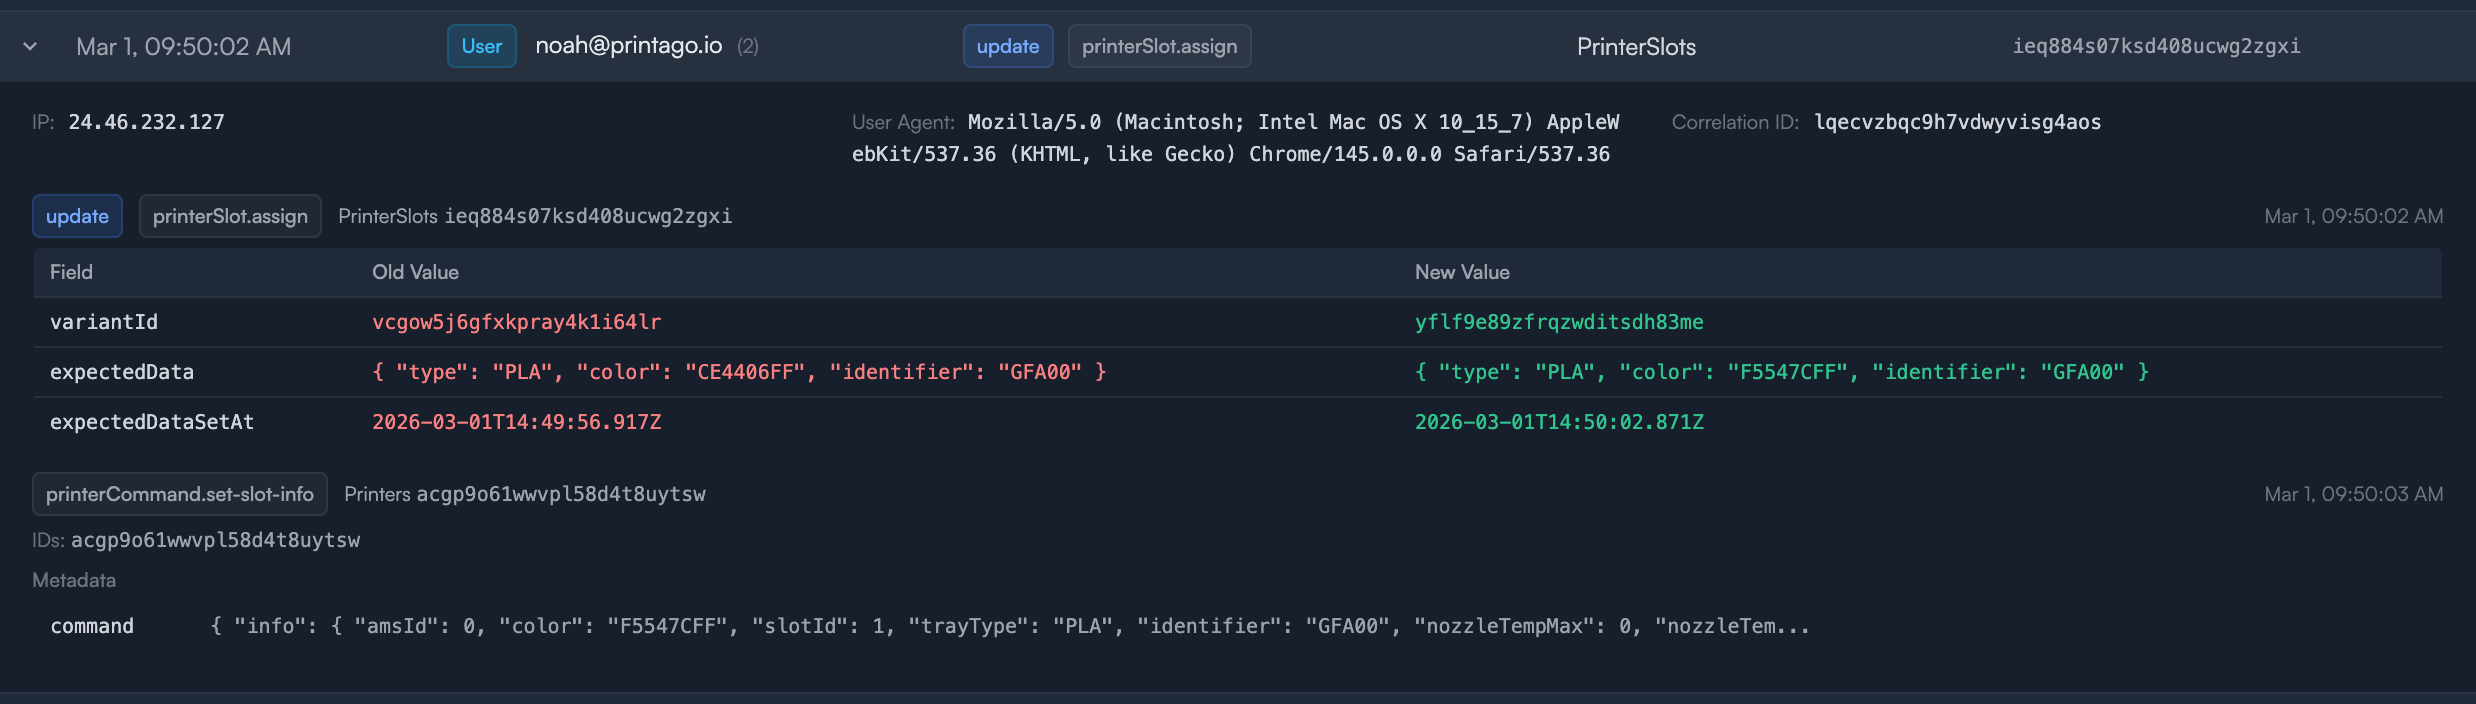
For update actions, each changed field shows the old value in red and the new value in green. Create actions show only new values, and delete actions show only the removed values. Long values are truncated — click to expand.
Sensitive fields like passwords, tokens, and secrets are automatically redacted and display as [REDACTED] in the change log.
Exporting Logs
To export the current view as a JSON file, click the ⋮ overflow menu and select Export JSON. The export includes all entries matching your current filters.
Related Topics
- Roles & Permissions List — see the
audit.log.viewpermission - User Management — manage who has access to audit logs
- API Keys — API key actions are tracked in the audit log
Need help with audit logs? Join our Discord community for support!