Part Management
Key Concepts
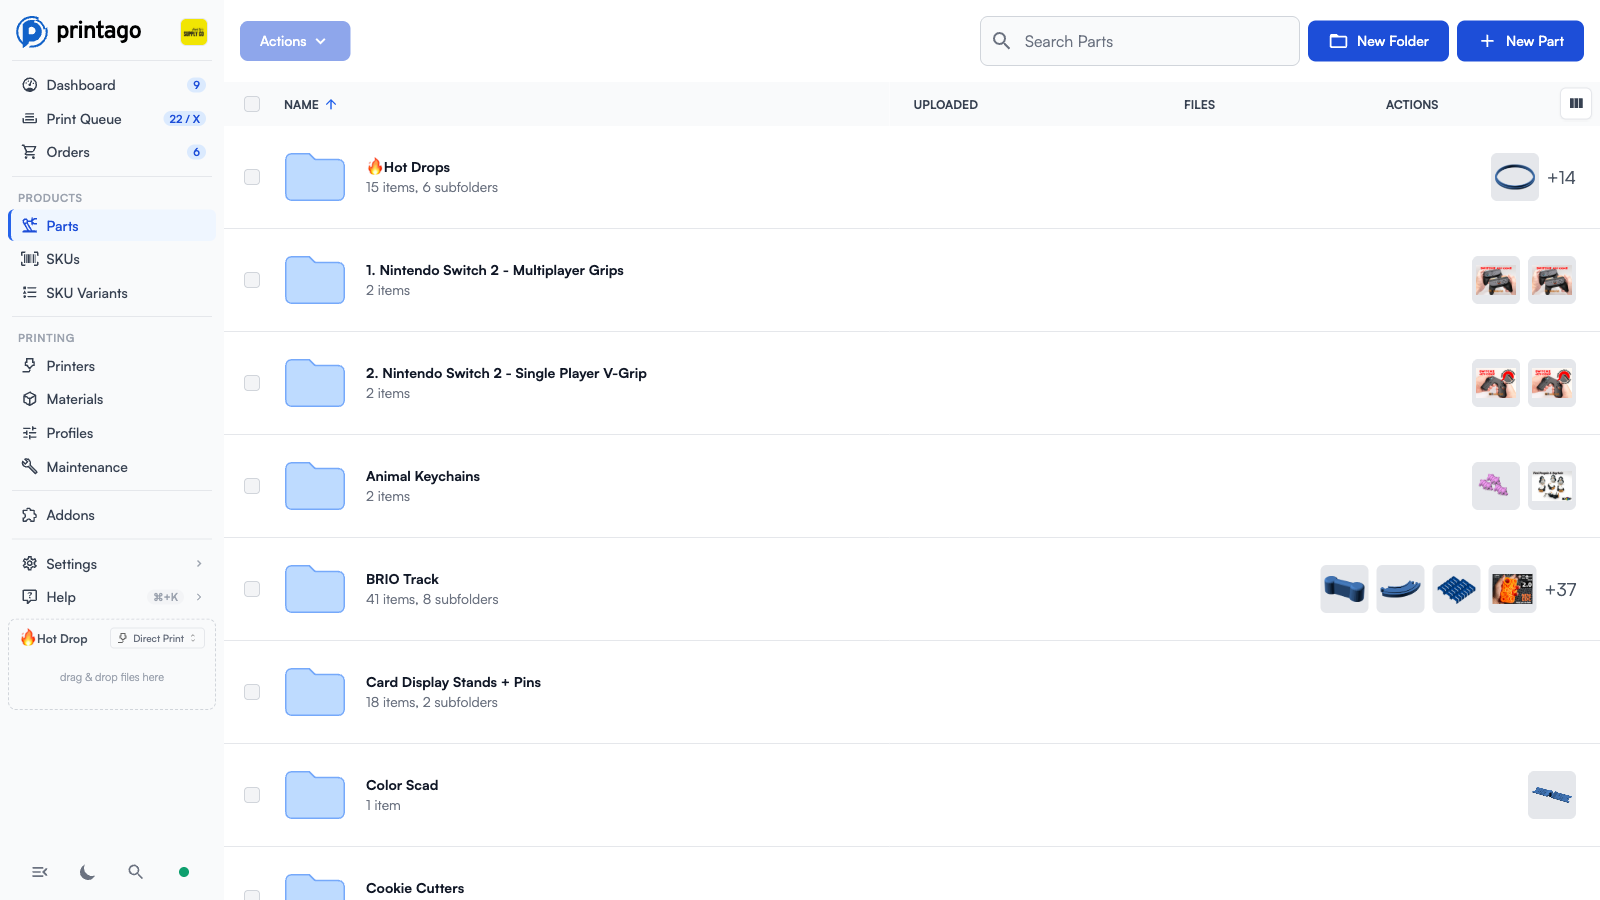
A part in Printago is an uploaded 3D model file—STL, STEP, 3MF, OpenSCAD, or GCODE—along with its associated printing configuration such as material requirements, slicer process profiles, and build plate settings. Parts are the atomic unit of your print library: every print job in Printago originates from a part, and parts can be reused across multiple SKUs to build complete products. Because Printago's cloud slicer generates printer-specific G-code on demand, a single part file works across every compatible printer in your fleet without needing separate exports for each machine model. Whether you're prototyping a one-off design or producing thousands of units across dozens of printers, parts give you a single source of truth for each model's geometry and print settings.
Supported Part Types
Printago supports several types of parts, each with different capabilities:
| Part Type | Description | Capabilities |
|---|---|---|
| STL | Static models | Same as STEP files to Printago - single material, can set slicer process per-part override |
| STEP | Static models with single material | Can set slicer process per-part as an override |
| 3MF Projects | Complete projects with all modifiers | Preserves all modifiers, negative parts, support enforcers, and any type of painting. 3MFs are preserved and can easily be sliced and sent to any printer they fit on |
| OpenSCAD | Parametric design files | Parametrically generate STL files with customizable parameters |
| ColorSCAD | Enhanced OpenSCAD | Add-on feature allowing you to define colors in OpenSCAD models to paint them |
| CadQuery / build123d | Python parametric design | Write Python scripts to generate parametric models with access to engineering libraries for threads, fasteners, gears, and more |
| GCODE 3MF | Pre-sliced files | From Bambu Studio or Orca - tightly bound to the type of printer they were sliced for, however can still re-map materials as required |
Cross-Printer Compatibility
Using Printago, your parts are seamlessly used across any models of printers in your farm. A 3MF created for a Bambu A1 Mini will work on a Bambu P1S and vice versa and without creating seperate files for each printer. The same goes for all other part types, except for gcode.3mf files. More information about how this works can be found on the Cloud Slicer page.
Part Processing
Printago automatically processes uploaded parts to:
- Parse material, color, and build-plate metdata (3MF).
- Generate thumbnails and previews
- Estimate print time and material usage on every printer in your farm
Processing happens in the background, so uploads finish immediately and you can keep working while Printago reads the file. While a part is processing, its row shows a blue Processing pill and a spinner over the thumbnail, and printing is disabled until it completes. Hover the pill (or tap it on a touch screen) to see each processing step as it runs. Steps that hit a temporary problem retry automatically.
If a file cannot be processed at all (for example, a corrupt 3MF), the part shows a red Processing failed pill instead, and the part page explains which step failed and why. When any parts have failed, a red button appears at the top of the parts list with the count. Click it to see every failed part with its file name and failure reason, jump to the part, delete it, or retry them all at once. Retrying is limited to once an hour per part, the same limit as Reprocess Part. If retrying does not help, the file itself is usually unreadable: replace it from the part page.
When parts are used in print jobs, they're sliced on-demand for the specific configuration (printer model, material, process settings, build plate type, etc). Printago intelligently caches the generated G-code in the background for faster future prints. When you update a part or change a setting, Printago automatically re-slices it with the new configuration.
Read more about how slicing works in Printago.
Print Time and Material Estimates
Shortly after you save a part, Printago slices it against the printers in your farm so you can see what it costs to print before you queue anything. Printers that share a model, nozzle and profiles are estimated once between them, so a shelf of identical machines does not slice the same part ten times.
The Materials section of the part shows the result as a single line: an average print time, an average material usage, and the grams for each material slot on the slot's own row. When the difference between your fastest and slowest printer is large enough to matter, a range appears next to the average.
Click View Details for the breakdown. It lists a row per printer model with how many of that model you have, the filament profile that was chosen for each material slot, and the time and material that model produced. A model Printago had to substitute a filament for is flagged there, which is usually why one model reports more material than another.
A few things worth knowing:
- The numbers appear a few seconds after you save. While an estimate is being produced, or after you change something that affects it, the line is dimmed and labelled rather than showing figures that are no longer true.
- If no printer in your farm can slice the part, the numbers are replaced by a warning under the material list. This nearly always means none of your printers has a filament profile configured for the material the part asks for: either change the part's material or add a matching filament to your printers.
- Parametric parts (OpenSCAD, CadQuery, build123d) are estimated from their default parameter values. A build with different parameters prints different geometry, so treat the estimate as a guide for that shape only.
- Reprocess Part, at the top of the part screen, re-reads the file and re-runs the estimate on every printer. Because that is a lot of slicing, it is limited to once an hour per part.
Adding Parts to Printago
- Navigate to
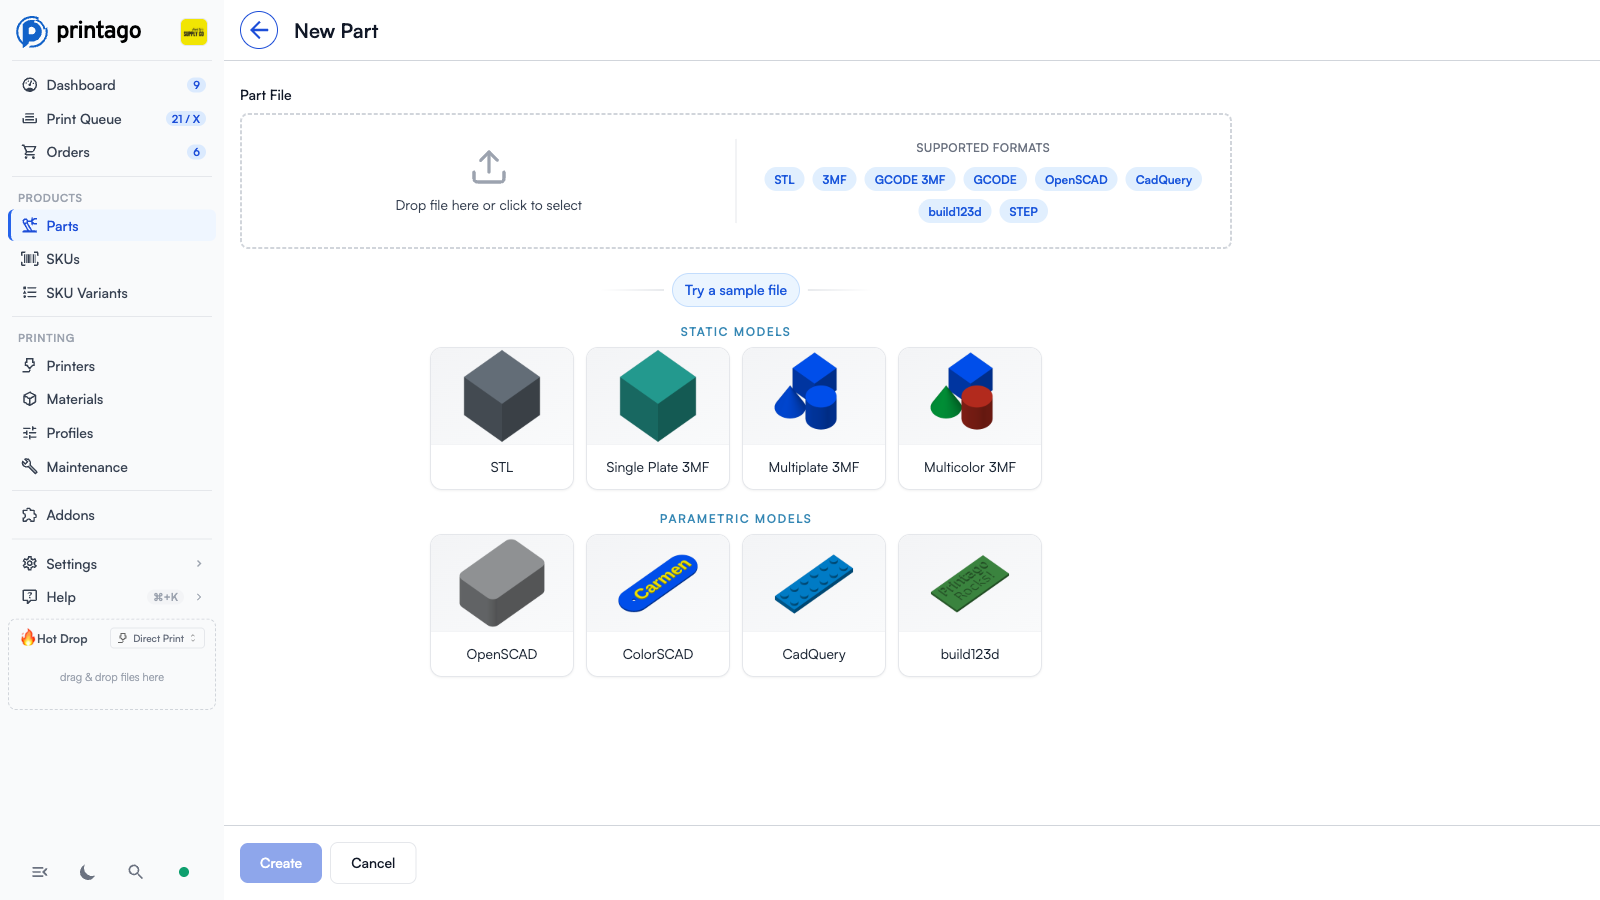
Products -> Partsand click+ New Partin the top right. - On the New Part page, drop a compatible file into the Part File area (or click to select one). The supported formats are shown next to the drop zone: STL, 3MF, GCODE 3MF, GCODE, OpenSCAD, CadQuery, build123d, and STEP. If you just want to explore, click Try a sample file to load one of the provided static or parametric example models.
 3. Enter a name and description for your part.
4. Parts are created in your current folder location (click to change if needed).
5. Select your slicer (3MF files auto-select the matching version with an "Auto-Selected" badge).
6. Choose a process profile override, or leave as "Printer Default" to use each printer's default settings.
7. Review the build plates and materials detected in your file.
8. Map each material to items in your Material library.
9. Click
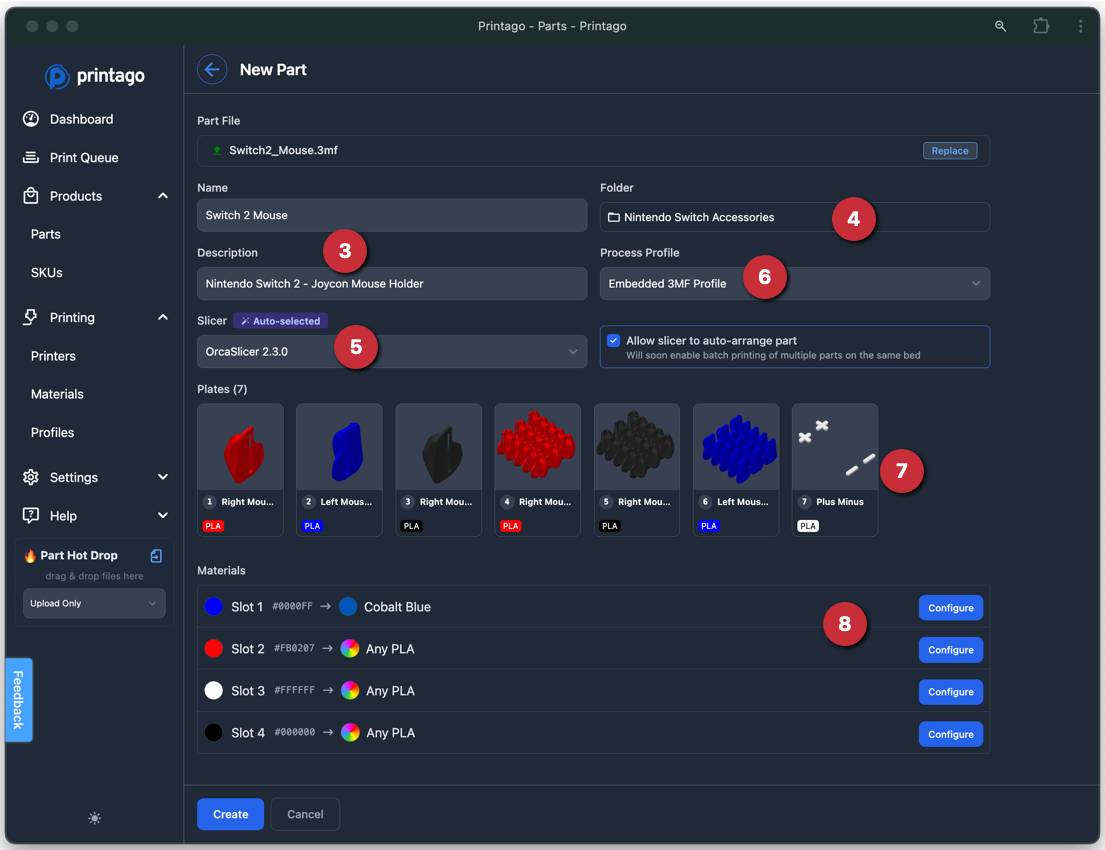
3. Enter a name and description for your part.
4. Parts are created in your current folder location (click to change if needed).
5. Select your slicer (3MF files auto-select the matching version with an "Auto-Selected" badge).
6. Choose a process profile override, or leave as "Printer Default" to use each printer's default settings.
7. Review the build plates and materials detected in your file.
8. Map each material to items in your Material library.
9. Click Create to upload your part.
File-Specific Settings
Different file types have unique capabilities and configuration options:
- STL and STEP Parts - Static single-material parts with process profile overrides
- 3MF Project Files - Complete projects with modifiers, supports, and multi-material painting
- GCODE 3MF Files - Pre-sliced files with printer-specific limitations
- Dynamic OpenSCAD Parts - Parametric parts with customizable parameters
- CadQuery & build123d Parts - Python parametric parts with engineering libraries
Need help with your parts? Contact our support team or check our troubleshooting guides, or join our Discord community for latest info and help!