Materials
Key Concepts
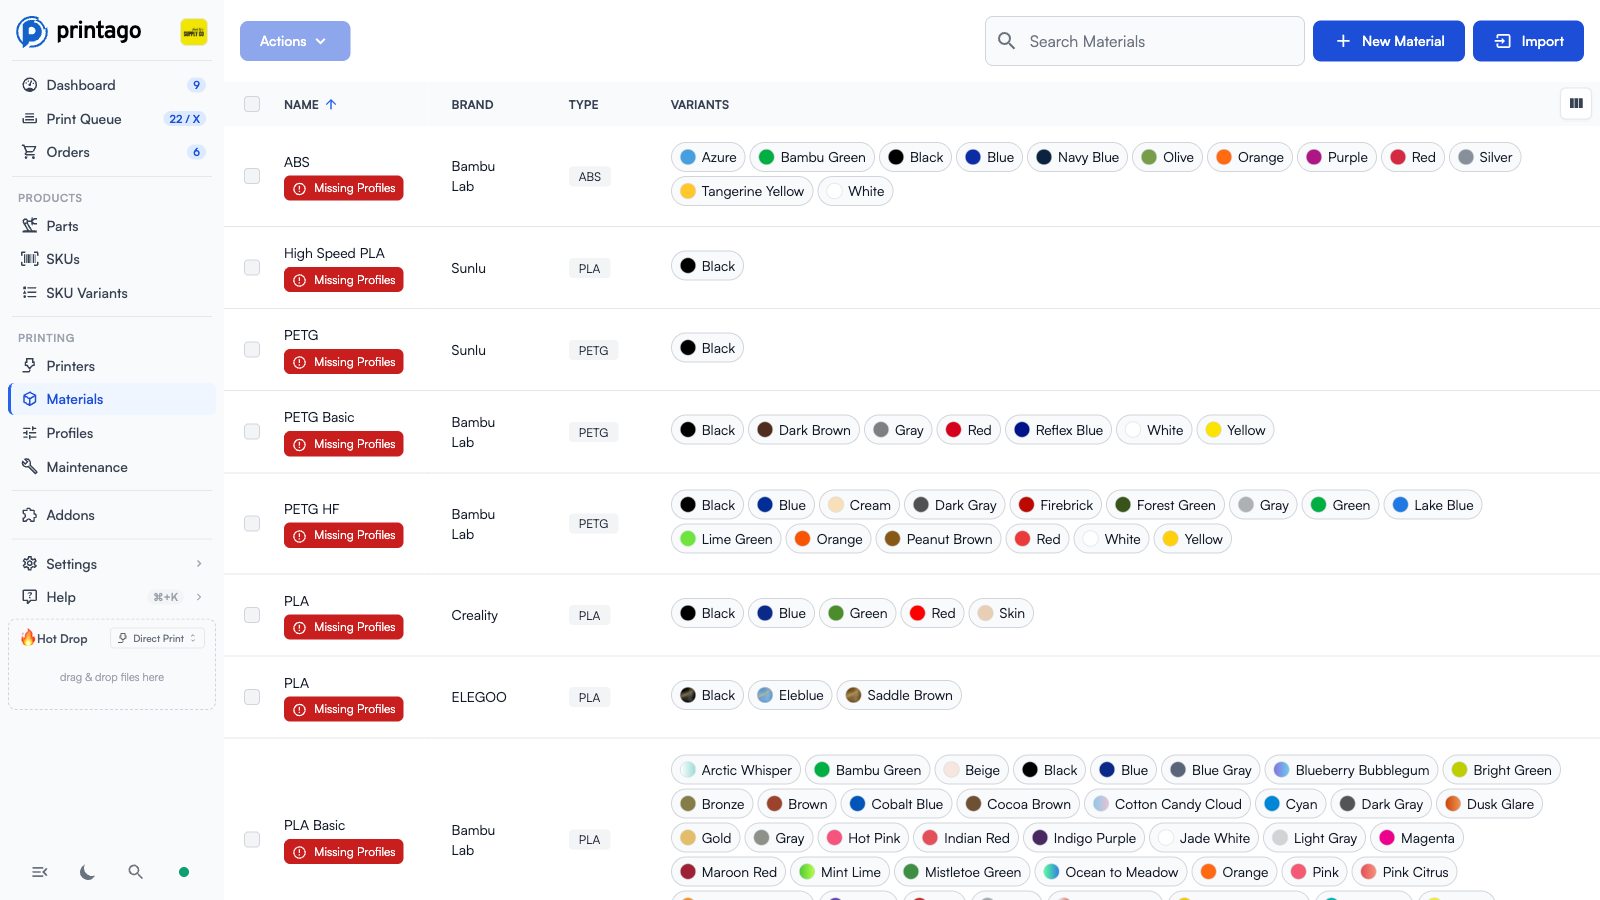
Materials in Printago represent the filaments loaded in your printers and are the primary factor in how jobs get routed to the right machine. Each material has two layers: a base material (like "Bambu PLA Basic") defining the filament type, brand, and slicing profiles, and variants (like "Red" or "Matte Black") representing specific colors or finishes. When you assign materials to a part and load matching filaments on your printers, Printago's queue automatically routes jobs only to printers with compatible materials. The system supports matching at different levels of specificity—you can require an exact color variant, any color of a particular brand, or any filament of a given type. For Bambu Lab printers with RFID-tagged filament, material detection and assignment happen automatically. The material system exists so you never accidentally print a part in the wrong filament and so that adding more printers with different materials loaded is seamless.
How Materials Work
Materials in Printago consist of two levels:
1. Base Materials
Base materials define the fundamental filament type and properties:
- Material Type: PLA, PETG, ABS, TPU, etc.
- Brand: Bambu Lab, Polymaker, Elegoo, etc.
- Filament Profile: Core slicing profiles for the material, one for each printer model
2. Material Variants (Colors)
Material variants are specific colors or finishes of a base material:
- Color Variant: Red, Blue, Matte Black, Silk Gold, etc.
- Profile Override: Optional color-specific slicing adjustments, one for each printer model
- Pressure Advance: Optional pressure advance override for the variant. Leave it empty to use the filament profile's value. When set, it applies no matter which slicer the part uses. On Bambu Lab printers it also takes priority over the value calibrated on the AMS, so the number you enter here is the number the printer uses.
Think of it as: Bambu PLA Basic (base material) → Bambu PLA Basic Red (variant)
Variant Names Are Unique
Every variant of a material must have a different name. Capitalization and surrounding spaces do not count, so "Black", "black", and "Black " are all the same name and a material can only have one of them. Different materials can each have their own "Black".
This rule prevents the most common cause of jobs that never route: two variants named "Black" under the same material, with one loaded on the printer and the other assigned to the part. They look identical everywhere in the app, but the queue treats them as different filaments and the job waits forever.
If you genuinely need two similar colors, give them distinct names such as "Black" and "Matte Black". If you already have duplicates, they were renamed to "Black (2)", "Black (3)", and so on. Check which one your printers and parts point at, then consolidate onto a single variant and delete the extras.
Dual-Color Filaments
Some filaments have two distinct colors (like Bambu Lab's Dual Silk series). These are identified by two hex color codes separated by a semicolon:
#FF9425FF;#C16784FF
Auto-Detection: When Printago reads RFID tags from your AMS, it uses these hex codes to match against your material library. If the hex codes don't match exactly (or there it san error in our filament database) it may create a new variant instead of matching an existing one.
Fixing Mismatched Colors:
- If a new unexpected variant is created (e.g., "Dark Orange"), note its hex code
- Find your intended variant in the materials list
- Modify the name from the actual Bambu filament name to enable editing the hex code
- Update the hex code to match what's in your AMS
- Delete the incorrectly created variant
- Remove and re-add the filament to your AMS to test auto-detection
Gradient filaments support any number of colors. Separate the hex codes by a semicolon to input gradient colors, e.g. 000000FF;FFFFFFFF;FF0000FF (black to white to red).
Material Assignment
Materials are assigned to printers and their AMS units to enable job matching and automatic printer selection.
Adding Materials
Materials are typically added through:
- RFID Detection: Automatic addition when RFID filament is detected
- Manual Addition: Add materials during part creation or printer assignment
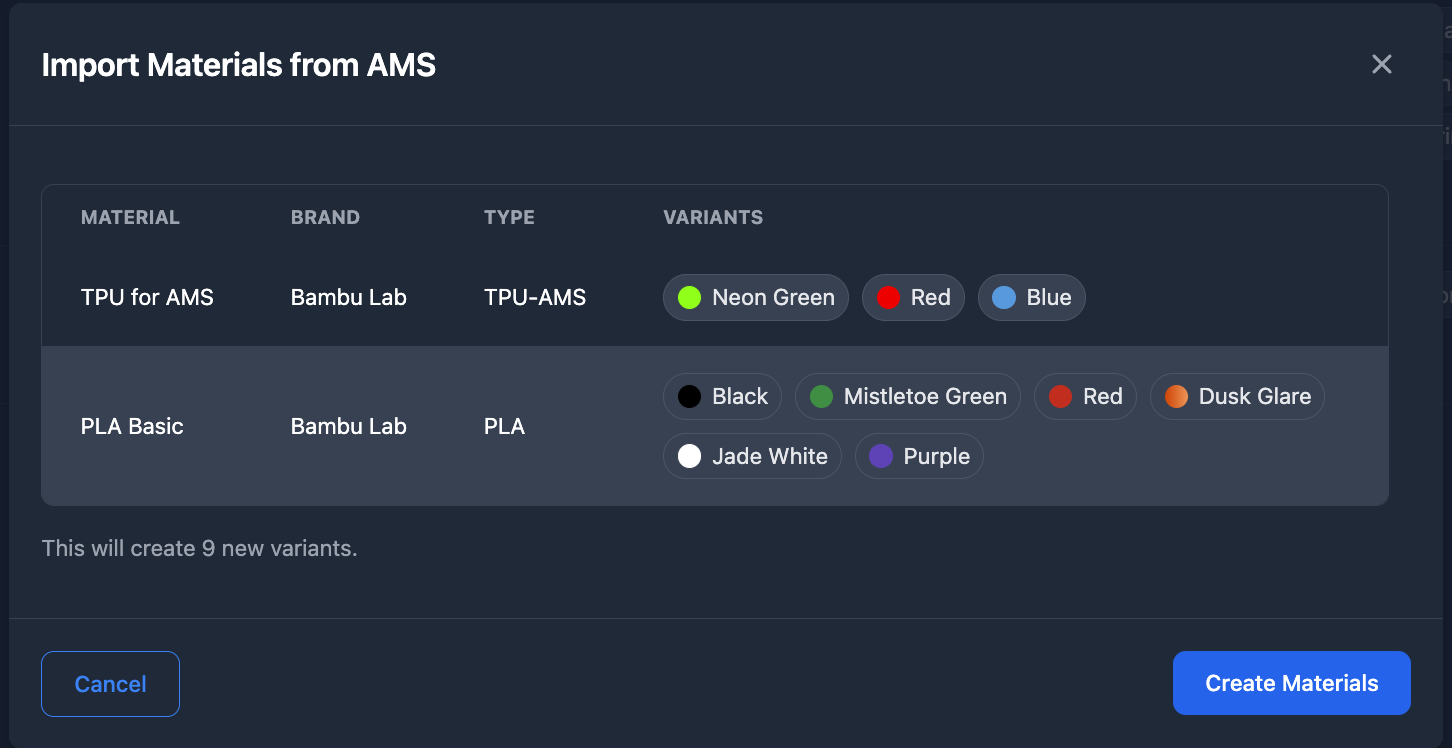
- Bulk Import: Import all missing materials currently loaded and read by your AMS units.
Manual Material Creation
To manually add a new material:
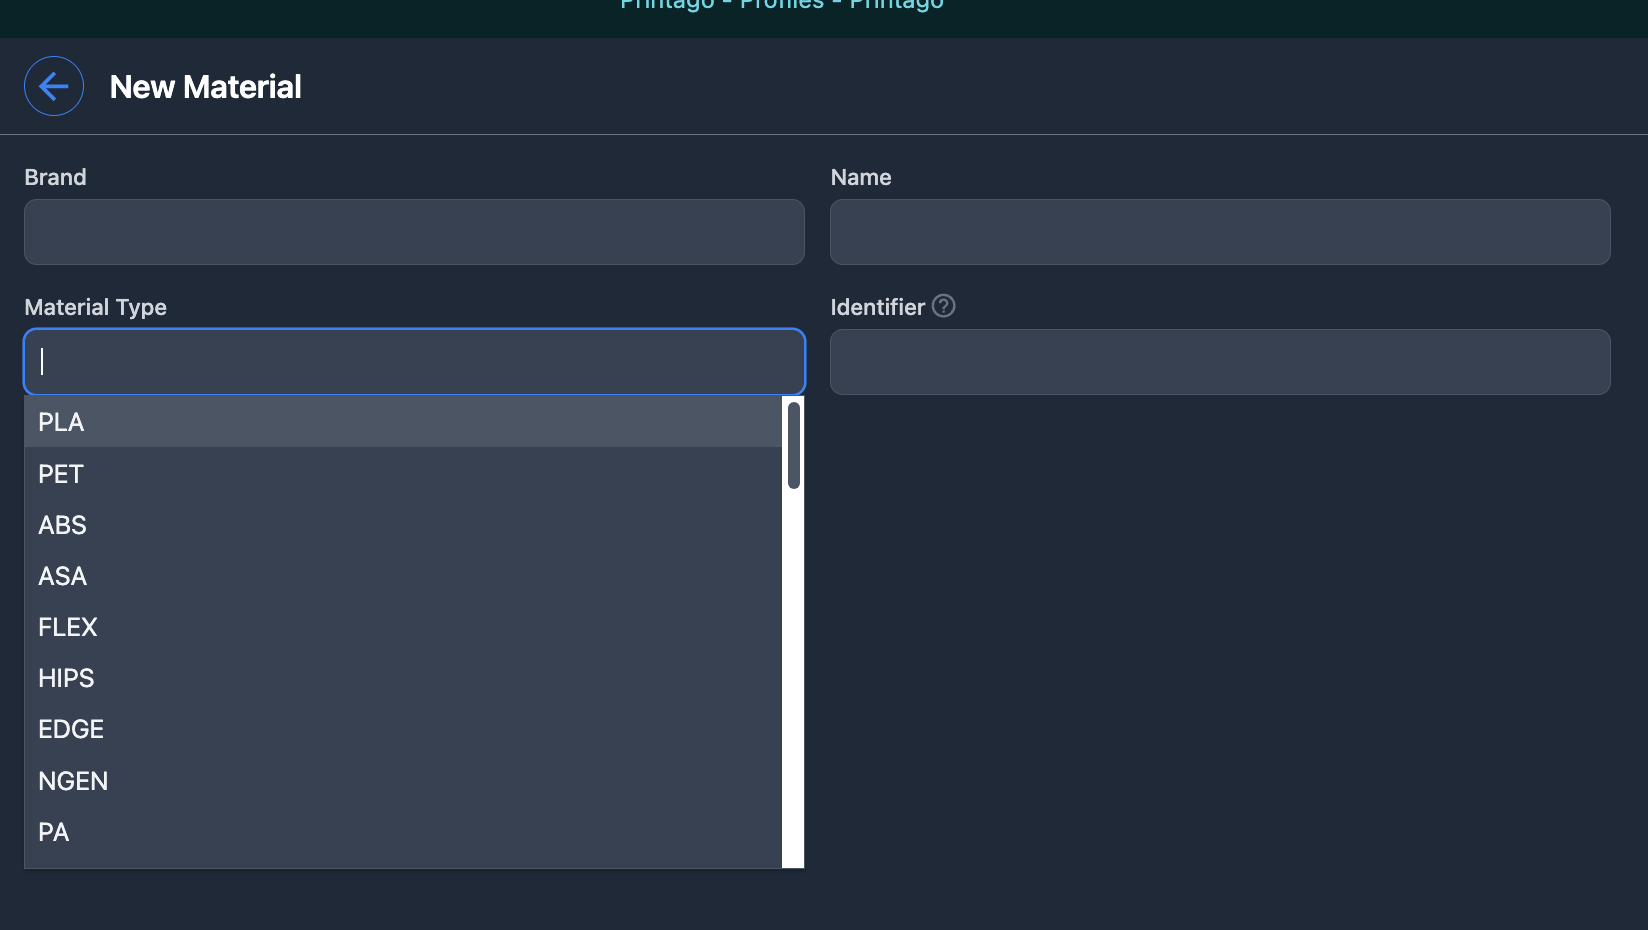
- Navigate to the
Printing→MaterialsPage, and click theNew Materialbutton. - Select a Brand or you can type it in if it's not in the pre-loaded list.
- Select a Material Type, or type one in if yours isn't found!
- Give the material a name and a unique identifier for the system to use for the material.
- Click
Create
Built-in Material Database
Printago includes comprehensive material databases:
- Bambu Lab Materials: All official Bambu materials and variants built-in
- Third-Party Materials: Extensive brand dropdown with popular manufacturers (Polymaker, Elegoo, etc.) or enter custom brand names.
Adding All Material Variants
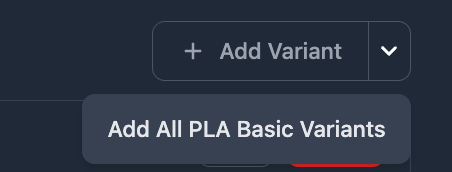
When adding materials, you can quickly add all available color variants for known materials:
Slicing Profile Configuration
Materials require slicing profiles to work with the Cloud Slicer.
Configuring Material Profiles
- Access Materials Page: Navigate to
Printing → Materials - Select Material: Choose the material to configure
- Configure Profiles: Assign slicing profiles for each combination of:
- Printer Model (A1 Mini, X1C, P1S, etc.)
- Nozzle Diameter (0.4mm, 0.6mm, etc.)
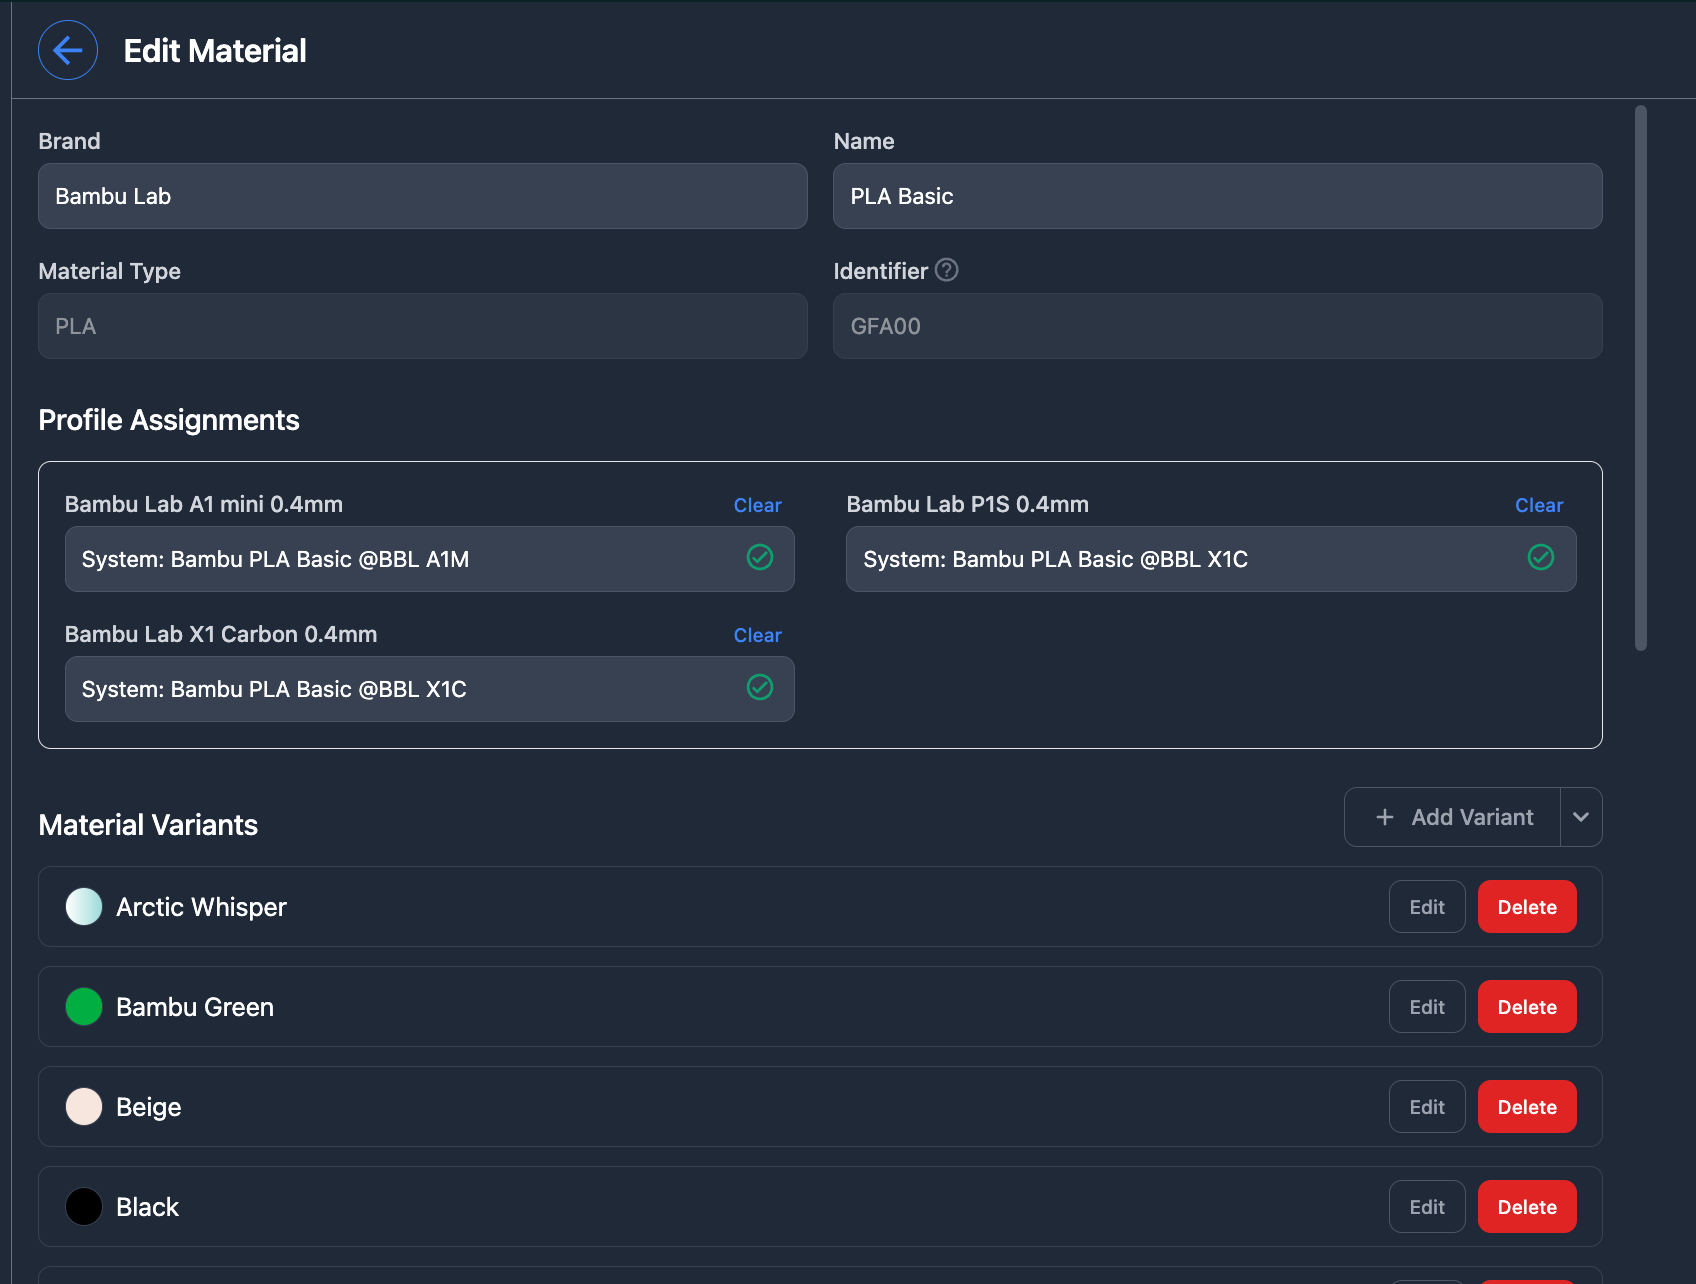
Profile selection boxes support auto-complete! Start typing "Matte" to quickly find "Matte PLA" profiles, or any partial text to wildcard search through available options.
Profile Resolution Priority
When slicing, material profiles are resolved in this order:
- Material Variant Override (color-specific adjustments)
- Base Material Profile (fundamental material settings)
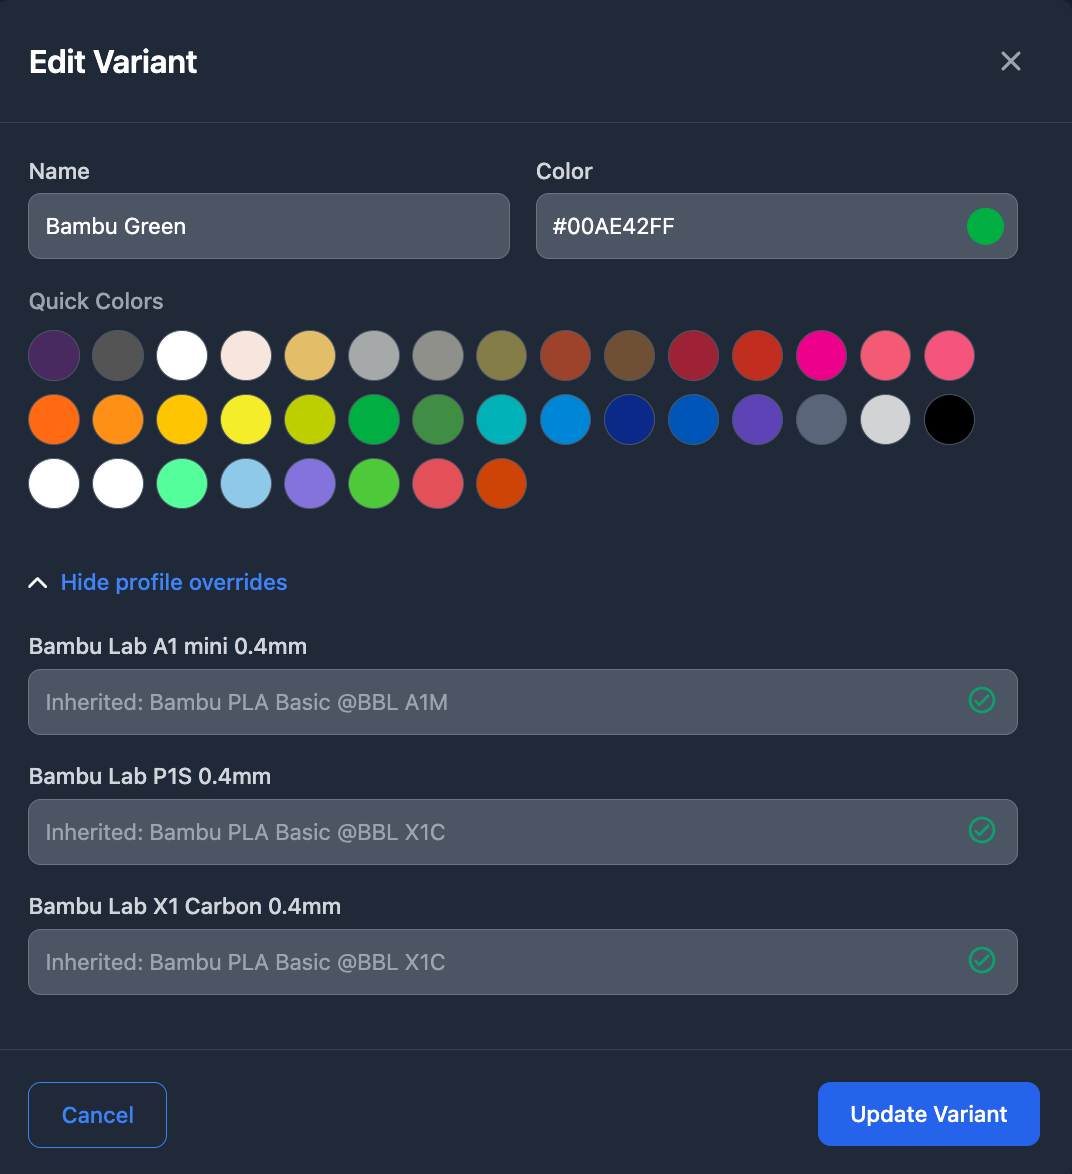
Materials must have configured slicing profiles for each printer model + nozzle combination they'll be used with. Missing profiles will prevent job matching.
Assigning Materials to Printers
Materials must be assigned to printers to enable the job matching described above. Clicking a filament slot on a printer opens the Printer Materials dialog, where you pick a slot under Loaded Filament and assign a material from the searchable Available Materials list (materials with profiles set up for that printer show a ✓ Profile Configured badge).
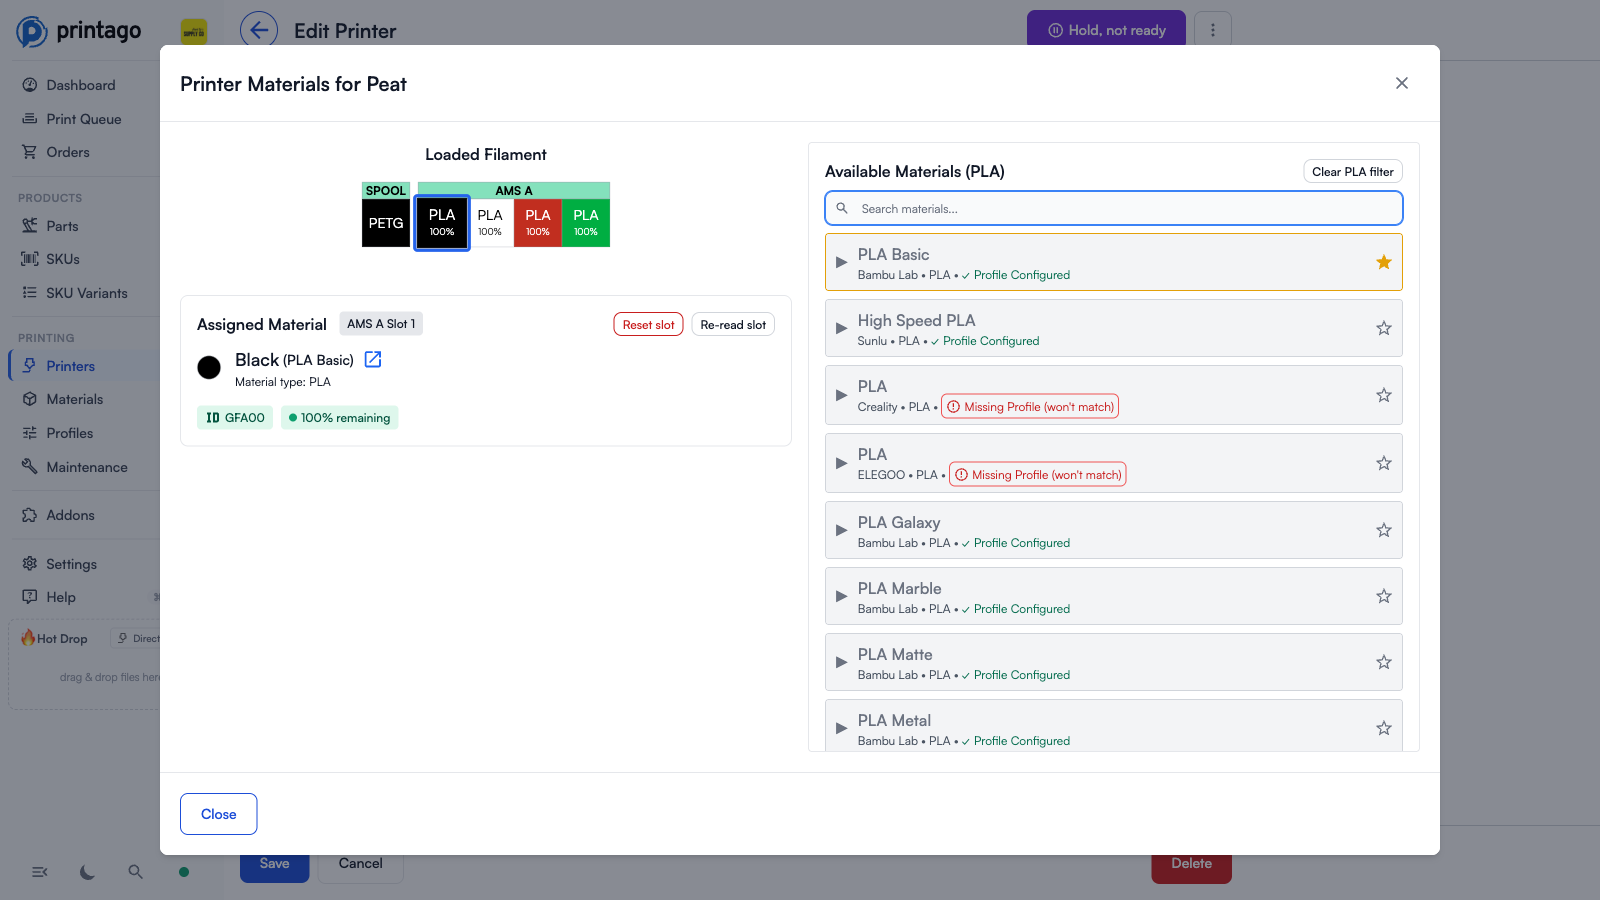
See Printer Management: Material Assignment for detailed assignment instructions including RFID auto-detection and manual assignment workflows.
What Printago writes to the printer
Assigning a material from this dialog does two things: it records the assignment in Printago (which is what job matching reads), and it writes the material into the slot on the printer itself, so the printer's own screen and its load/unload routine agree with Printago.
The slot write carries the material's identifier, its colour, its type, and the filament's nozzle temperature range. That range is read from the slicing profile configured for the material on that printer's model and nozzle diameter, using the same profile resolution priority as slicing: a variant's profile wins over the base material's. Assigning the same material to two printers of different models can therefore write two different ranges, each taken from that model's own profile.
The range matters outside of printing. Sliced G-code carries its own temperature commands, so a print is unaffected by what the slot says. The printer's manual load and unload routines have no G-code to follow and heat to the range stored in the slot instead, which is what makes the correct range important during a filament change.
If the material has no slicing profile for that printer's model and nozzle, the
range cannot be resolved and Printago writes zeroes, leaving the printer without
a usable range for that slot. The slot's ✓ Profile Configured badge in the
Available Materials list is the quickest way to spot this. Configure the profile
under Printing → Materials → (material) and assign the material again.
Clearing a slot (Reset slot) also writes zeroes, which is what tells the printer the slot holds nothing.
Material Override When Queuing Jobs
When adding parts to the print queue, you can override the default material selection:
- Single Part Printing: Select different material in print dialog - see Printing Parts
- Bulk Printing: Configure materials individually for each part
- SKU Printing: Material overrides available during SKU printing - see Printing SKUs
- OpenSCAD Parts: Material selection affects ColorSCAD color mapping
Job Matching System
Materials enable Printago's intelligent job-to-printer matching. For detailed information about how the print queue processes jobs and matches them to printers, see Print Queue Management.
Material Matching Levels
Parts can specify materials at different levels of specificity:
- Exact Variant: "Bambu PLA Basic Red" - matches only that specific color
- Base Material: "Bambu PLA Basic" - matches any color of that material
- Generic Type: "Any PLA" - matches any PLA material from any brand
Matching Examples
Example 1: Exact Match
- Part requires: "Bambu PLA Basic Red"
- Printer has: "Bambu PLA Basic Red" ✅ Match!
- Printer has: "Bambu PLA Basic Blue" ❌ No match
Example 2: Base Material Match
- Part requires: "Bambu PLA Basic" (any color)
- Printer has: "Bambu PLA Basic Red" ✅ Match!
- Printer has: "Bambu PLA Basic Blue" ✅ Match!
- Printer has: "Generic PLA" ❌ No match (different brand)
Example 3: Generic Type Match
- Part requires: "Any PLA"
- Printer has: "Bambu PLA Basic Red" ✅ Match!
- Printer has: "Generic PLA" ✅ Match!
- Printer has: "Any PLA" ✅ Match!
Example 4: Mismatch Scenario
- Part requires: "Bambu PLA Basic" (specific brand/material)
- Printer assigned: "Any PLA" (generic type)
- Result: ❌ No match - part requirement is more specific than printer capability
Multi-Color 3MF Matching
When working with multi-color 3MF files, understanding how material matching works across multiple slots is crucial:
Important Behavior: When you assign "Any Color [Material]" to multiple slots in a 3MF file, Printago will use the first matching material it finds for ALL those slots. This may result in multiple slots pulling from the same physical spool.
Example: Sparkle Dragon (2 colors)
- 3MF Slot 1 configured as: "Any Color PLA Sparkle"
- 3MF Slot 3 configured as: "Any Color PLA Sparkle"
- AMS has: Red Sparkle in slot 1, Gold Sparkle in slot 3
- Result: Both 3MF slots will use Red Sparkle (the first match found) ❌
Solution: Assign specific color variants for multi-color prints:
- 3MF Slot 1: "PLA Sparkle Red" (specific variant)
- 3MF Slot 3: "PLA Sparkle Gold" (specific variant)
- Result: Each slot uses its intended color ✅
For parts with multiple colors, always assign specific material variants rather than using "Any Color" matching. This ensures each color in your 3MF file uses the intended filament.
Choosing Among Duplicate Slots
When the same material is loaded in more than one slot on a printer, the AMS slot selection setting decides which slot a job uses. By default Printago assigns the lowest slot first (left-to-right), so slot 1 is used before slot 2, and so on — giving predictable, repeatable assignment instead of landing on an arbitrary slot.
Change this under Settings > Account > General:
| Option | Behavior |
|---|---|
| Lowest slot first (left-to-right) | Leftmost matching slot first (AMS A slot 1, then 2, …). Default. |
| Highest slot first (right-to-left) | Rightmost matching slot first. |
| Most-empty spool first | The matching slot with the least filament remaining — use up nearly-empty spools before starting a fresh one. |
| Most-full spool first | The matching slot with the most filament remaining. |
This only applies when a material is loaded in multiple slots; when it's in a single slot, that slot is always used.
Most-empty and Most-full rely on the printer reporting how much filament is left in each slot. Slots that don't report a remaining amount are tried after those that do, falling back to lowest-slot order.
Material Tips
- Use Specific Materials: Prefer exact material specifications for consistent results
- Generic Fallbacks: Use "Any [Type]" for prototyping or non-critical prints
- Profile Completeness: Ensure all materials have profiles for your printer fleet
Common Issues
Jobs Not Matching Printers:
- Verify material is loaded and assigned to printer
- Check that material has slicing profiles configured
- Ensure part material requirements match available materials
Need help with materials? Join our Discord community for support and tips from other users!