Part Management
Parts are the foundation of your 3D printing workflow in Printago. A part represents any 3D model that you want to print, and can be used across multiple SKUs.
Supported Part Types
Printago supports several types of parts, each with different capabilities:
| Part Type | Description | Capabilities |
|---|---|---|
| STL | Static models | Same as STEP files to Printago - single material, can set slicer process per-part override |
| STEP | Static models with single material | Can set slicer process per-part as an override |
| 3MF Projects | Complete projects with all modifiers | Preserves all modifiers, negative parts, support enforcers, and any type of painting. 3MFs are preserved and can easily be sliced and sent to any printer they fit on |
| OpenSCAD | Parametric design files | Parametrically generate STL files with customizable parameters |
| ColorSCAD | Enhanced OpenSCAD | Add-on feature allowing you to define colors in OpenSCAD models to paint them |
| GCODE 3MF | Pre-sliced files | From Bambu Studio or Orca - tightly bound to the type of printer they were sliced for, however can still re-map materials as required |
Cross-Printer Compatibility
Using Printago, your parts are seamlessly used across any models of printers in your farm. A 3MF created for a Bambu A1 Mini will work on a Bambu P1S and vice versa and without creating seperate files for each printer. The same goes for all other part types, except for gcode.3mf files. More information about how this works can be found on the Cloud Slicer page.
Part Processing
Printago automatically processes uploaded parts to:
- Parse material, color, and build-plate metdata (3MF).
- Generate thumbnails and previews
- Calculate print time estimates (coming soon)
- Calculate material usage estimates (coming soon)
When parts are used in print jobs, they're sliced on-demand for the specific configuration (printer model, material, process settings, build plate type, etc). Printago intelligently caches the generated G-code in the background for faster future prints. When you update a part or change a setting, Printago automatically re-slices it with the new configuration.
Read more about how slicing works in Printago.
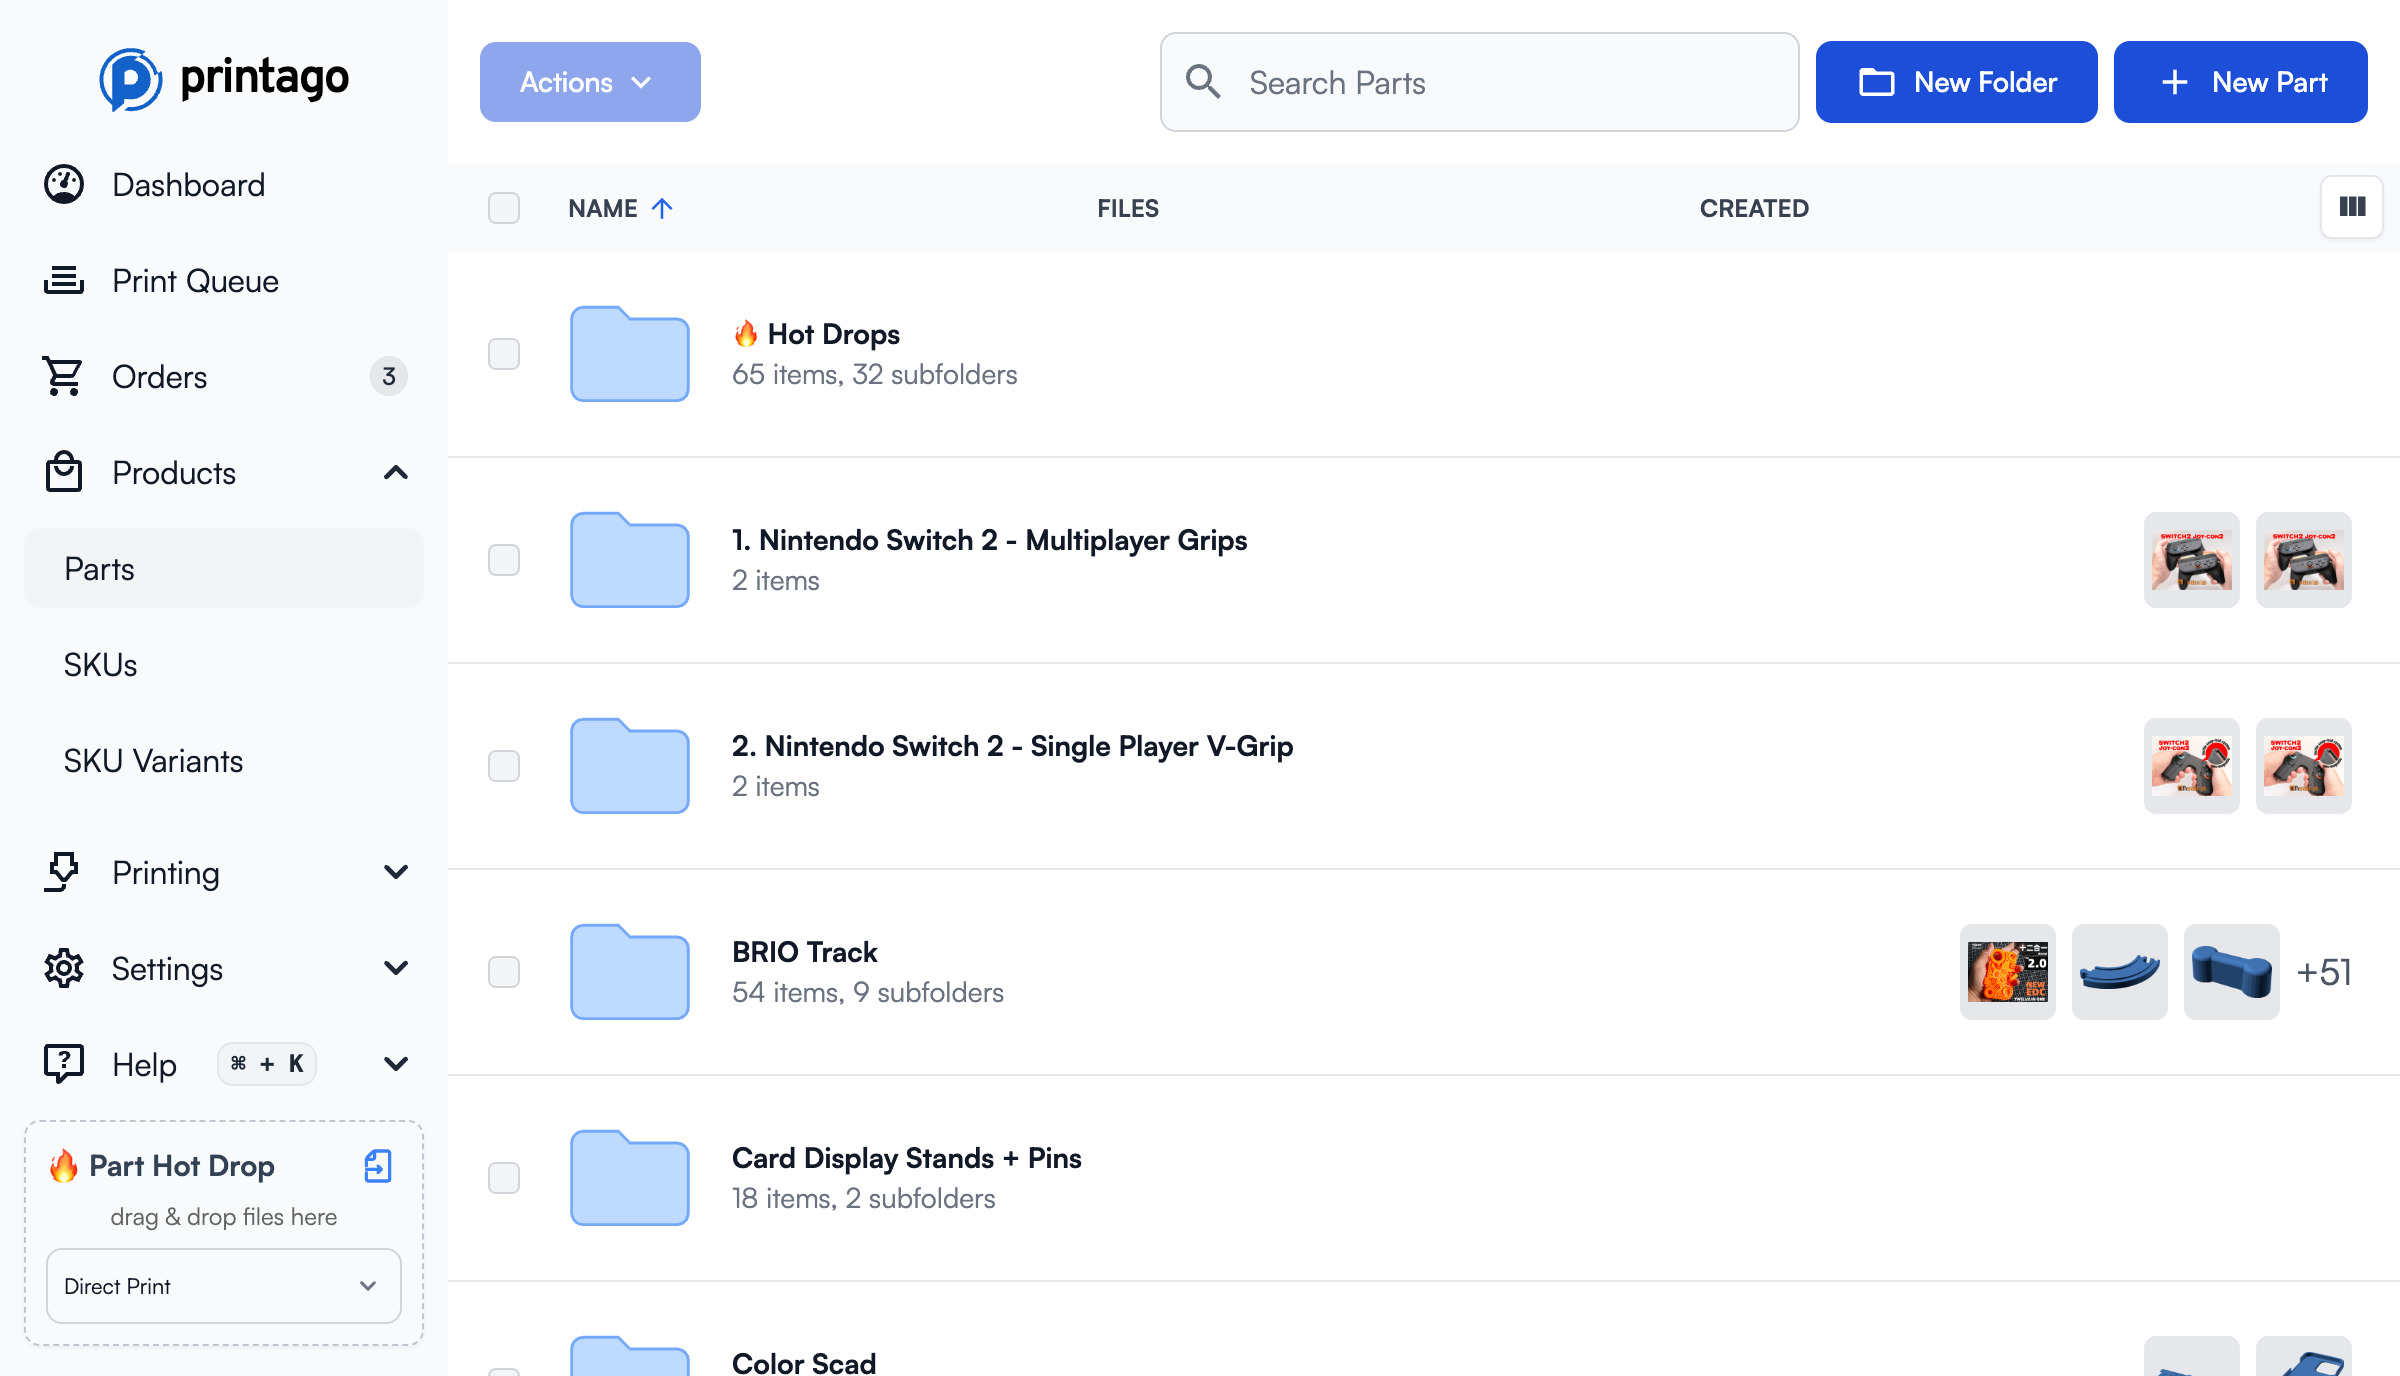
Adding Parts to Printago
- Navigate to
Products -> Partsand click+ Add Partin the top right. - Browse or drag a compatible file into Printago.
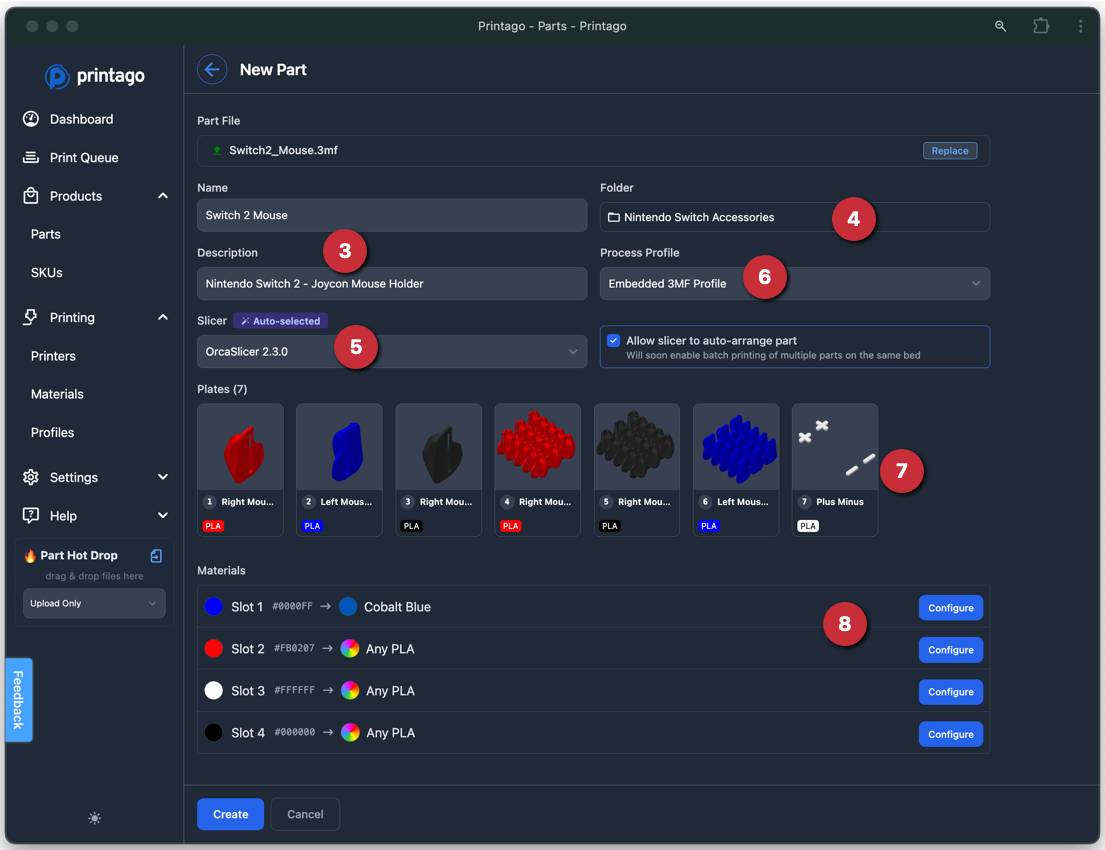
- Enter a name and description for your part.
- Parts are created in your current folder location (click to change if needed).
- Select your slicer (3MF files auto-select the matching version with an "Auto-Selected" badge).
- Choose a process profile override, or leave as "Printer Default" to use each printer's default settings.
- Review the build plates and materials detected in your file.
- Map each material to items in your Material library.
- Click
Createto upload your part.
File-Specific Settings
Different file types have unique capabilities and configuration options:
- STL and STEP Parts - Static single-material parts with process profile overrides
- 3MF Project Files - Complete projects with modifiers, supports, and multi-material painting
- GCODE 3MF Files - Pre-sliced files with printer-specific limitations
- Dynamic OpenSCAD Parts - Parametric parts with customizable parameters
Need help with your parts? Contact our support team or check our troubleshooting guides, or join our Discord community for latest info and help!