Quick Start Guide
Get up and running with Printago in minutes. This guide walks you through connecting printers, setting up materials, and your first automated print job.
Before You Begin
Ensure your Bambu Lab printers are ready for cloud integration:
- Complete initial setup of your Bambu Lab printer(s)
- Pair your printer(s) with your Bambu Cloud account
- Enable cloud profile syncing in your slicer (Bambu Studio/Orca)
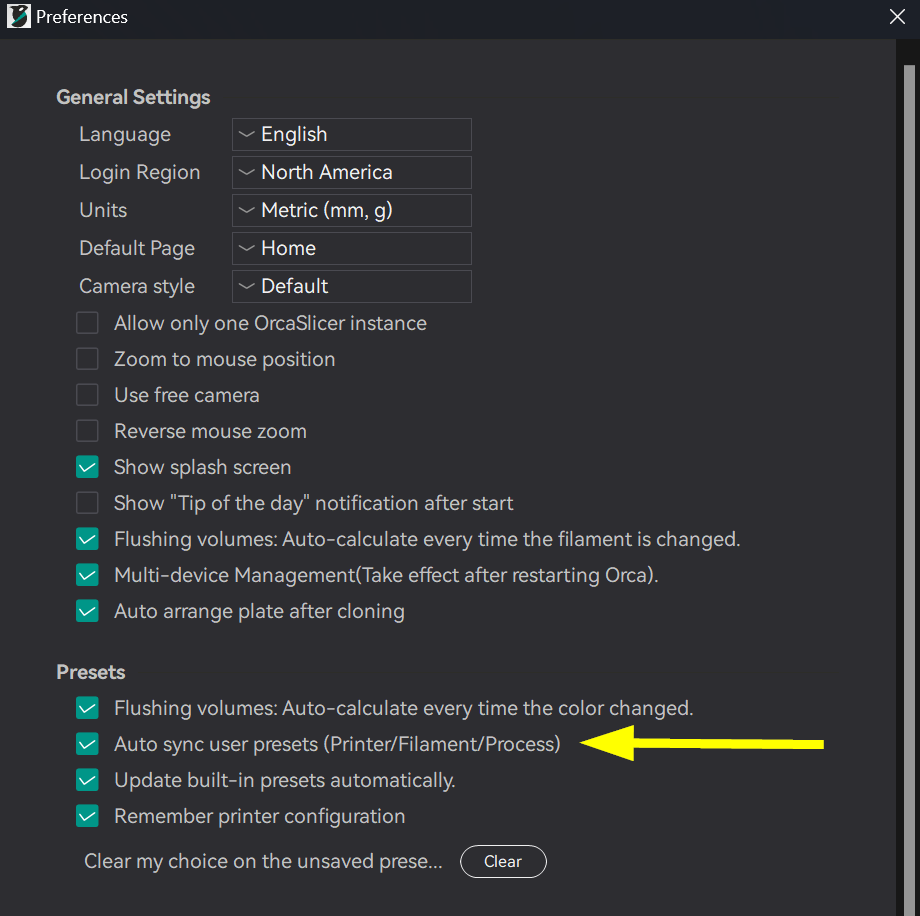
In Bambu Studio/Orca Slicer: Go to Preferences > Network > Enable cloud syncing and sync your profiles. Printago will import these profiles when you run the Bambu Integration flow.
Step 1: Create Your Account
- Go to printago.io and create your free account
- Verify your email address and log in
Step 2: Connect Your Printers
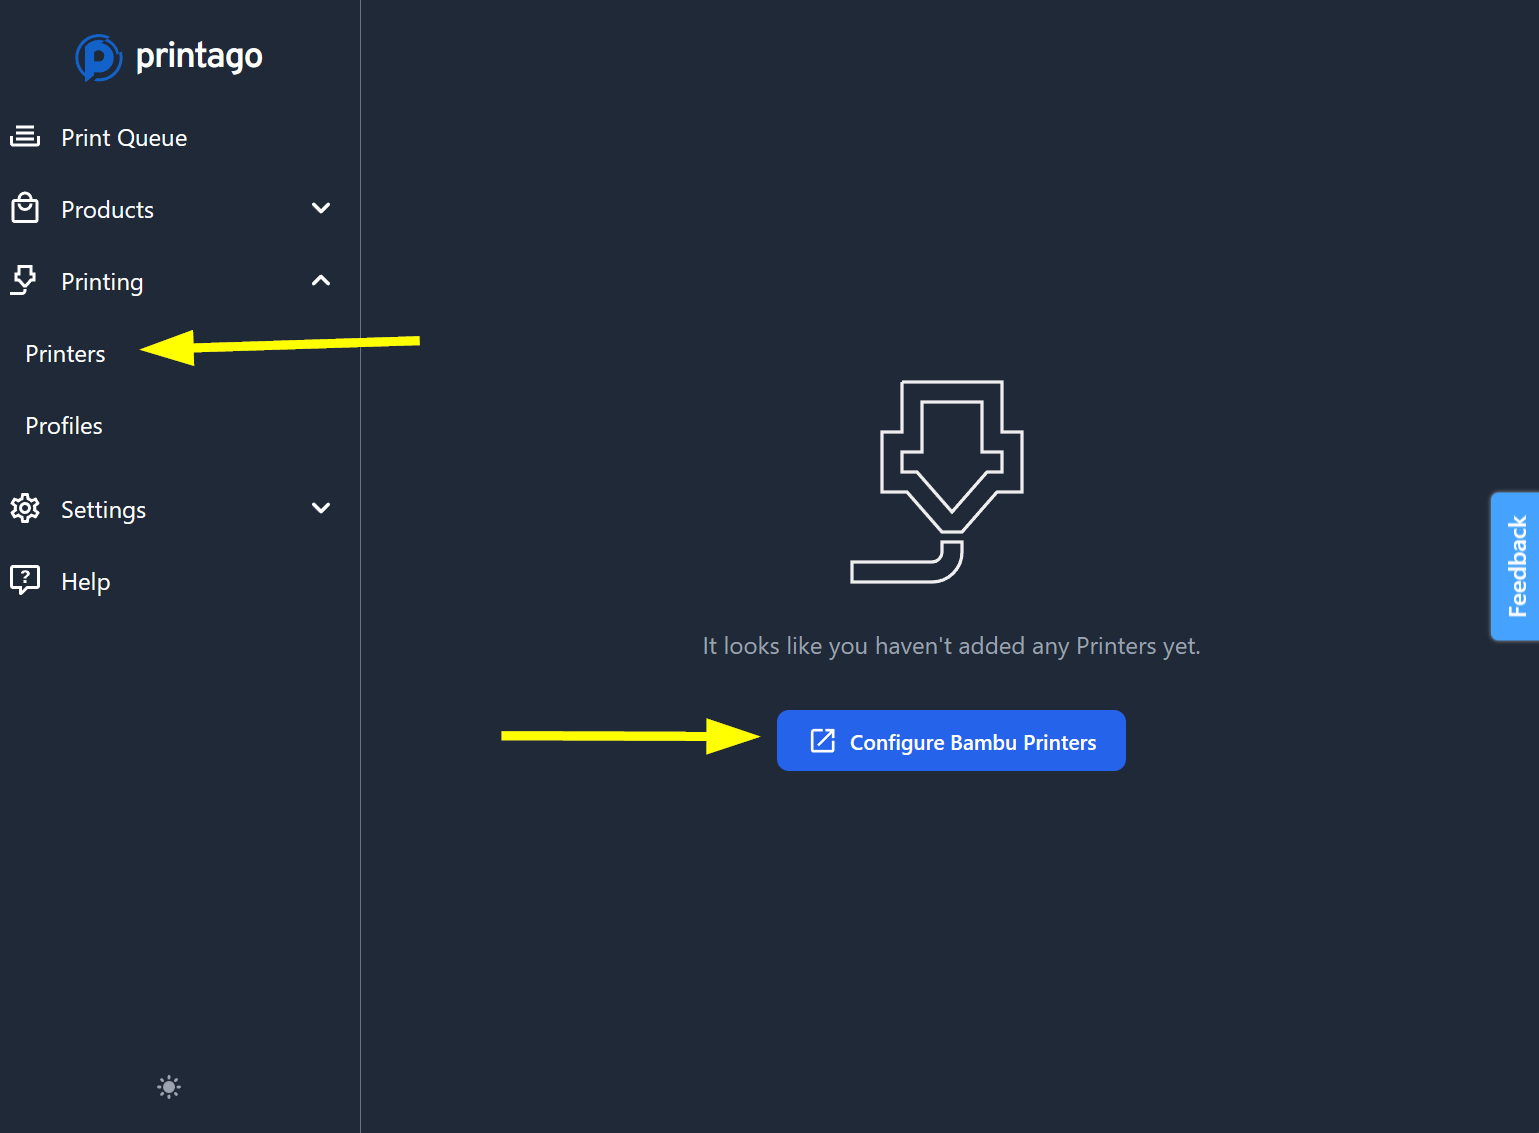
- From the Dashboard, click
Add Printersor navigate toPrinting → Printers
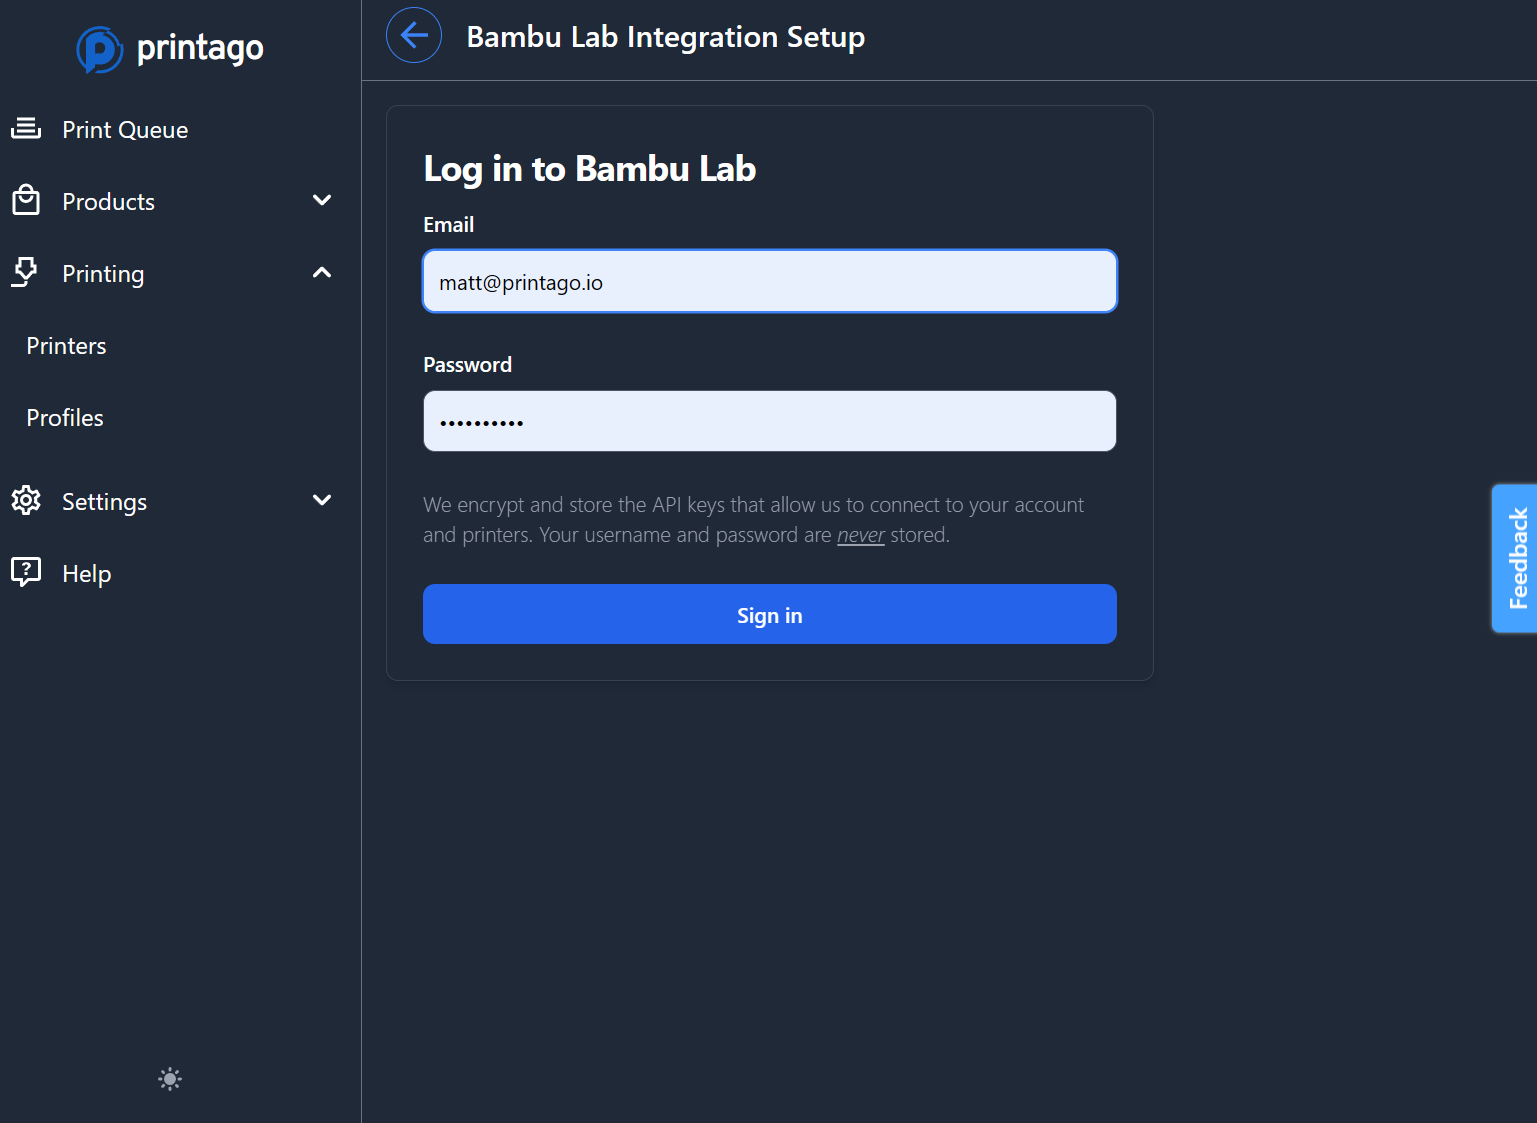
- Enter your Bambu Cloud credentials and complete Bambu's 2-Factor authentication as prompted
-
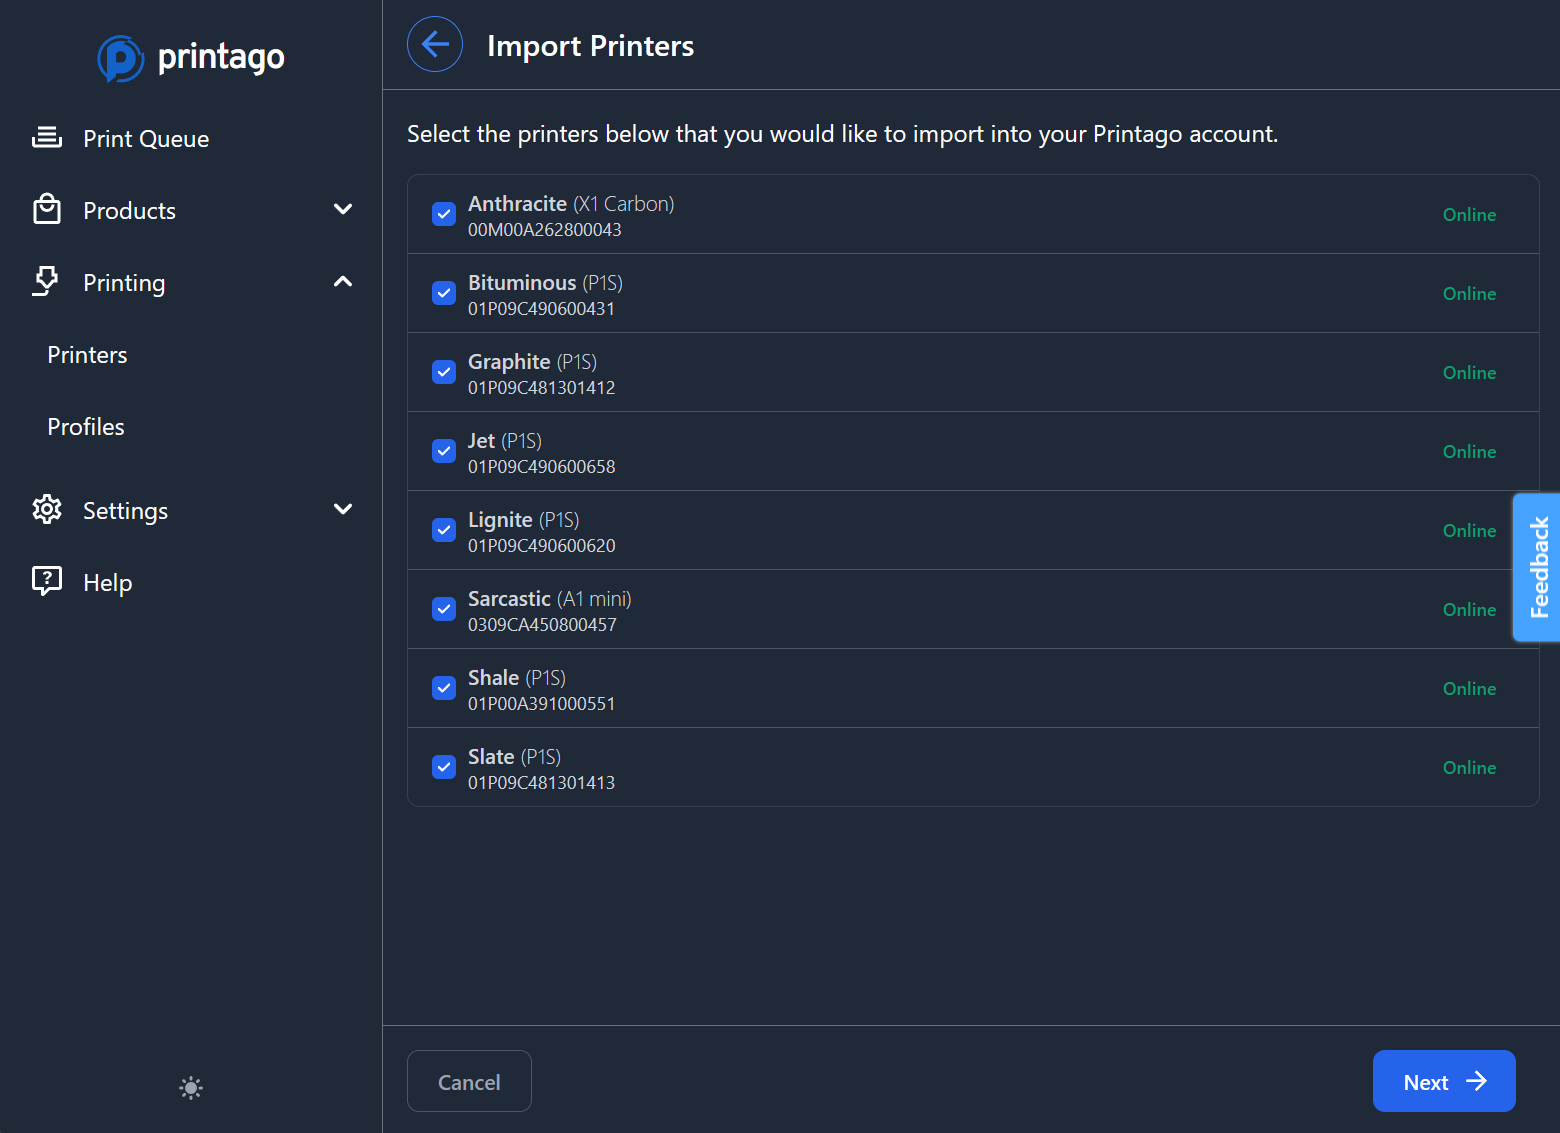
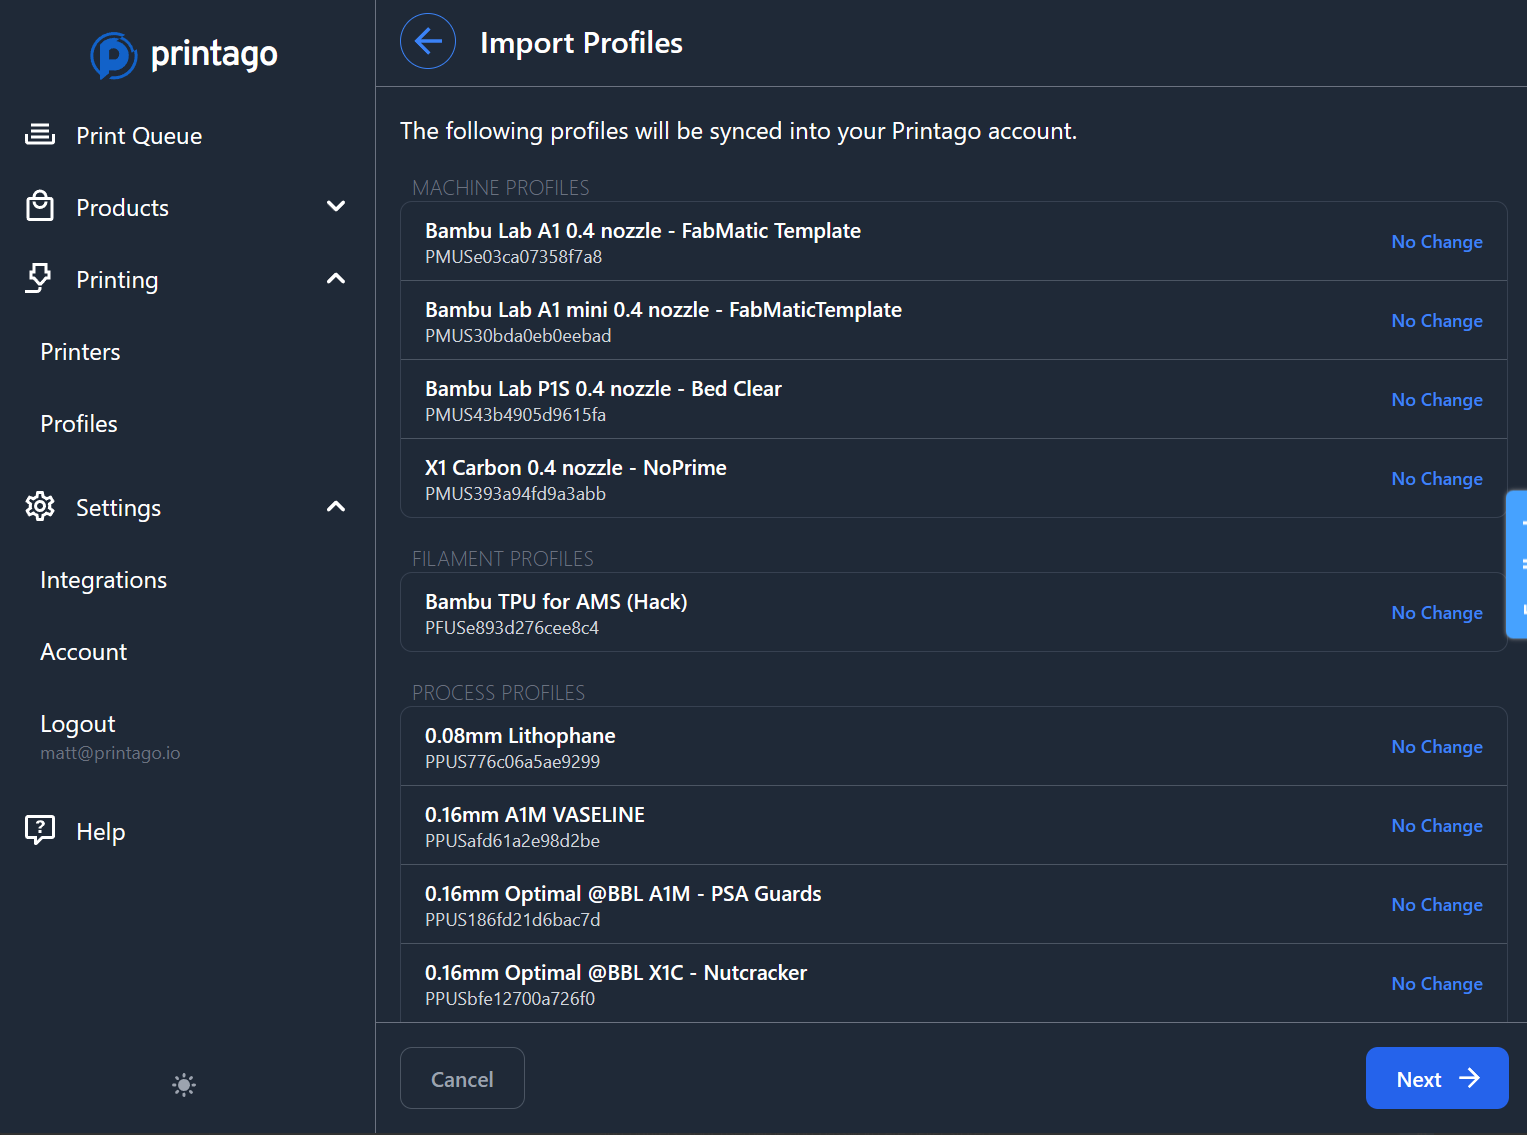
The Bambu Integration flow will guide you through selecting printers to connect and importing your cloud-synced slicing profiles
Free Unlimited PrintersPrintago supports unlimited printers regardless of account type. See Subscription Management for commercial features.
- Configure each printer's default machine and process profiles and click finish (materials are configured separately in Step 3)
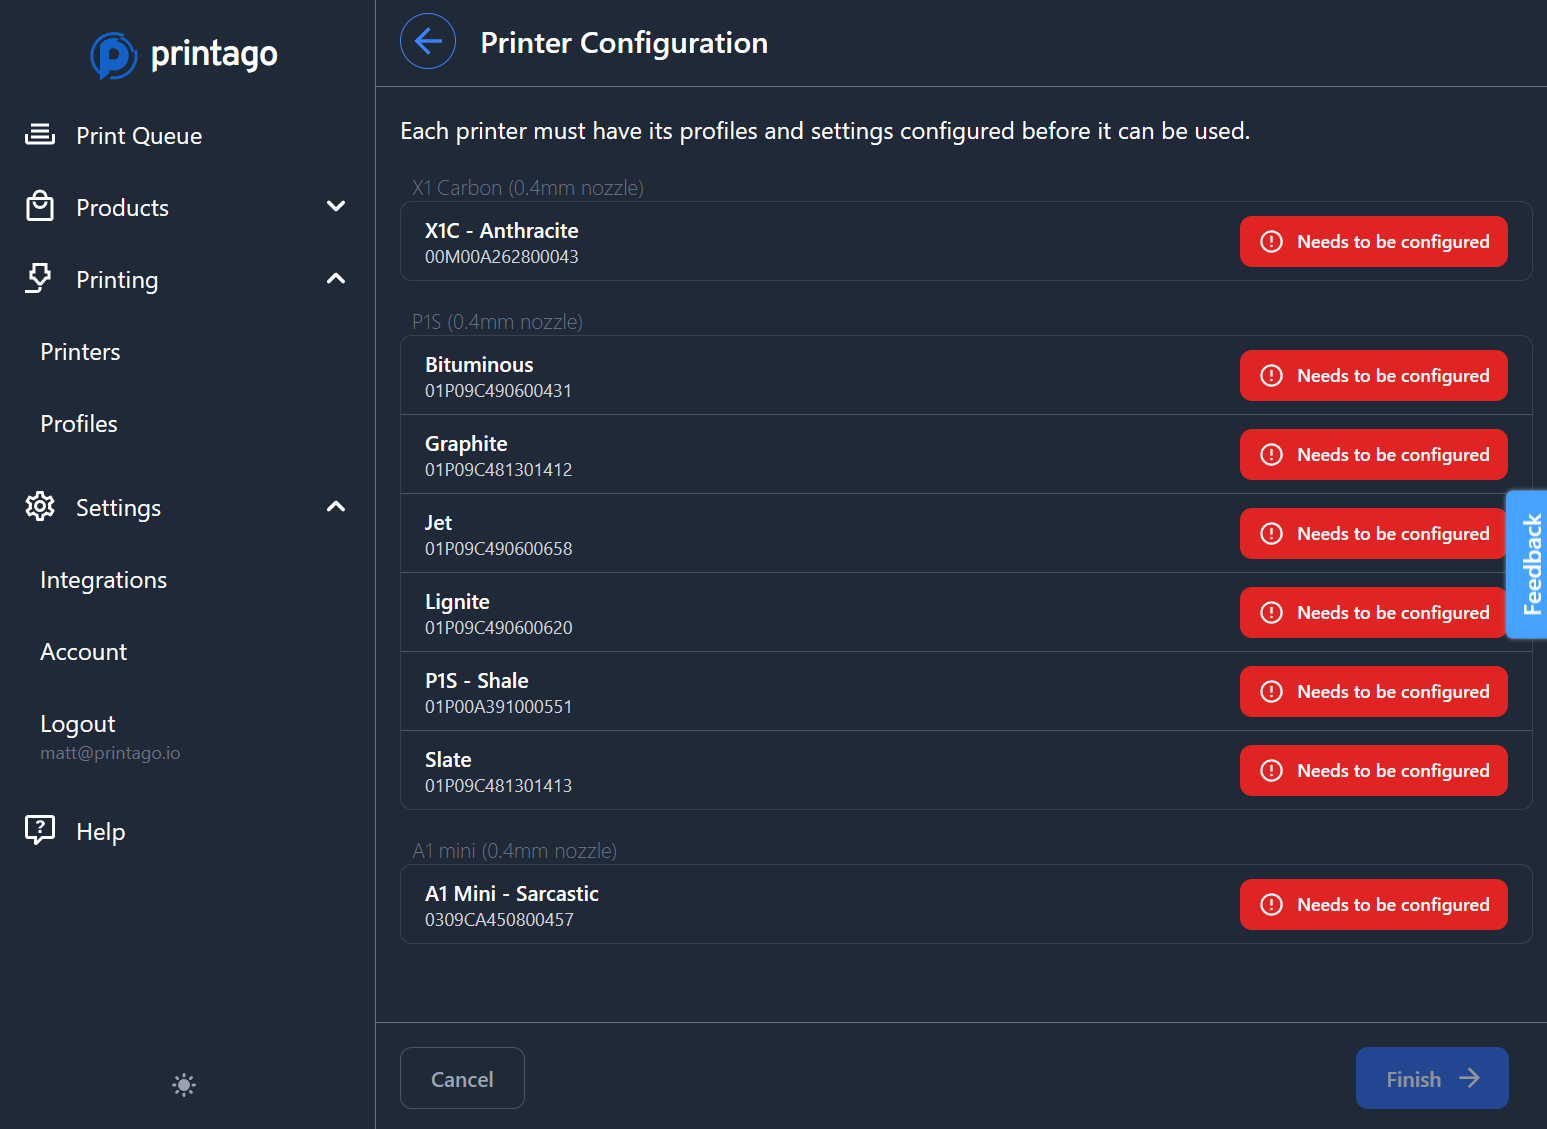
Use Save to all X printers in this group to quickly configure multiple identical printers at once.
Step 3: Set Up Materials
Before creating parts, configure your printer materials for intelligent job matching.
This Quick Start covers importing materials from your AMS. For adding third-party materials, manual entry, or bulk import methods, see Materials Documentation.
Import Materials from AMS
- Navigate to
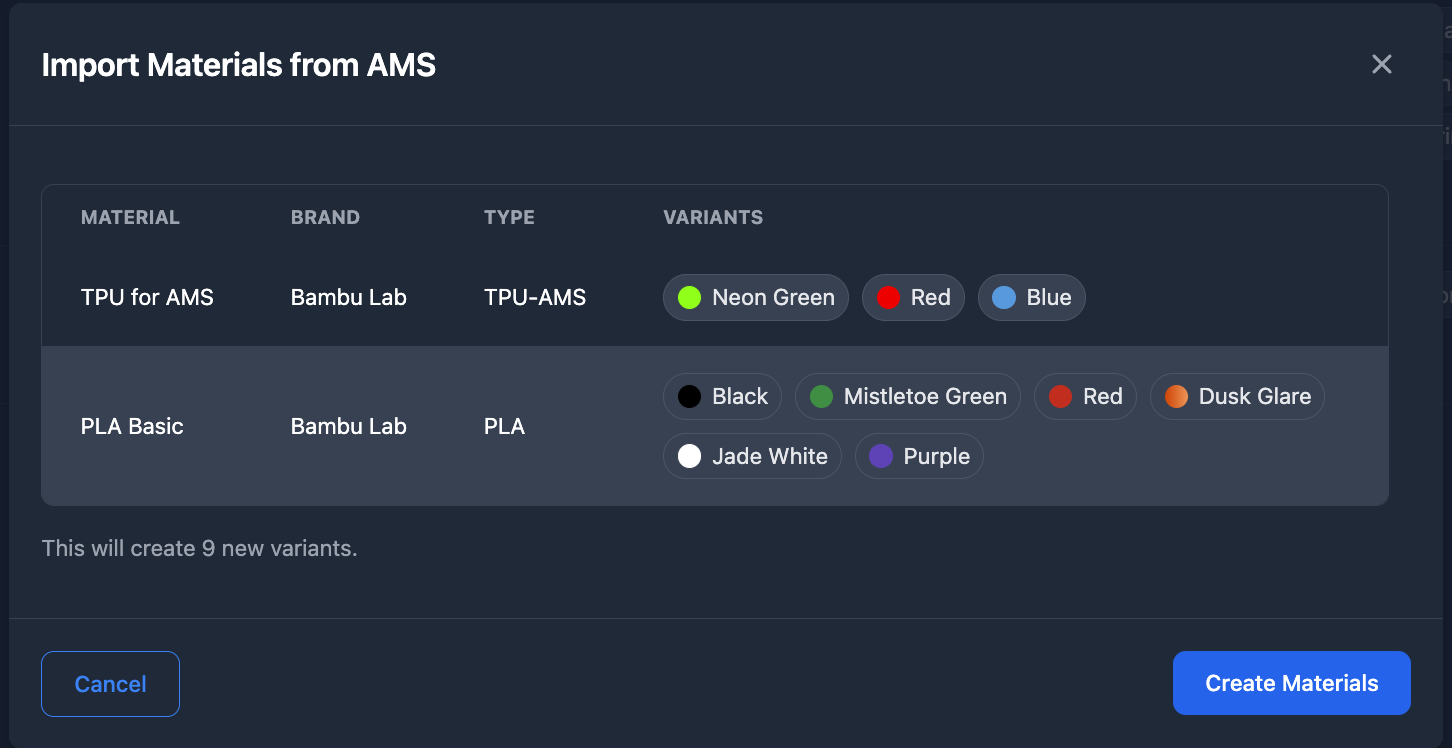
Printing → Materials - Click
Import from AMSto automatically detect and add materials currently loaded in your printers
Configure Material Slicing Profiles
- For each imported material, configure slicing profiles for your printer models and nozzle sizes:
- Click on any material in your library
- Set up profiles for each Printer Model + Nozzle Size combination
- Use the auto-complete search (type "PLA" to find PLA profiles quickly)
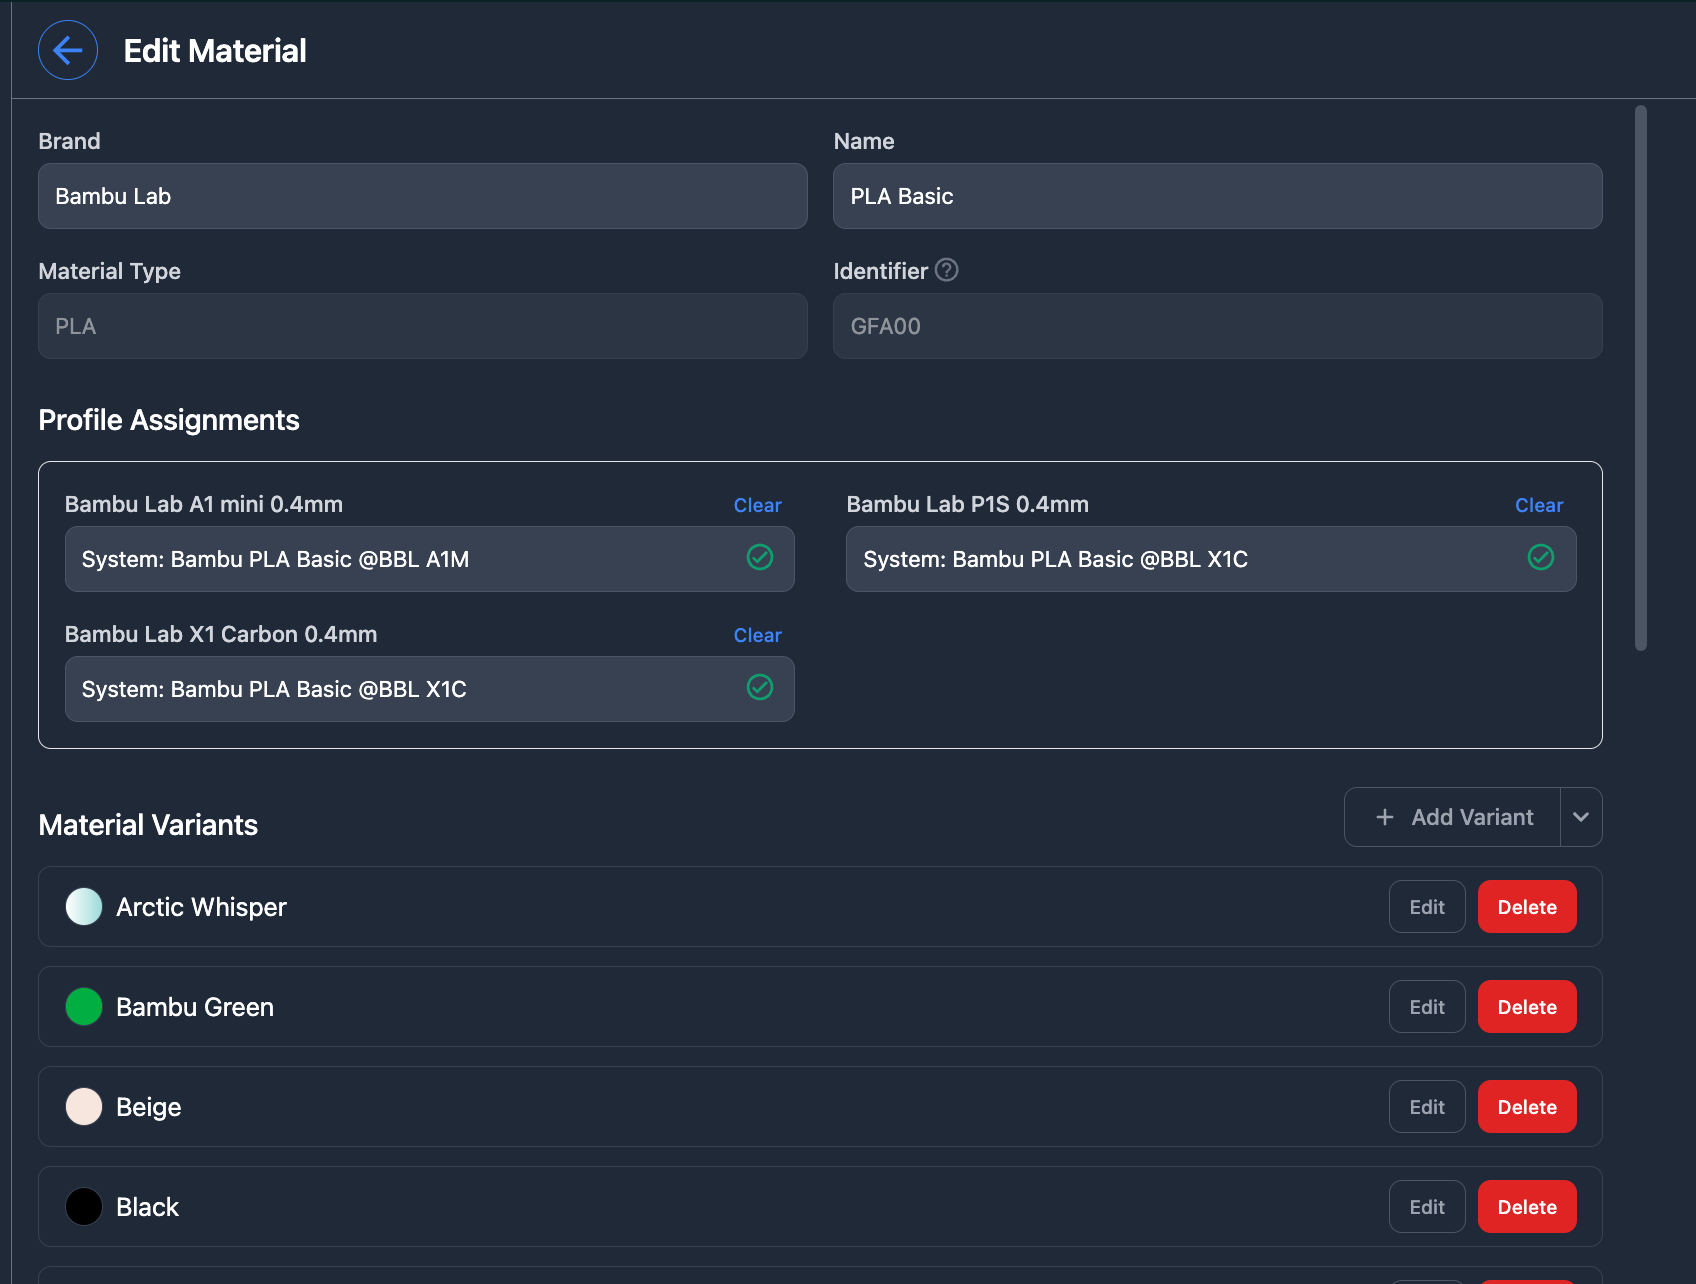
Materials must have slicing profiles configured for each printer model and nozzle size they'll be used with. Missing profiles prevent job matching.
Step 4: Add Your First Part
- Go to
Products → Partsand clickAdd Part
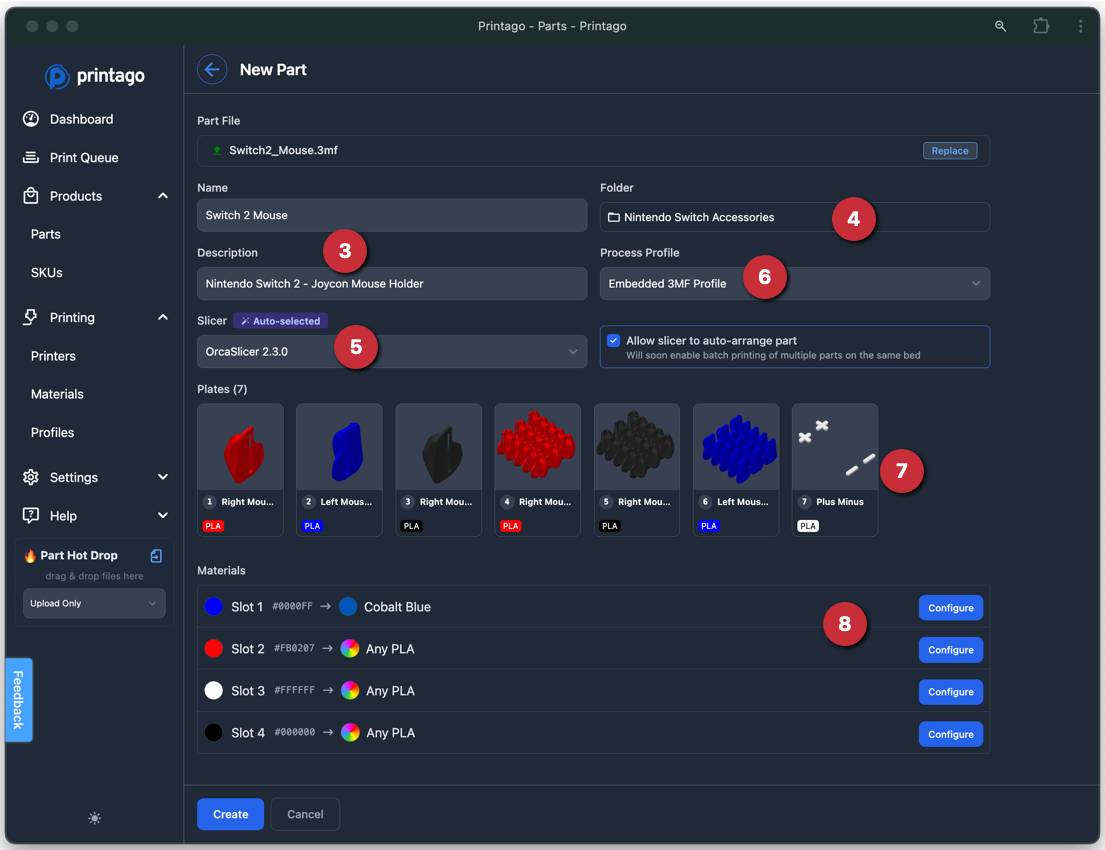
- Upload Your File: Browse or drag your STL or 3MF file into Printago
- Configure Part Details:
- Enter a name and description for your part
- Select your slicer (3MF files auto-select the matching version)
- Choose a process profile override, or leave as "Printer Default"
- Material Mapping: Map each material detected in your file to items in your Material library
- Click
Createto upload your part
Printago supports STL, STEP, 3MF Projects, OpenSCAD, and GCODE.3MF files. Regular .gcode files are not supported.
Step 5: Start Your First Print
- Find the saved part in the parts library and click the
Printbutton
After saving the part, a toast notification will give you a quick link to open it up, or you can print the file using Bulk Actions
-
Configure your print:
- Set quantity
- Choose printer assignment method:
- Next Available: Automatic matching based on material compatibility
- Specific Printer: Target an individual printer
- Tagged Printers: Target a group of printers
- Override material selection if desired
-
Click
Printto add the job to the queueSmart MatchingPrintago automatically matches jobs to compatible printers based on material requirements, nozzle size, and availability.
-
Head to the
Print Queueto view your job.
Step 6: Mark Printers Ready
Finally, for printers to match with jobs Printago must be made aware that the printer bed is clear and that a job may be sent.
19. Navigate to Printing → Printers and mark printers as Clear & Ready:
- Individual: Click status dropdown →
Clear & Ready - Bulk: Select multiple printers → Bulk Actions →
Availability→Clear & Ready
You can safely use "Select All" - actively printing printers will ignore the "Clear and Ready" command.
Step 7: Watch the Magic Happen
-
Automatic Processing: Printago automatically:
- Matches your job to a compatible printer
- Slices the part using the Cloud Slicer
- Sends the job to the printer and starts printing
-
Monitor Progress: Use the
Print Queueto:- Track job progress in the
In Progresstab - Reorder queued jobs by dragging
- Pause, resume, or cancel jobs using bulk actions
- Track job progress in the
Jobs process in top-to-bottom order, automatically matching to compatible printers based on material requirements.
Step 8: Complete the Workflow
Important: When jobs finish, mark printers as Clear & Ready to enable the next job!
Check out FabMatic for automated bed clearing and continuous printing.
Next Steps
- Scale Up: Add more printers, materials, and parts
- Learn More: Explore Materials Management, Printer Management, and Print Queue Management
- Get Help: Join our Discord community
Happy printing! 🎉