Quick Start Guide
Get up and running with Printago in minutes. This guide walks you through the essential setup and your first print job.
Before You Begin
Before starting with Printago, ensure you have:
- Completed initial setup of your Bambu Lab printer(s)
- Paired your printer(s) with your Bambu Cloud account
- Enabled cloud profile syncing in your slicer
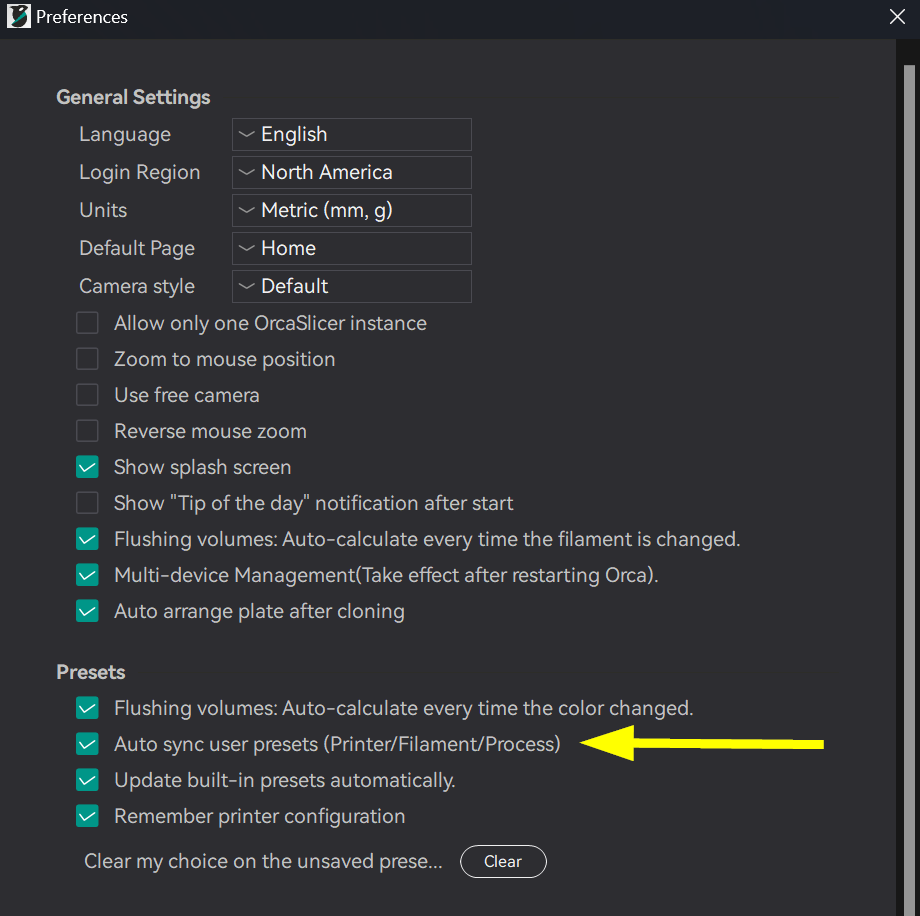
Enable Cloud Profile Sync
Printago automatically syncs slicing profiles from your Bambu Lab Account. When you modify a profile, changes apply to all associated parts. Adding a new printer? No need to re-slice existing models - Printago assigns profiles to parts and handles slicing automatically in the background.
In Orca Slicer or Bambu Studio:
- Ensure you're logged into the slicer with your Bambu Lab account.
- Open Preferences
- Navigate to Presets section
- Enable "Auto sync user presets"
Adding Your Printers & Profiles
Printago imports all your Bambu Lab printers at once - no need to add them individually!
-
Navigate to
Printersin the sidebar -
Click
Configure Bambu Printers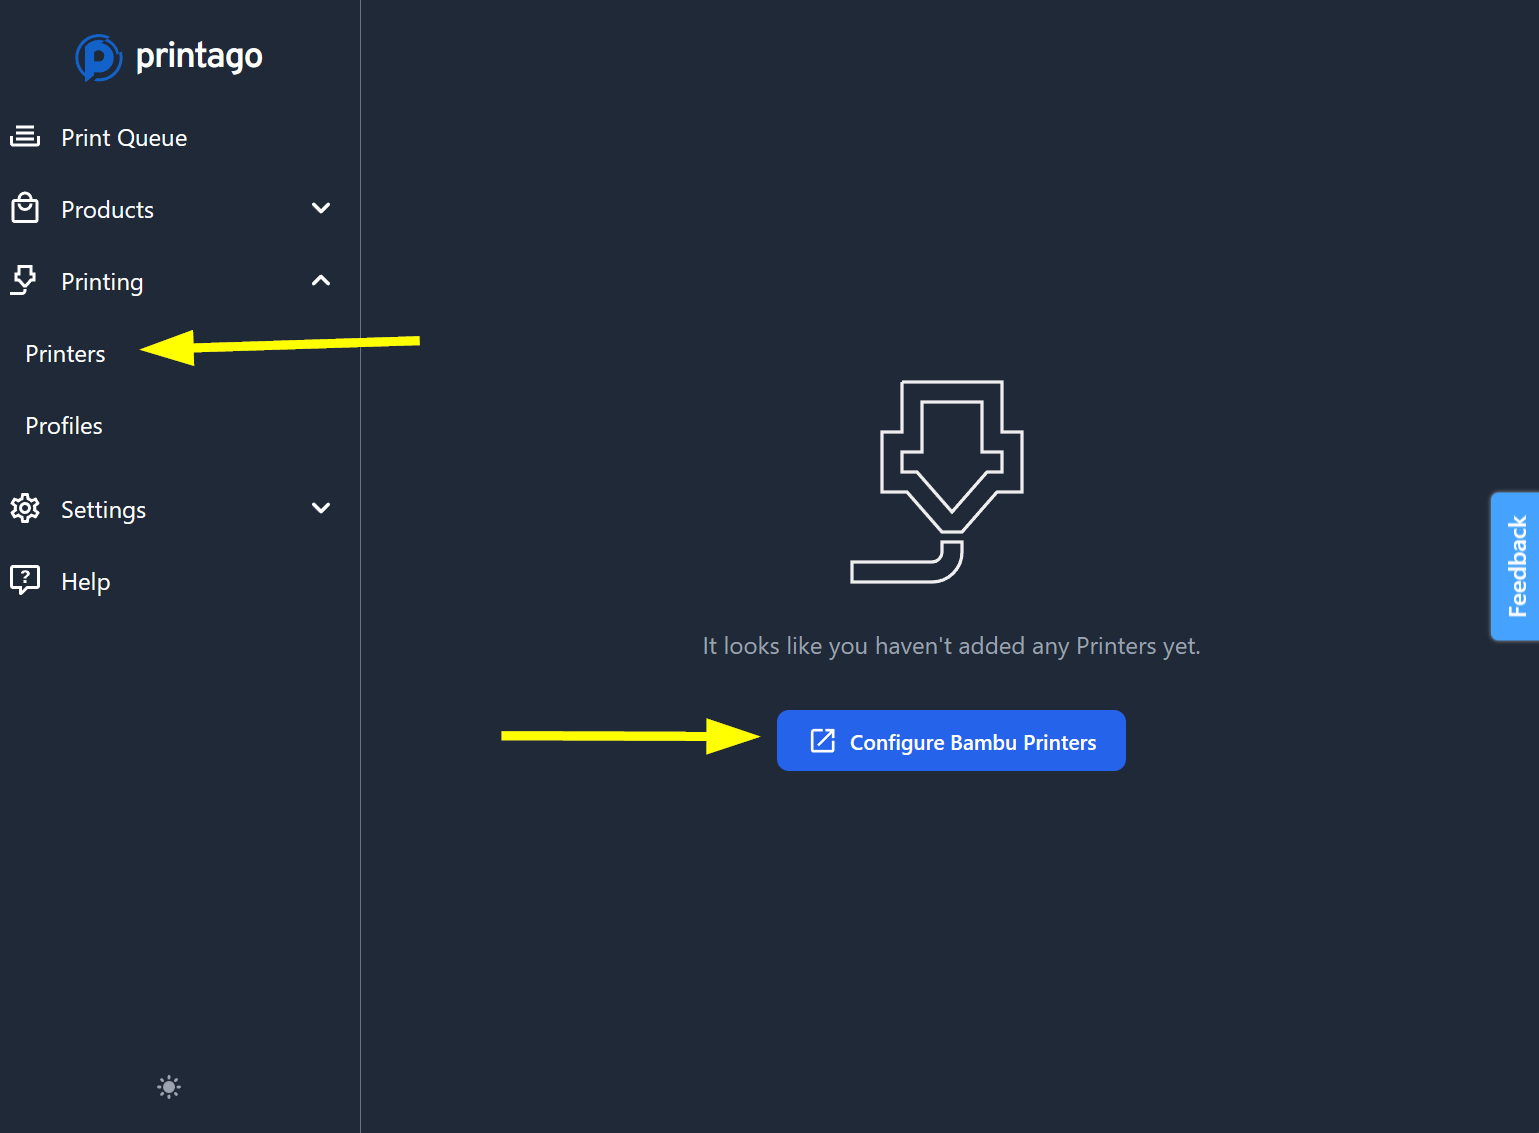
-
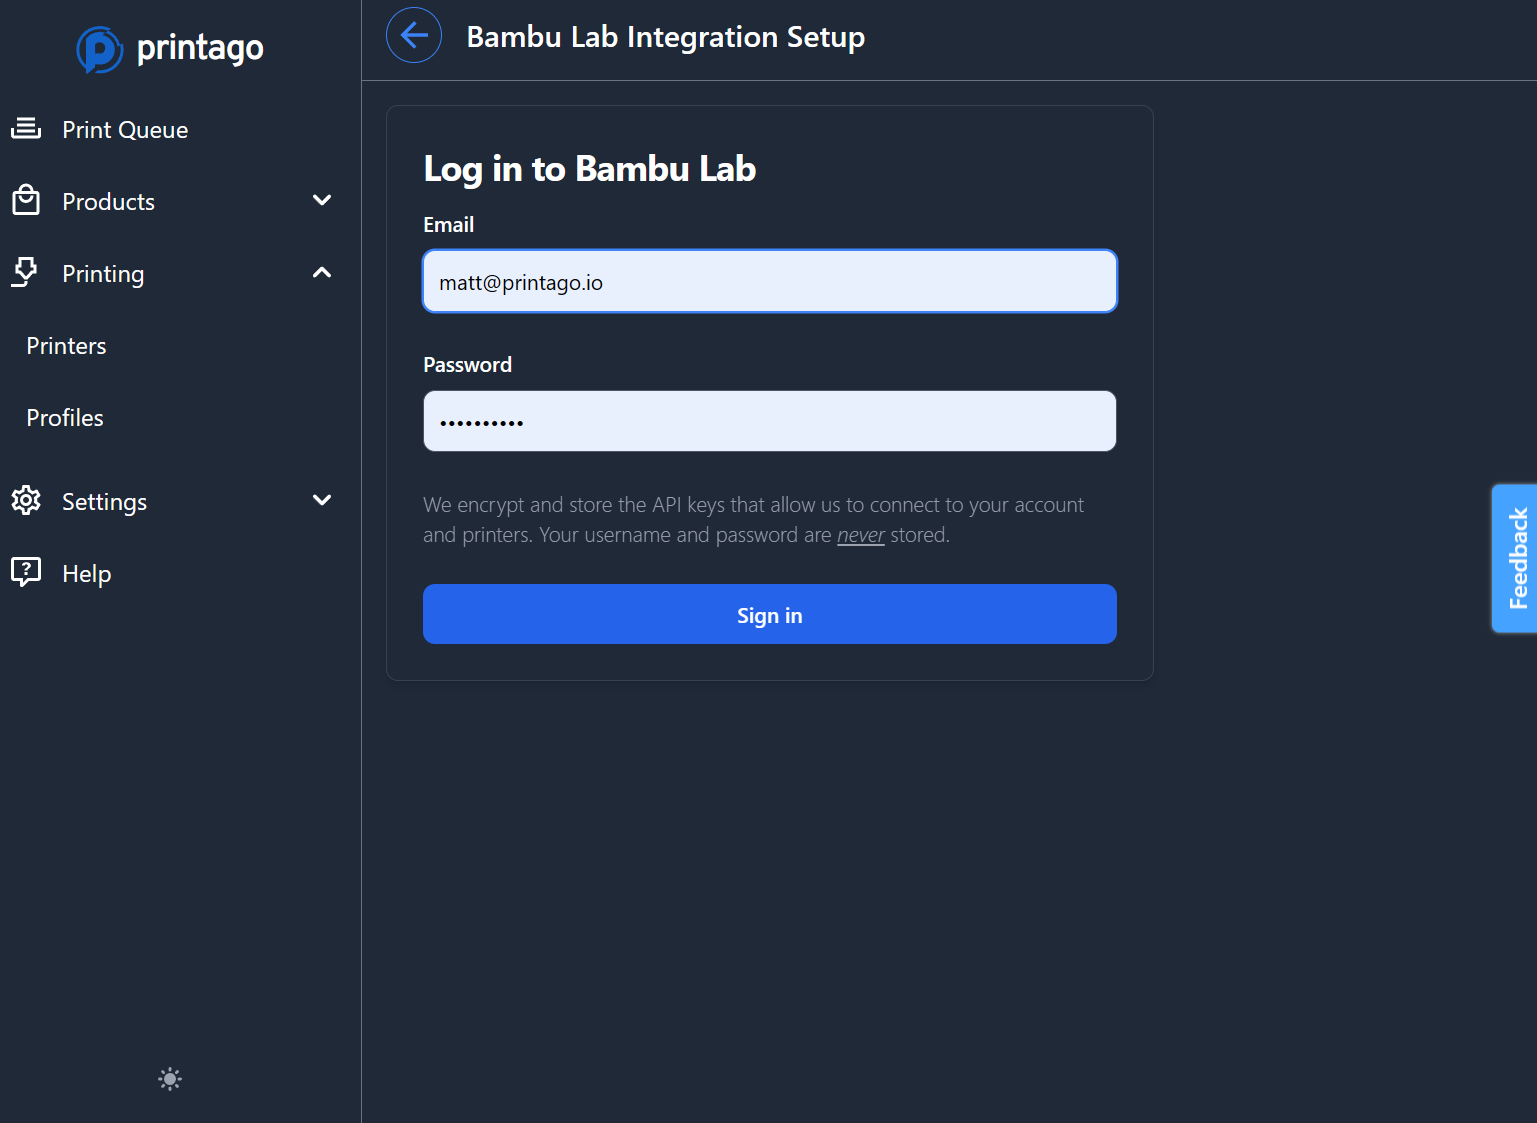
Enter your Bambu Cloud credentials and complete Bambu's 2-Factor authentication as prompted
-
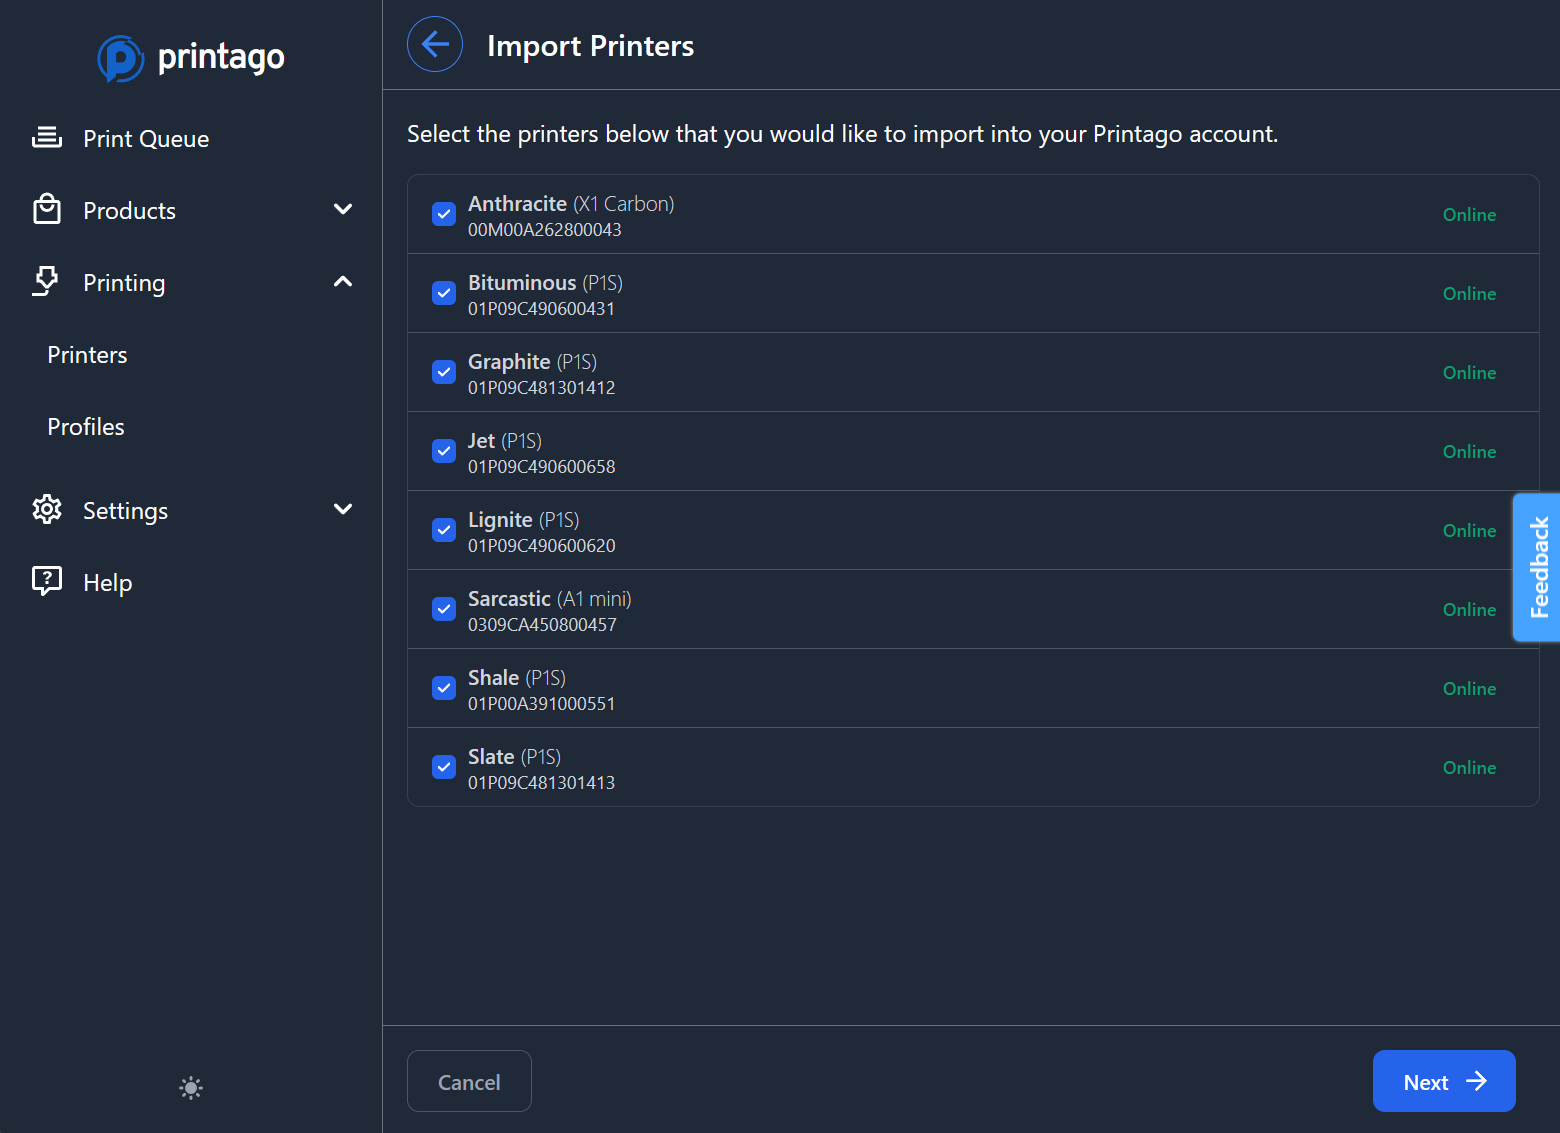
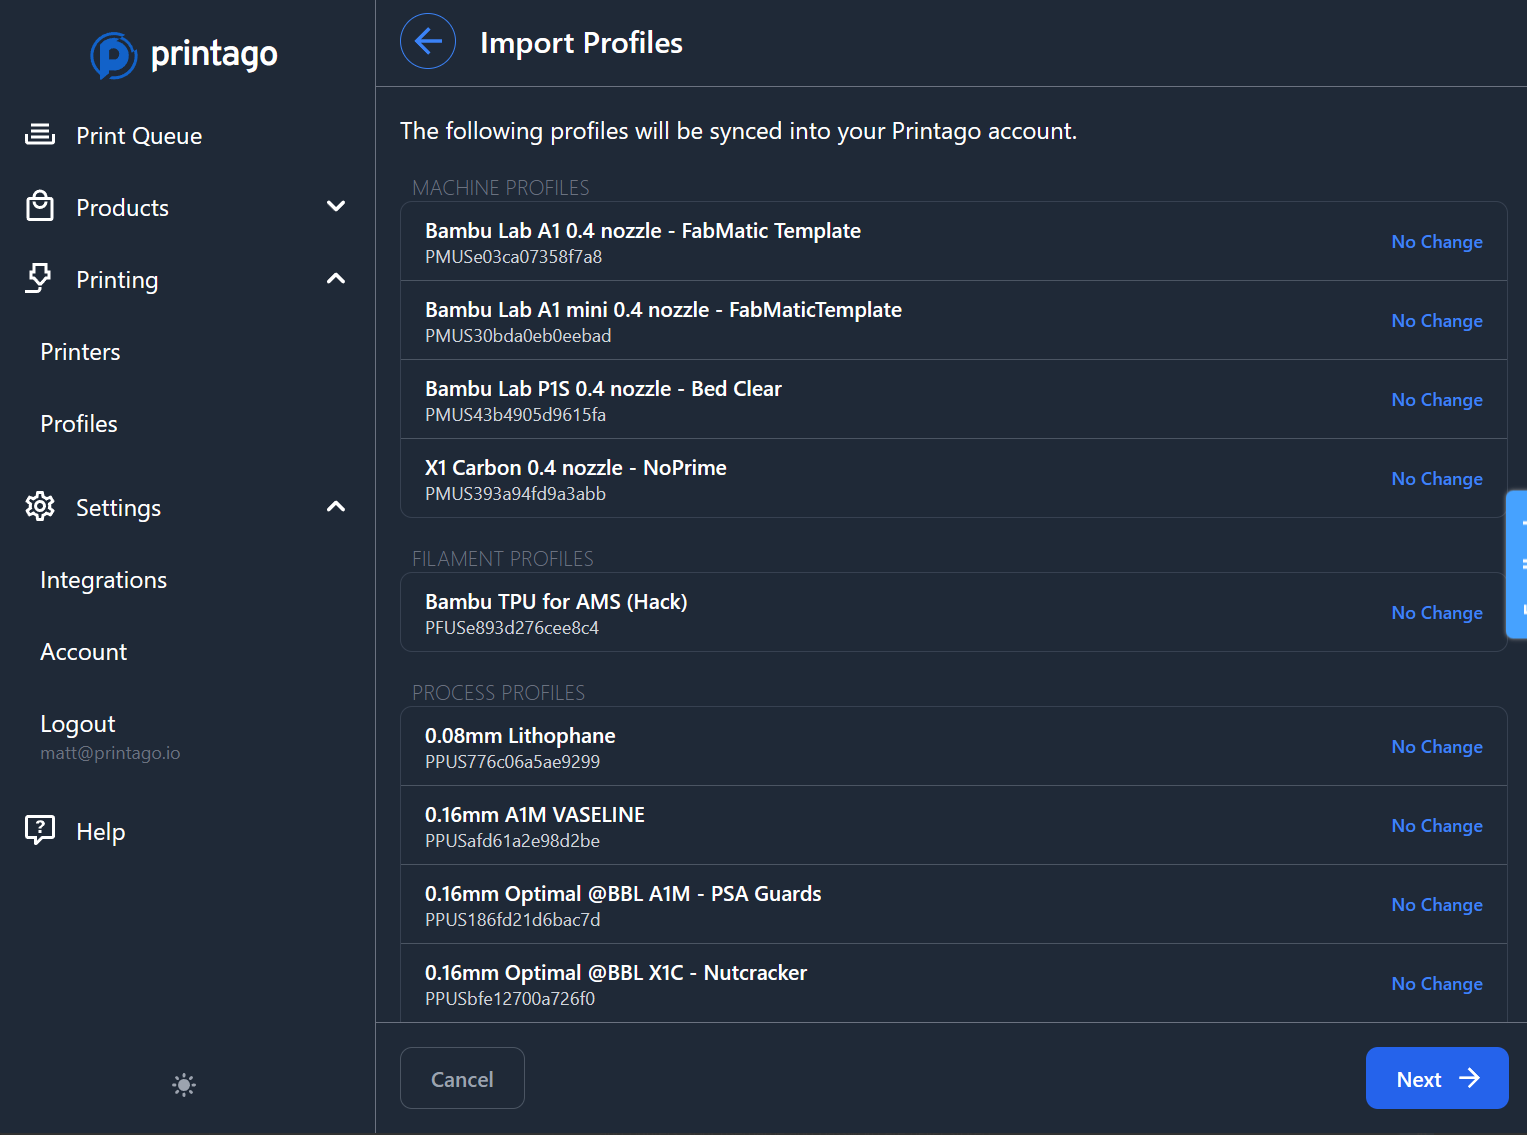
After authentication, you'll be taken through a short, two-step wizard allowing you to select which 3d printers to pair and profiles to import.
Free Unlimited PrintersPrintago allows you to connect and use unlimited printers - free!
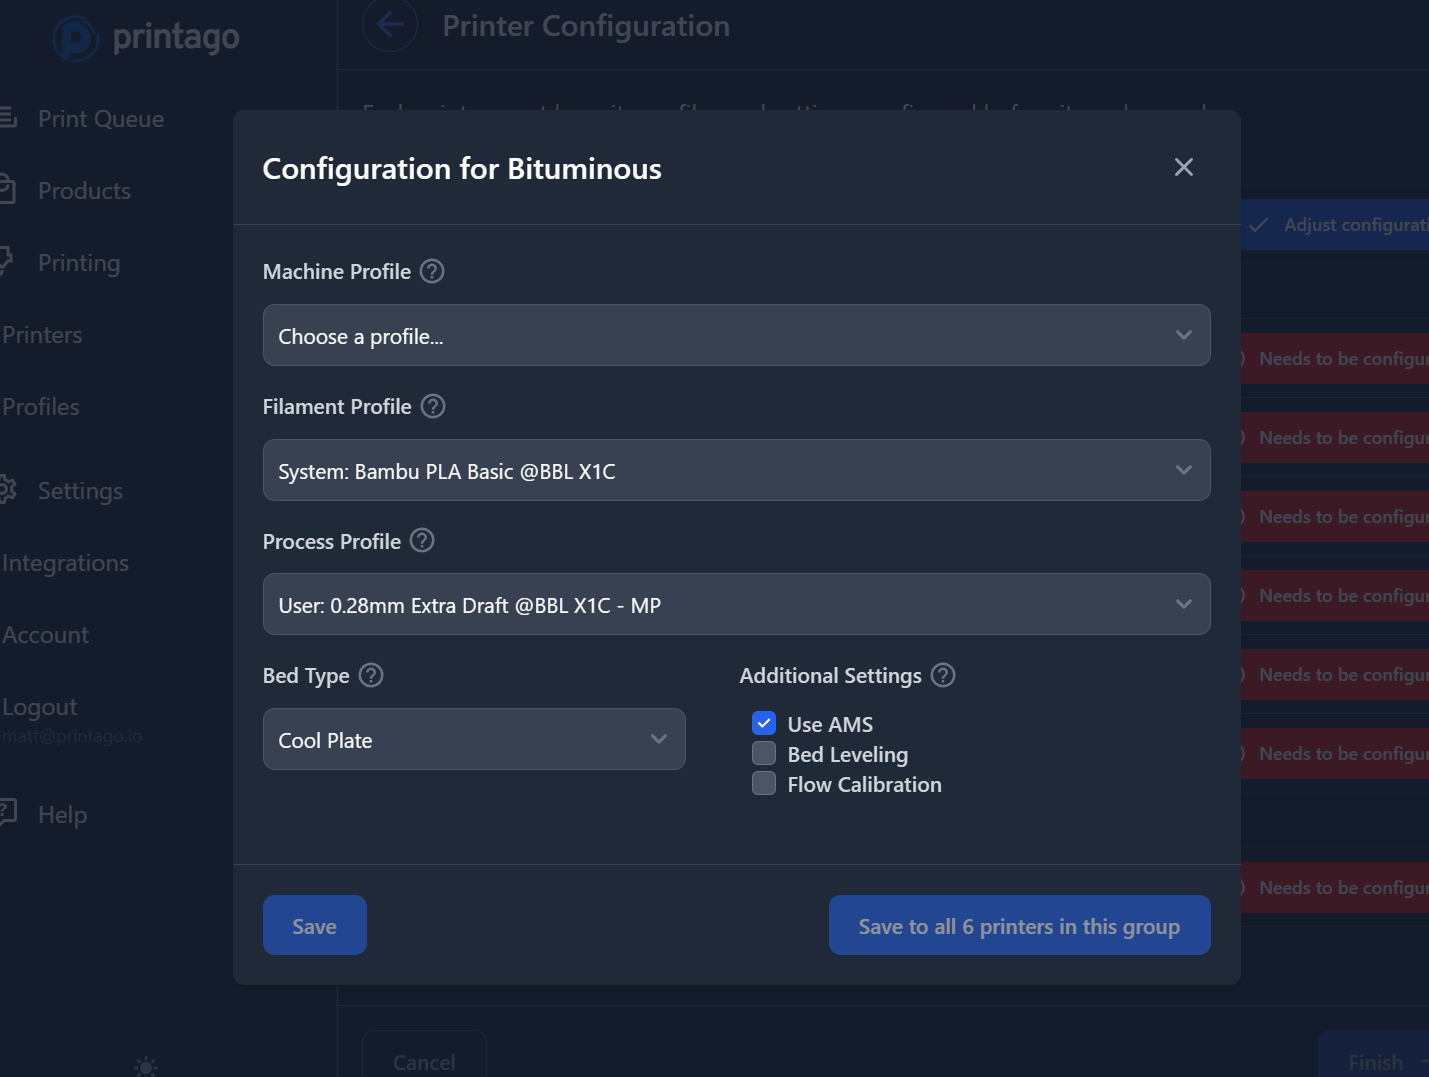
Configuring Printer Defaults
-
On the final screen of the Bambu Wizard, printers slicing configuration must be set. Familiar dropdown boxes will allow you to set a profile for
Printer,Filament, andProcess.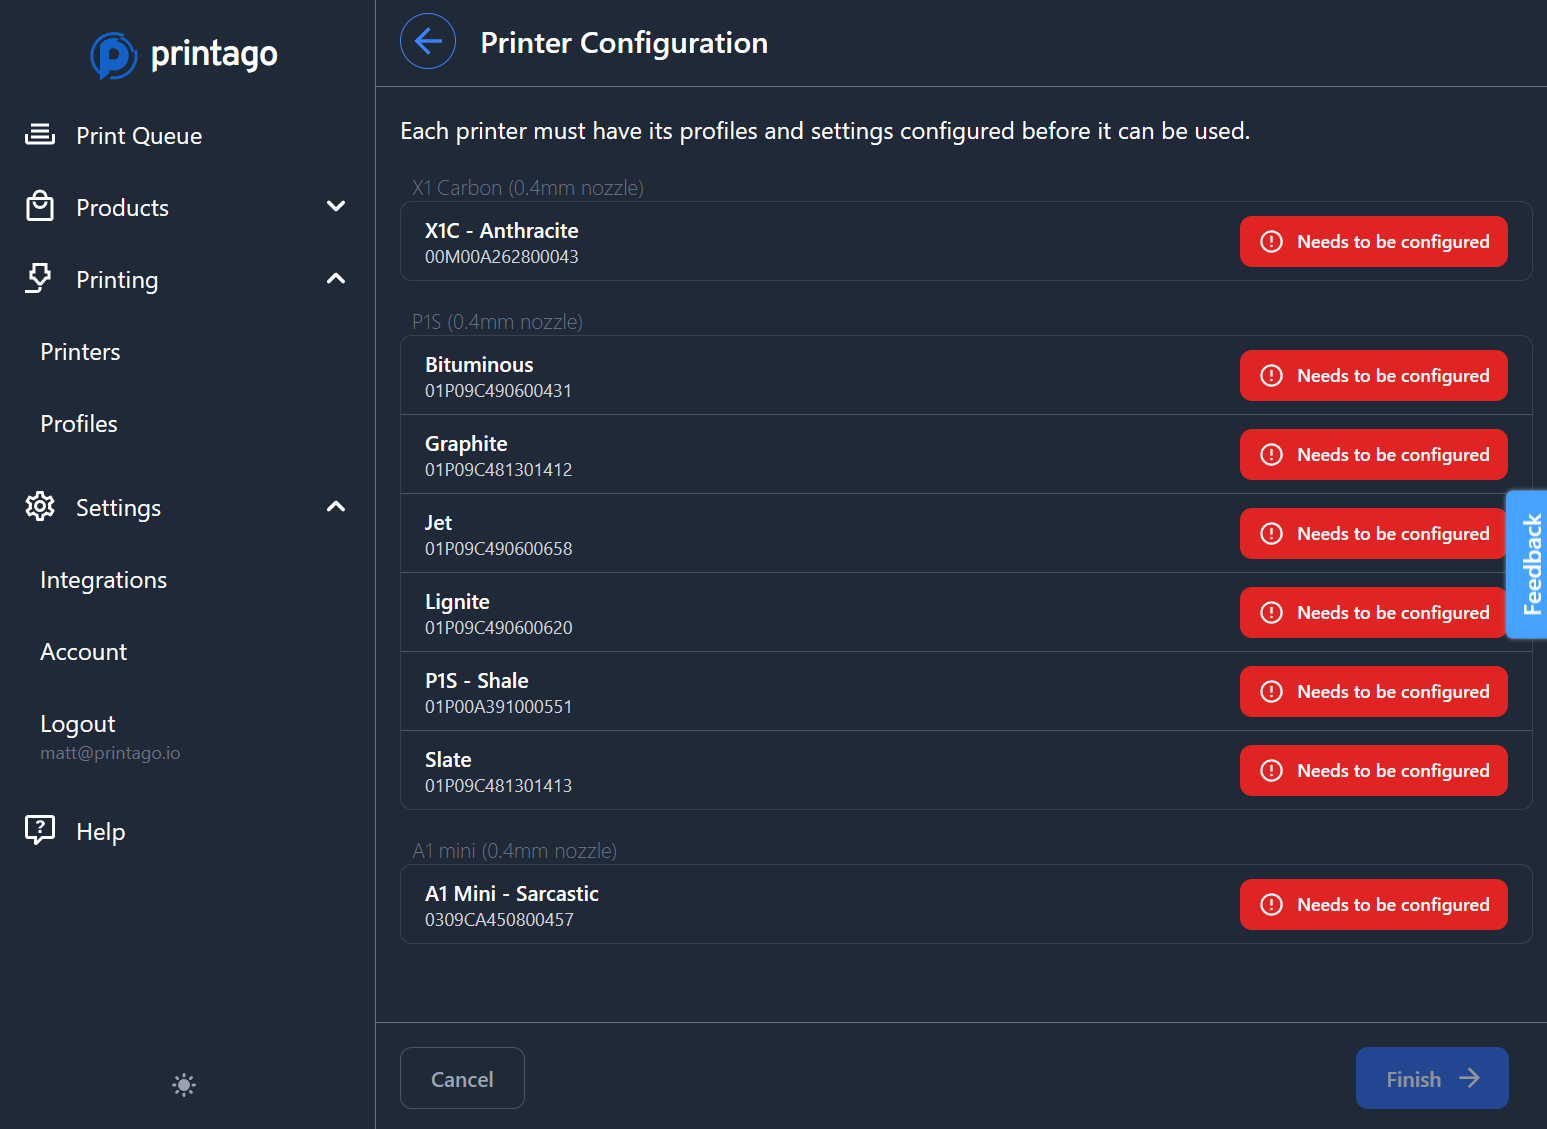
Printago uses these settings for slicing and material matching.
All printago parts are sliced on-demand as needed based on your printer and part configurations.
Use the Save to all X printers in this group option to quickly configure multiple identical printers of the same type at once.
Creating Your First Print
Start with an STL file to understand Printago's slicing and printing workflow.
Printago supports STL, STEP, 3MF, and OpenSCAD part types.
.gcode and .gcode.3mf are not supported.
-
Go to Products → Parts, and click
Add Part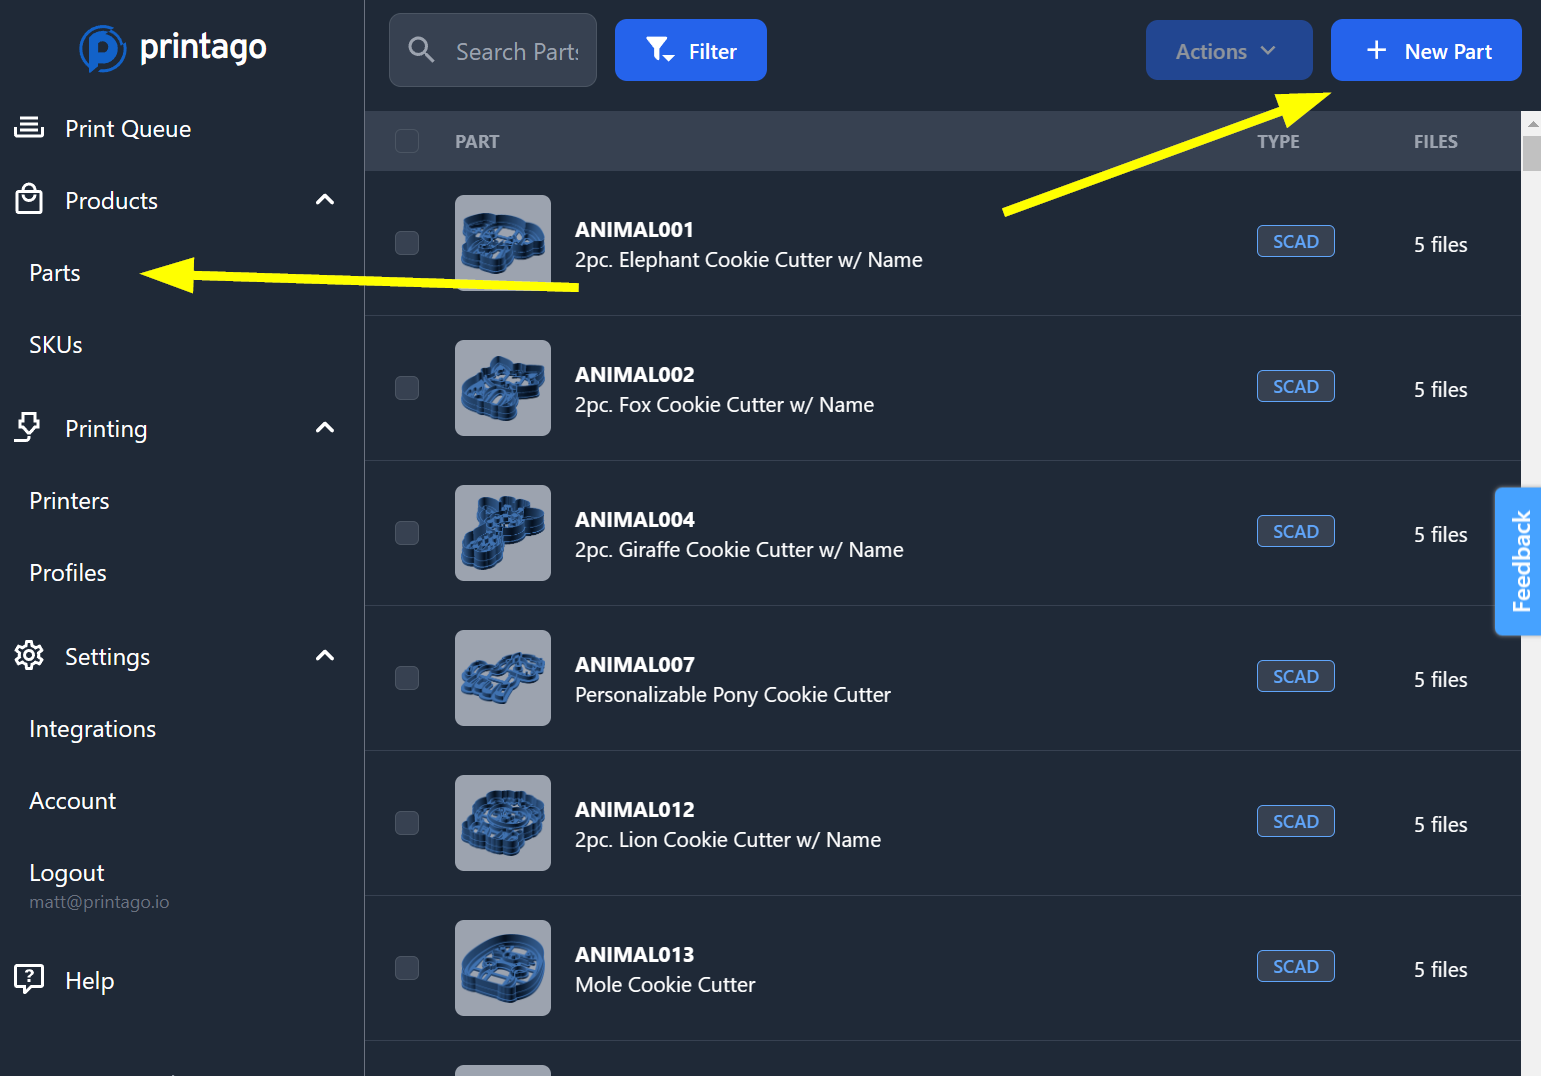
-
Upload your file and give it a name and description.
Optionally you can set:
Filament Typeto restrict the part to only printing on printers with certain materials (e.g. PLA, ABS)Process Profileto override any printer's process slicer setting
-
Click
Createand our part will be saved and ready for printing!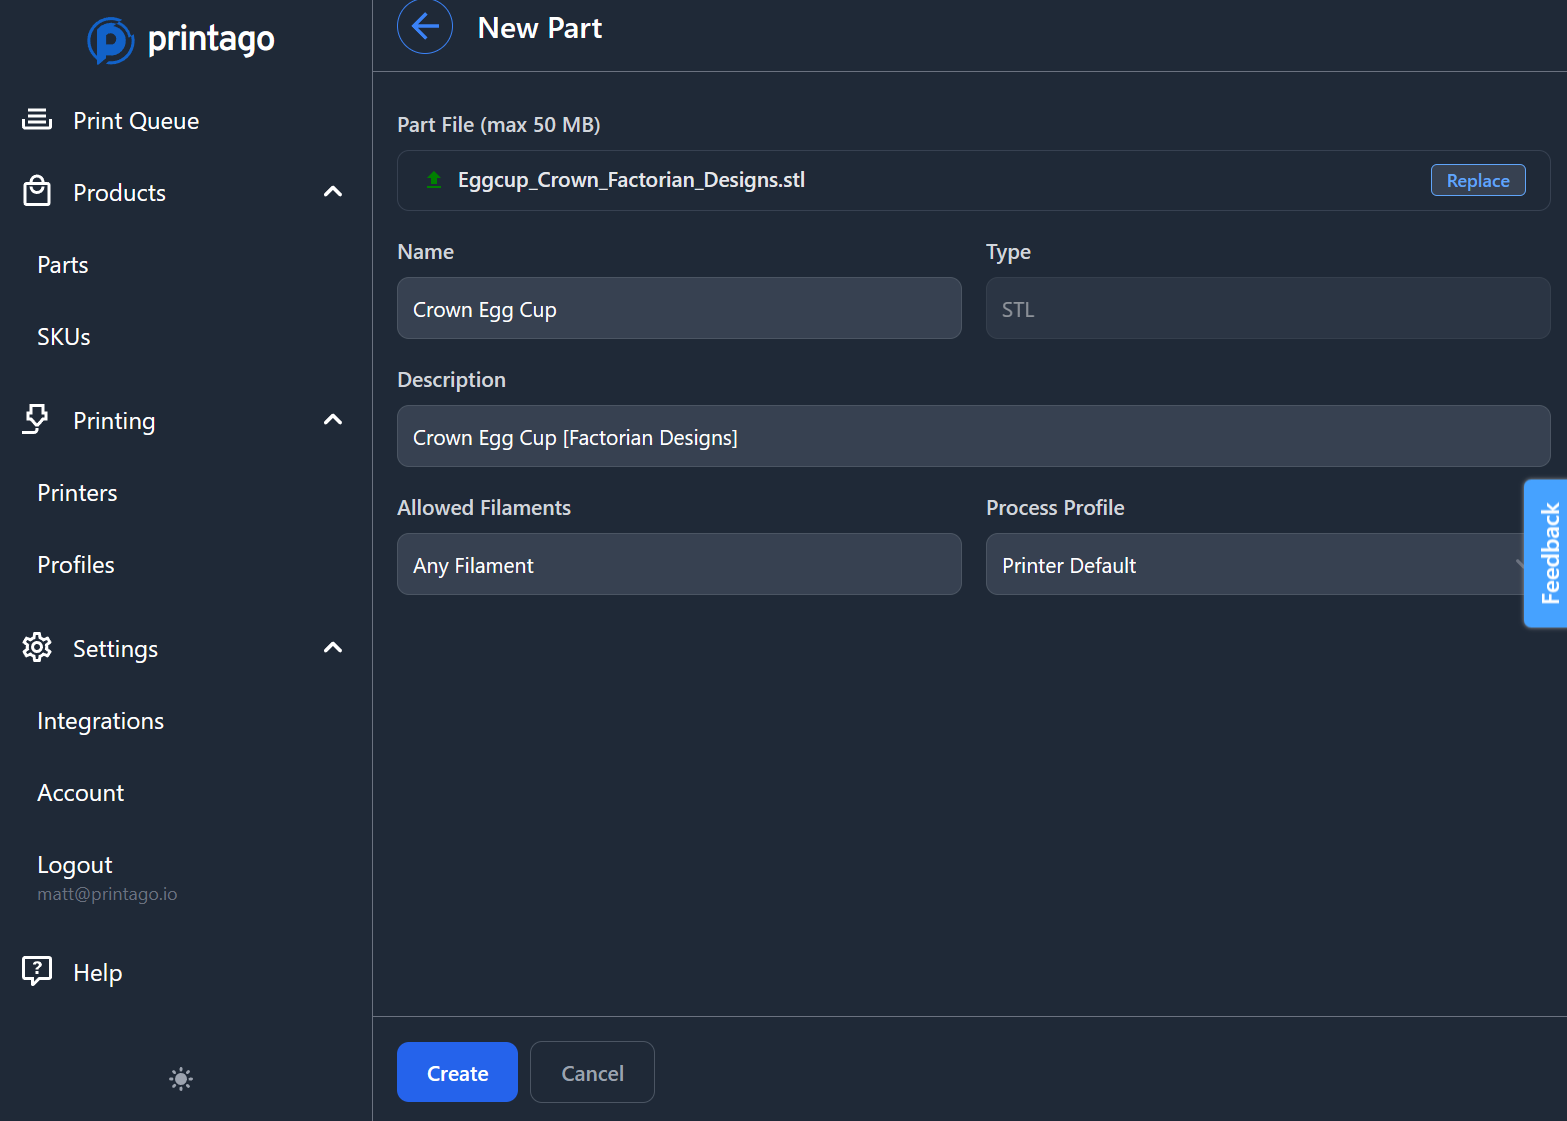
Starting Prints
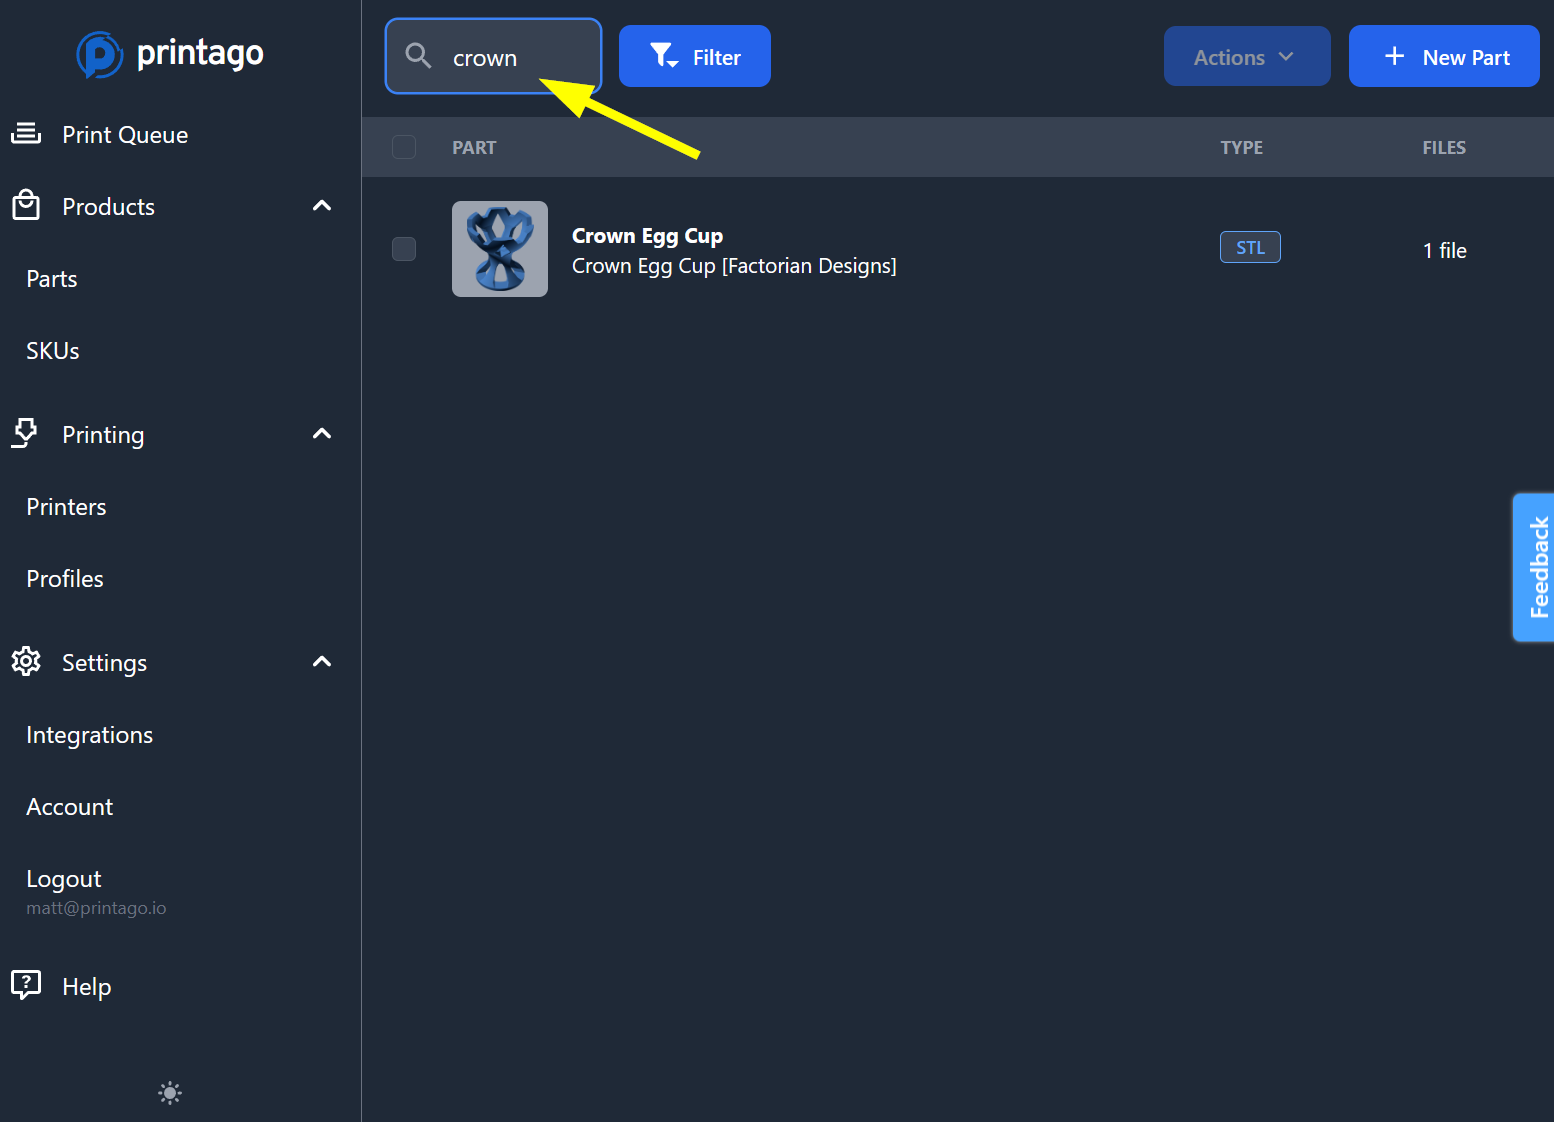
-
After saving your part, you'll be brought back to the parts list. Find your part, and click it.
-
From this screen you can edit the part or print it. Click
Printbutton in the upper right.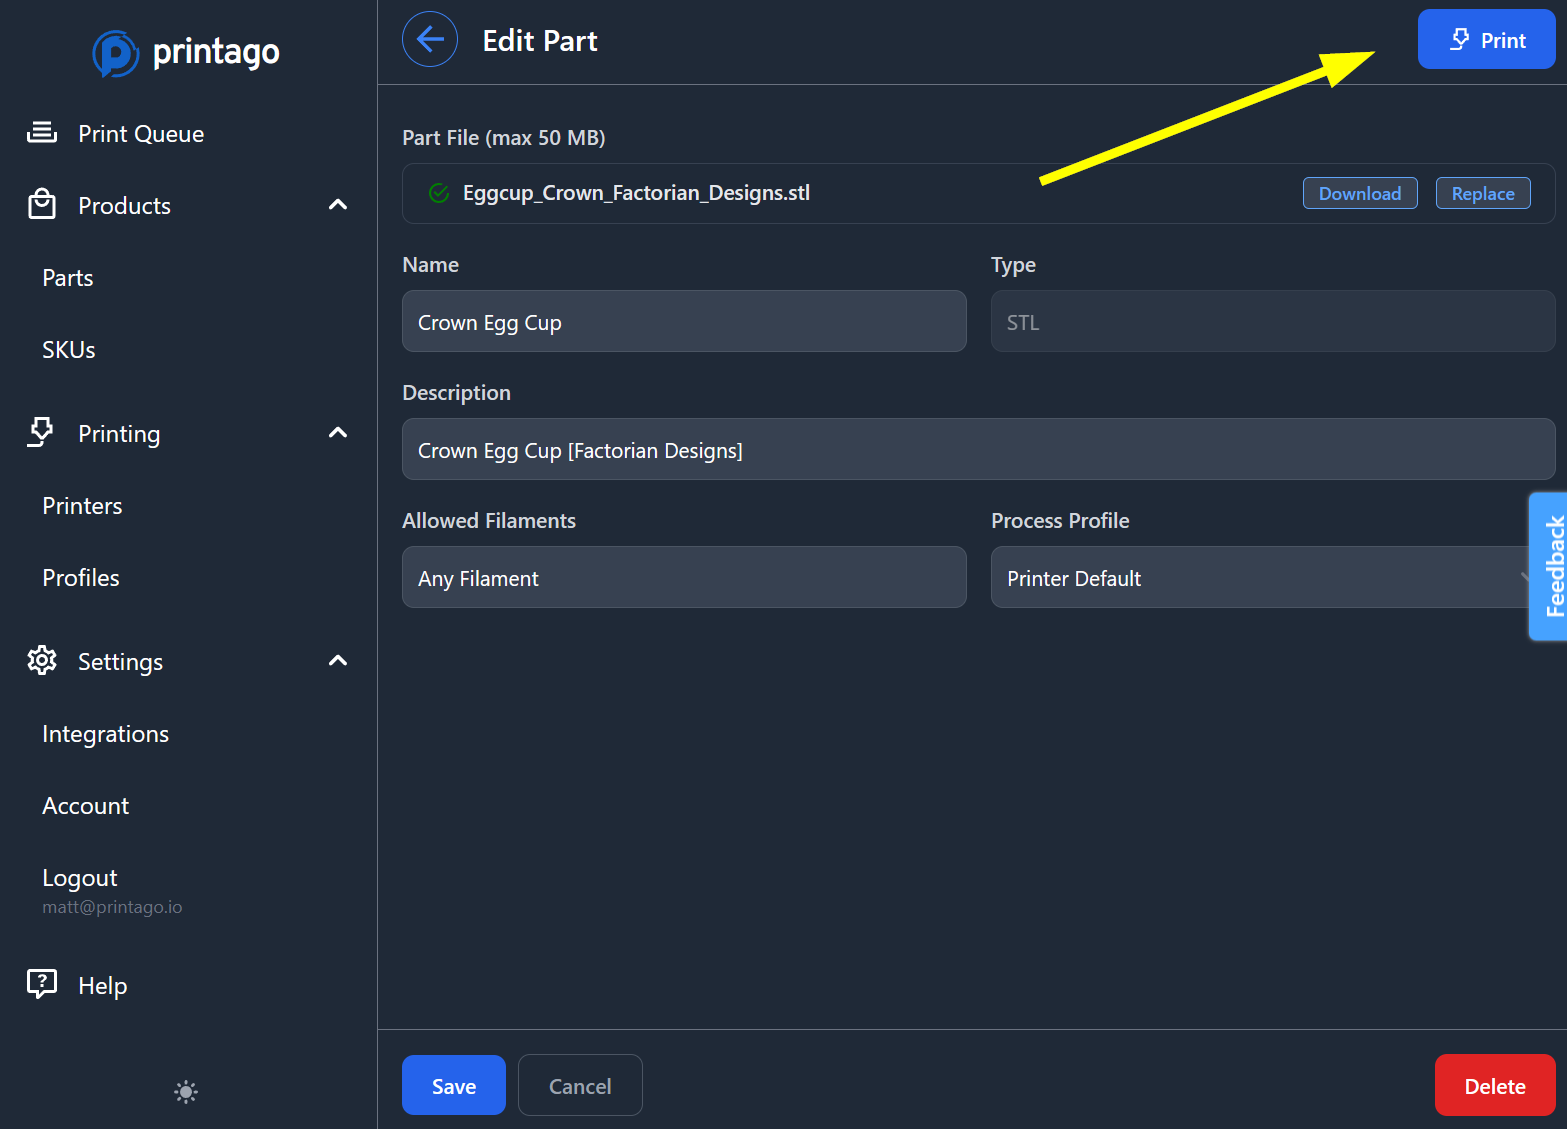
-
Select Next Available Printer to automatically match your part with compatible printers, or choose a specific printer manually.
Printer with Specific Tags allows you to print to a dynamically defined group of printers.
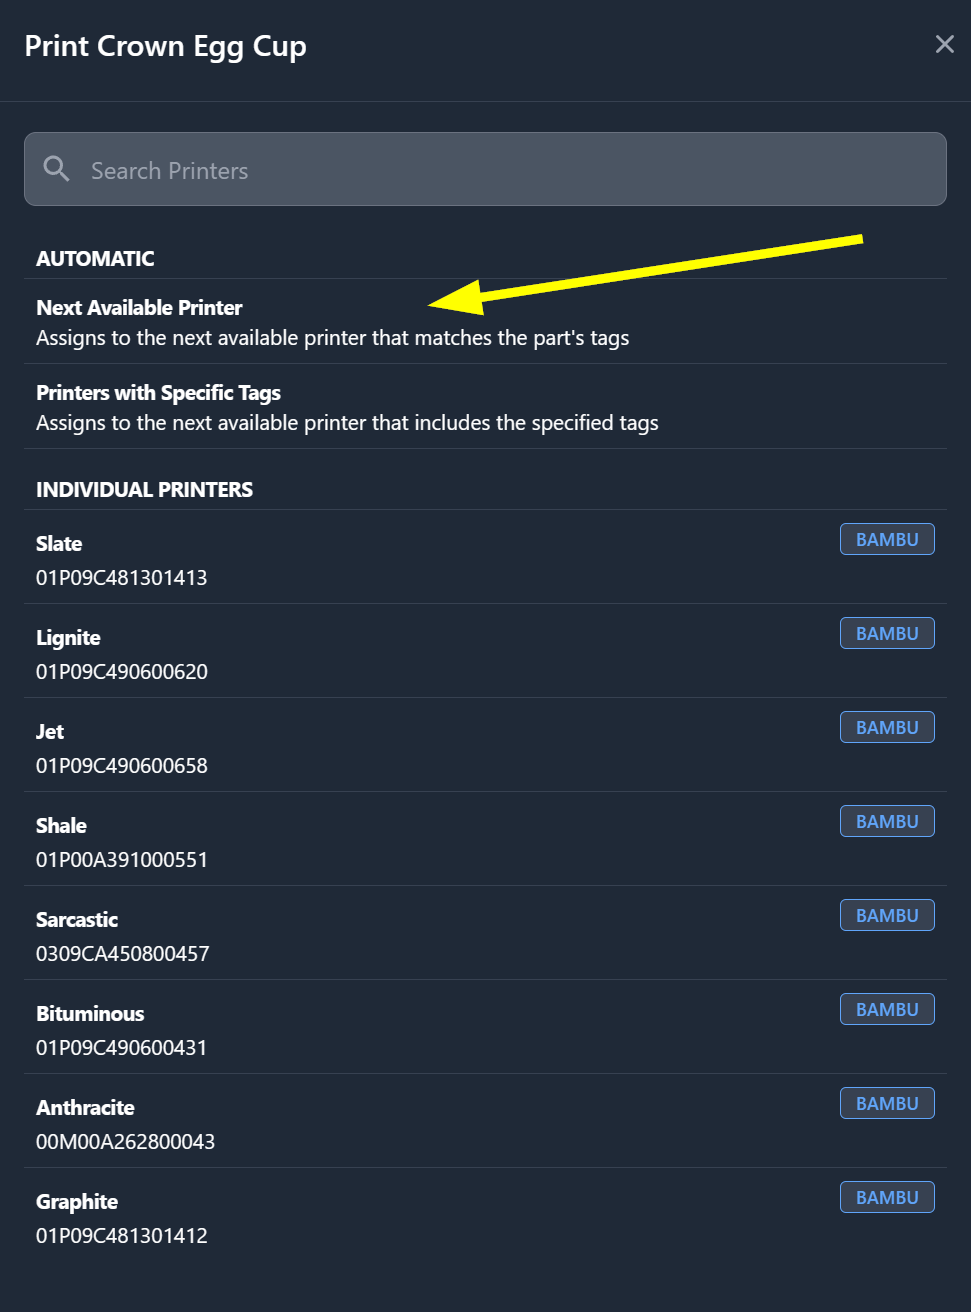 Printer Matching
Printago automatically matches parts to compatible printers based on requirements like material type, nozzle size, and user-defined tags.
-
Here you can adjust the quantity, but for now just click
Print!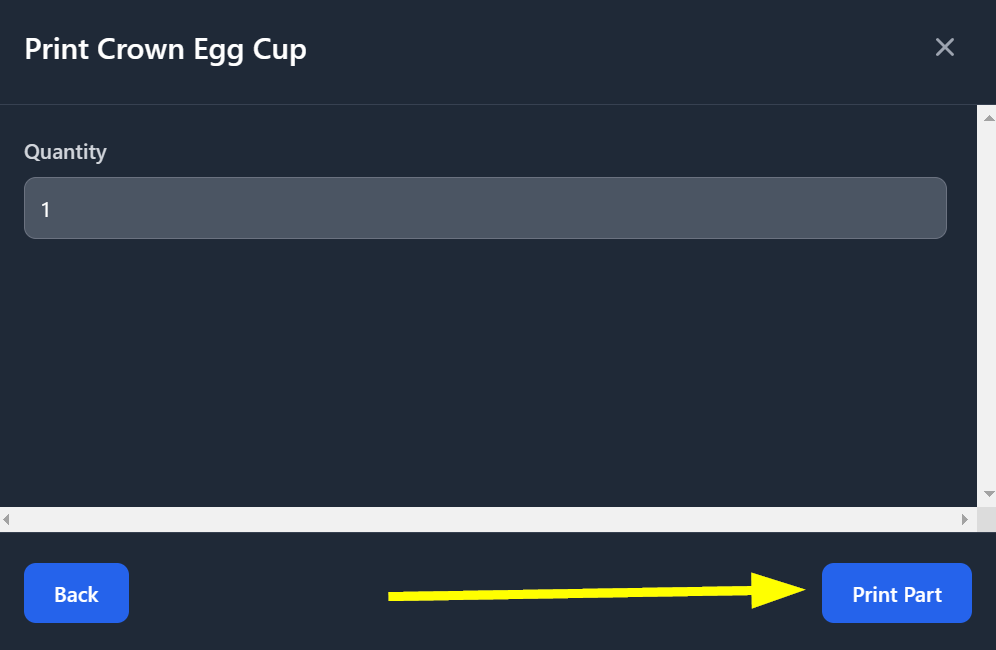
-
You'll be shown a confirmation screen of the print. Head over to the
Print Queueto check out the jobs.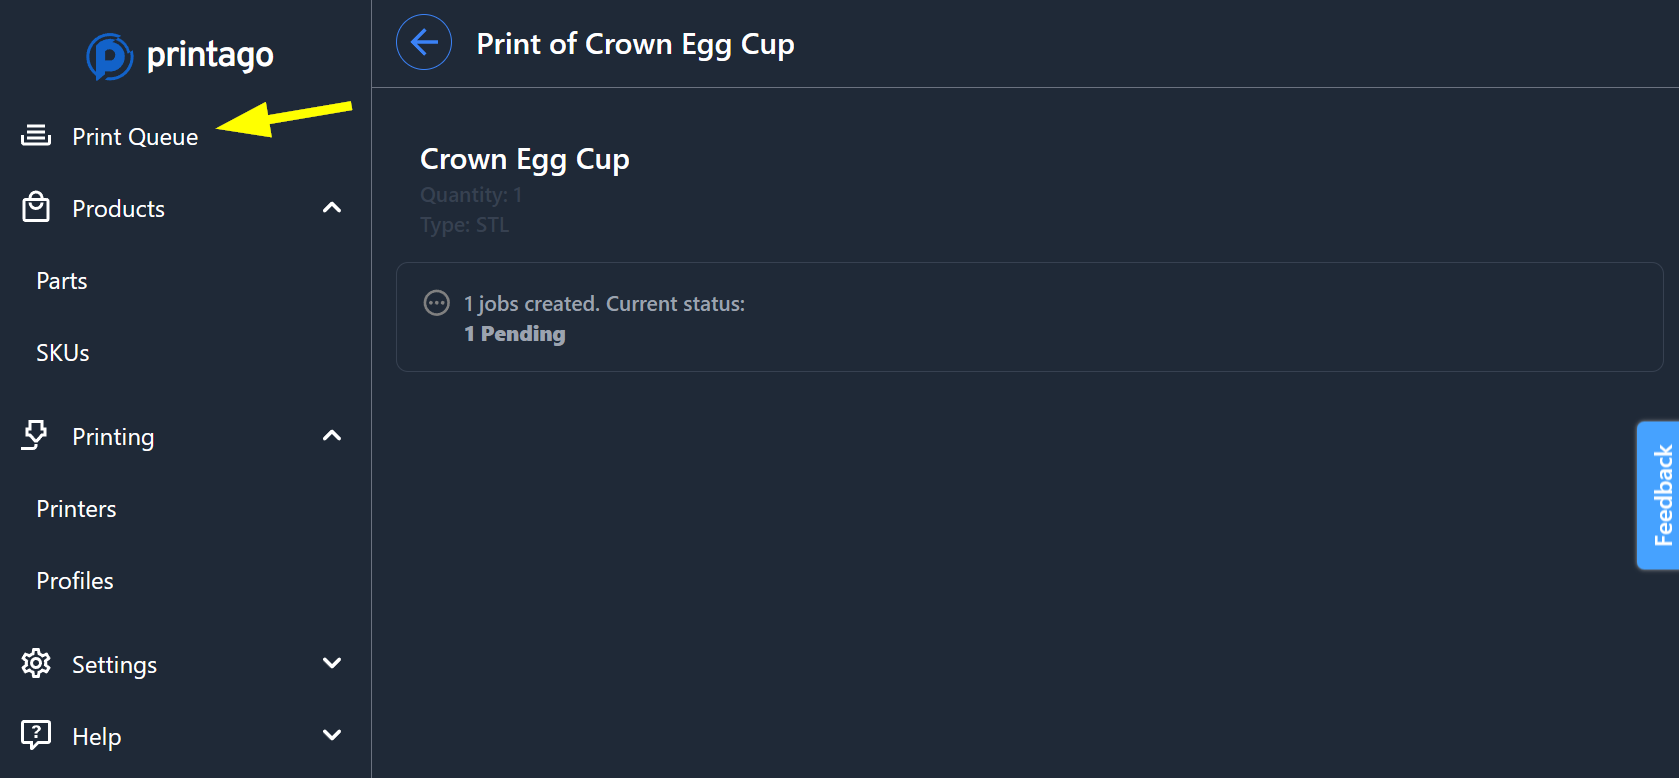
-
We can see that our item is queued up successfully, however, it didn't move to
In Progress. Printago does not take exclusive control of your printers, and you must let us know when the bed is clear and each printer is ready for a print. Click onPrintersnext.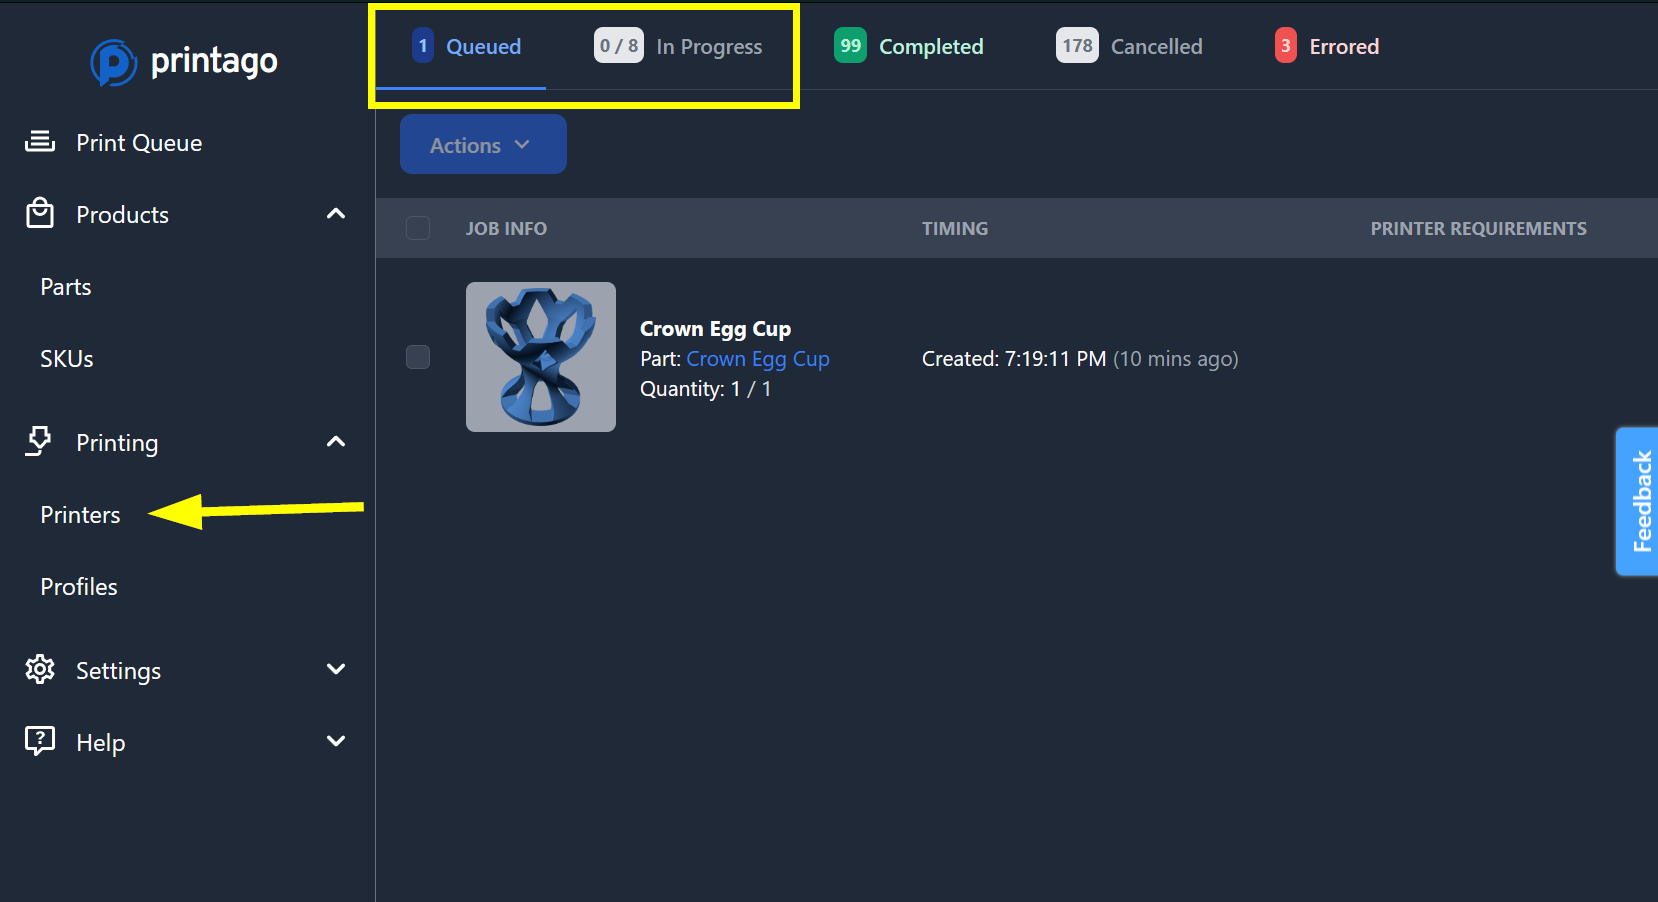
-
When first connected, all your printers will be
Awaiting clear & ready state.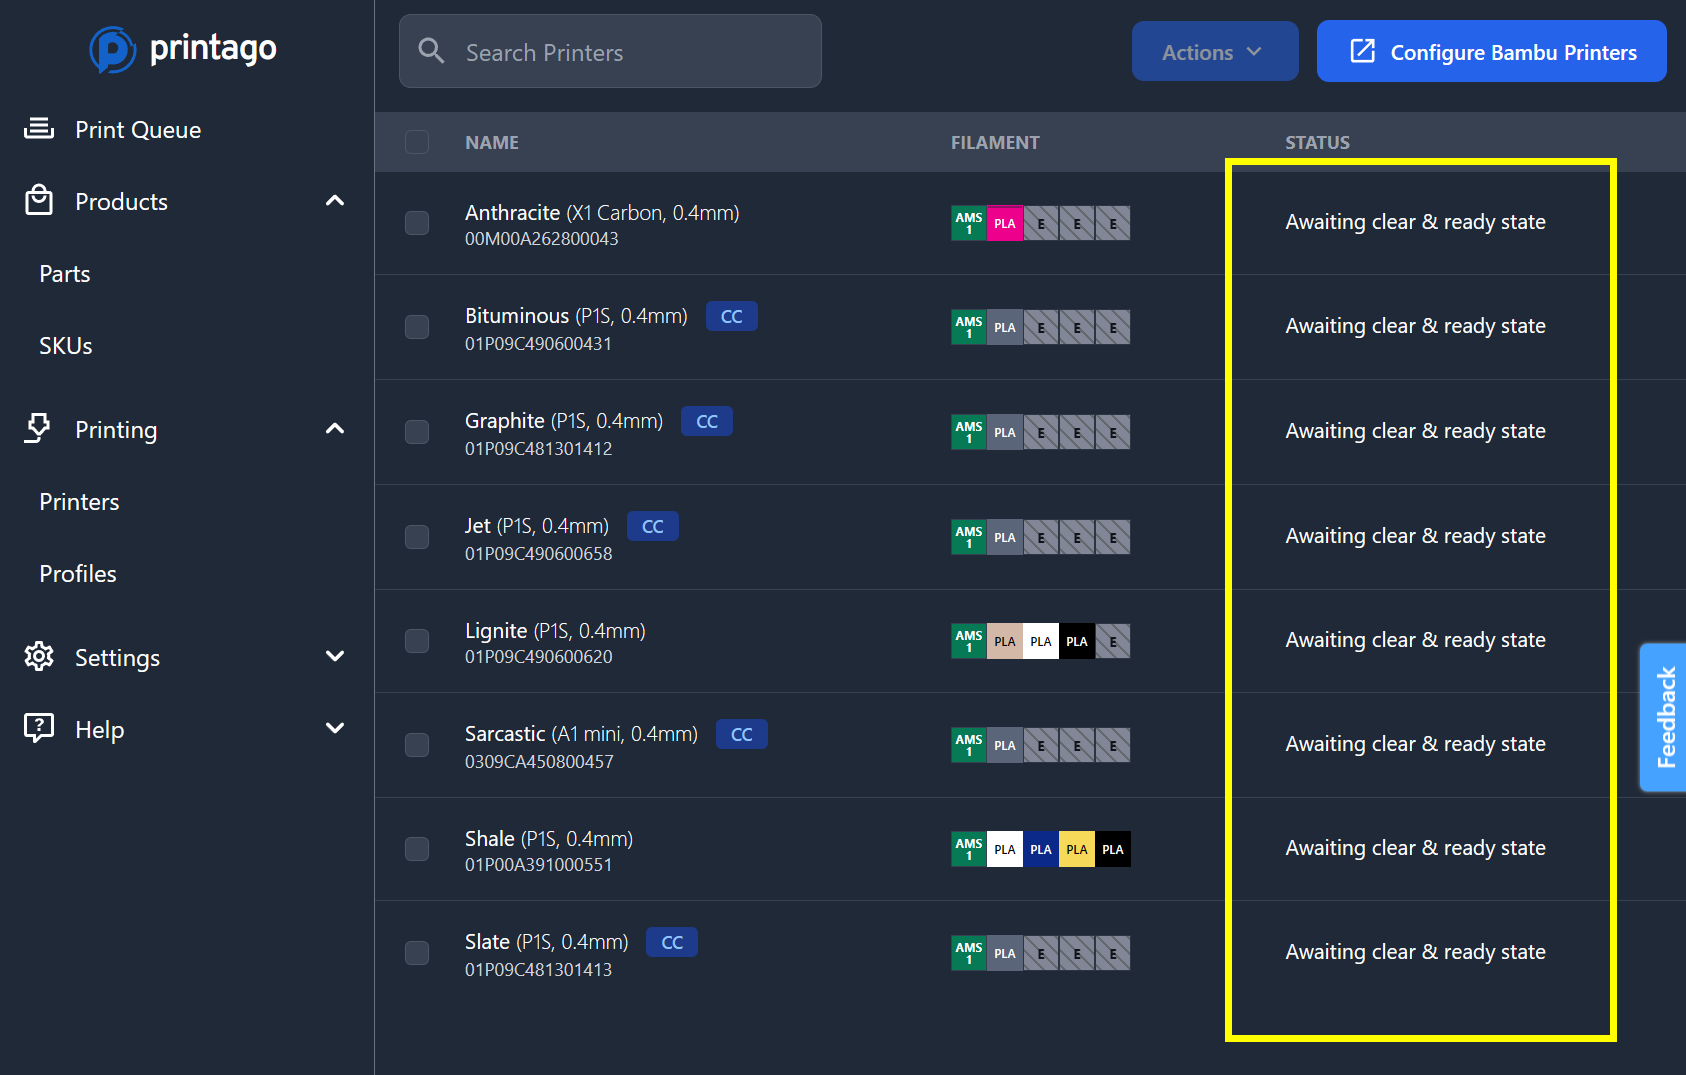
-
Click on a printer that you'd like to send your first job to, and then find and click the
Confirm clear & readybutton in the upper right corner.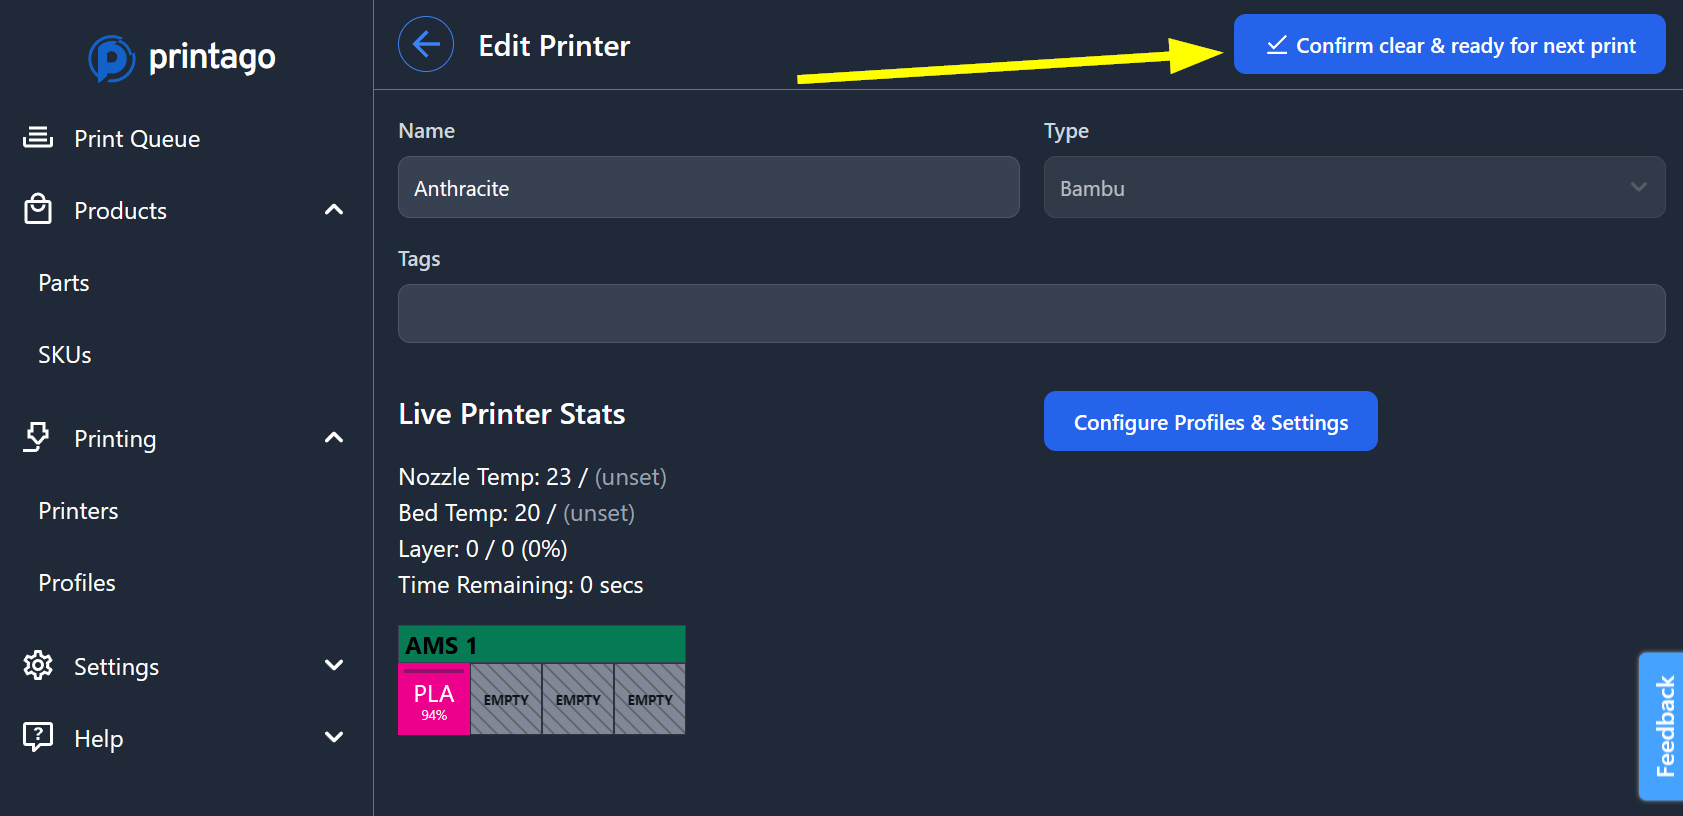 Clear & Ready State
Printers must be marked "Clear & Ready" before they'll accept new jobs. This lets Printago know it can send a print.
-
Head back to the printers page, and using the checkboxes select other printers you'd like to mark as ready. Click the multi-action dropdown (
XX Printers Selected) ->Availability->Clear & Ready.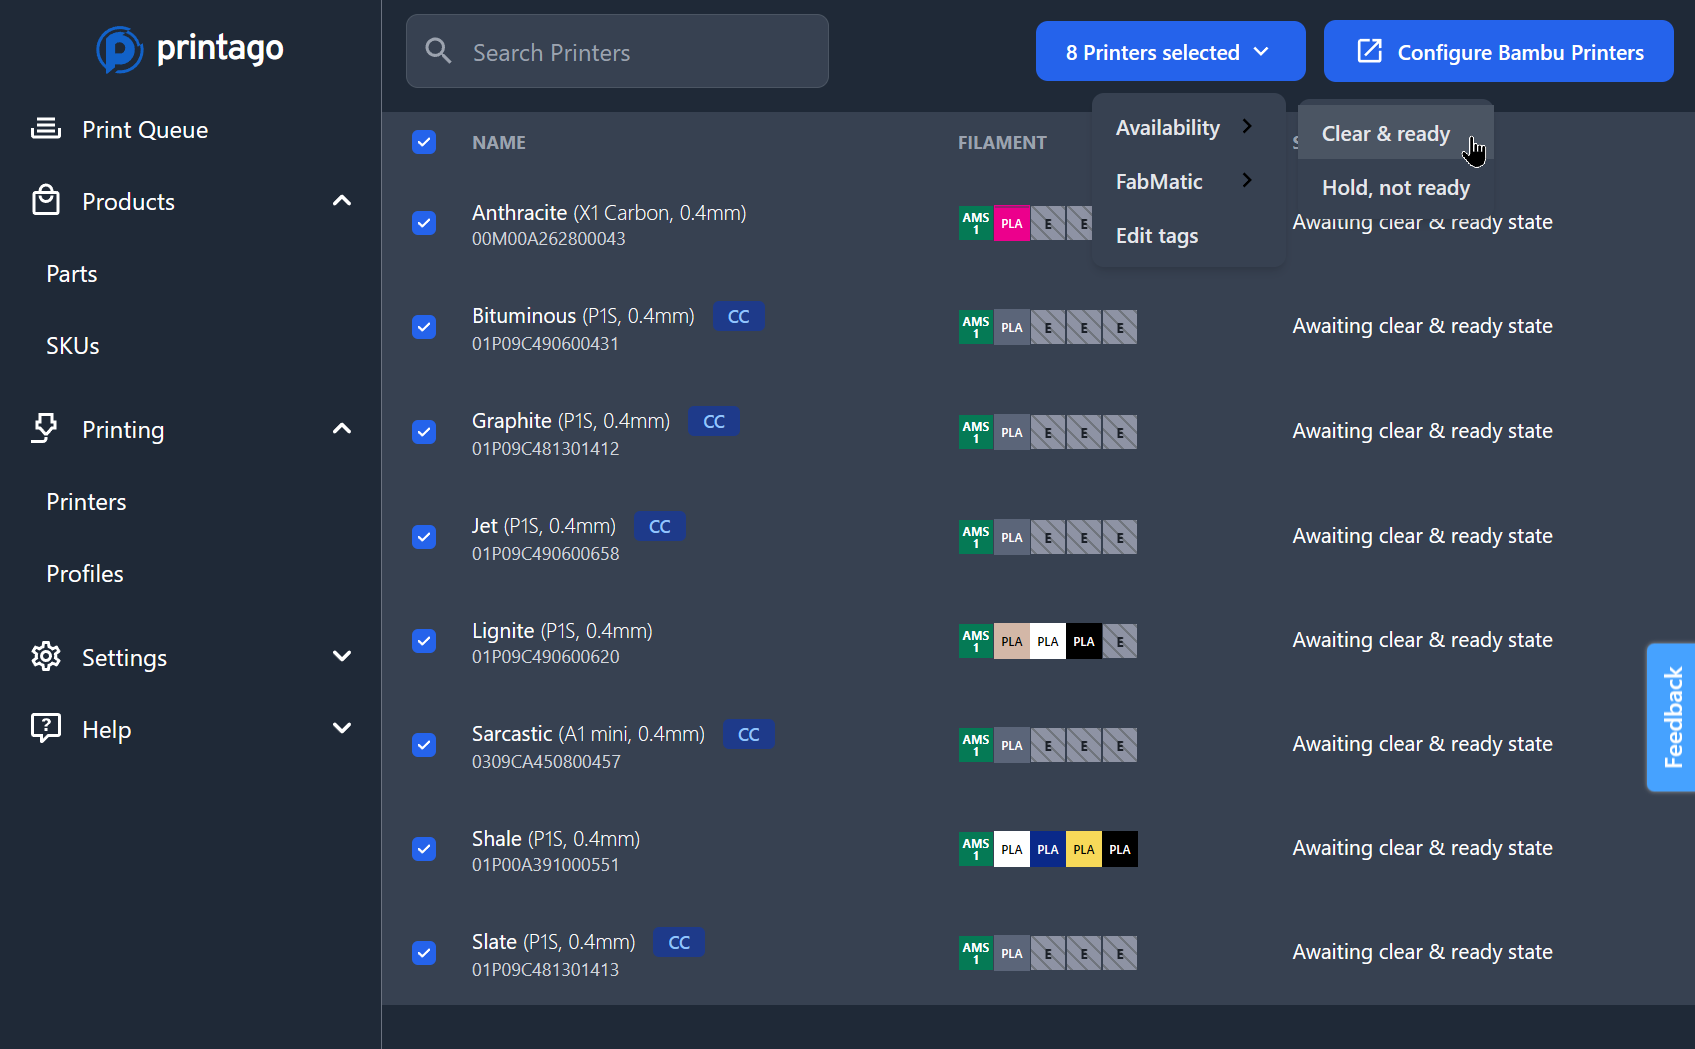
-
To let Printago know a jobs can be sent, click the confirmation button and parts will start assigning to your printers instantly! Head back to the
Print Queuenext.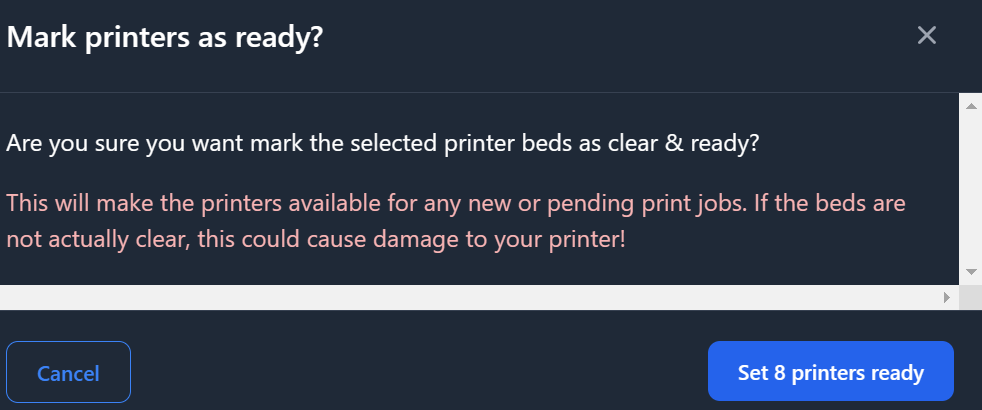 info
infoYou can safely use "Select All" when clearing print beds - any printer that's currently printing will ignore the "Clear and Ready" command.
Queue Management
-
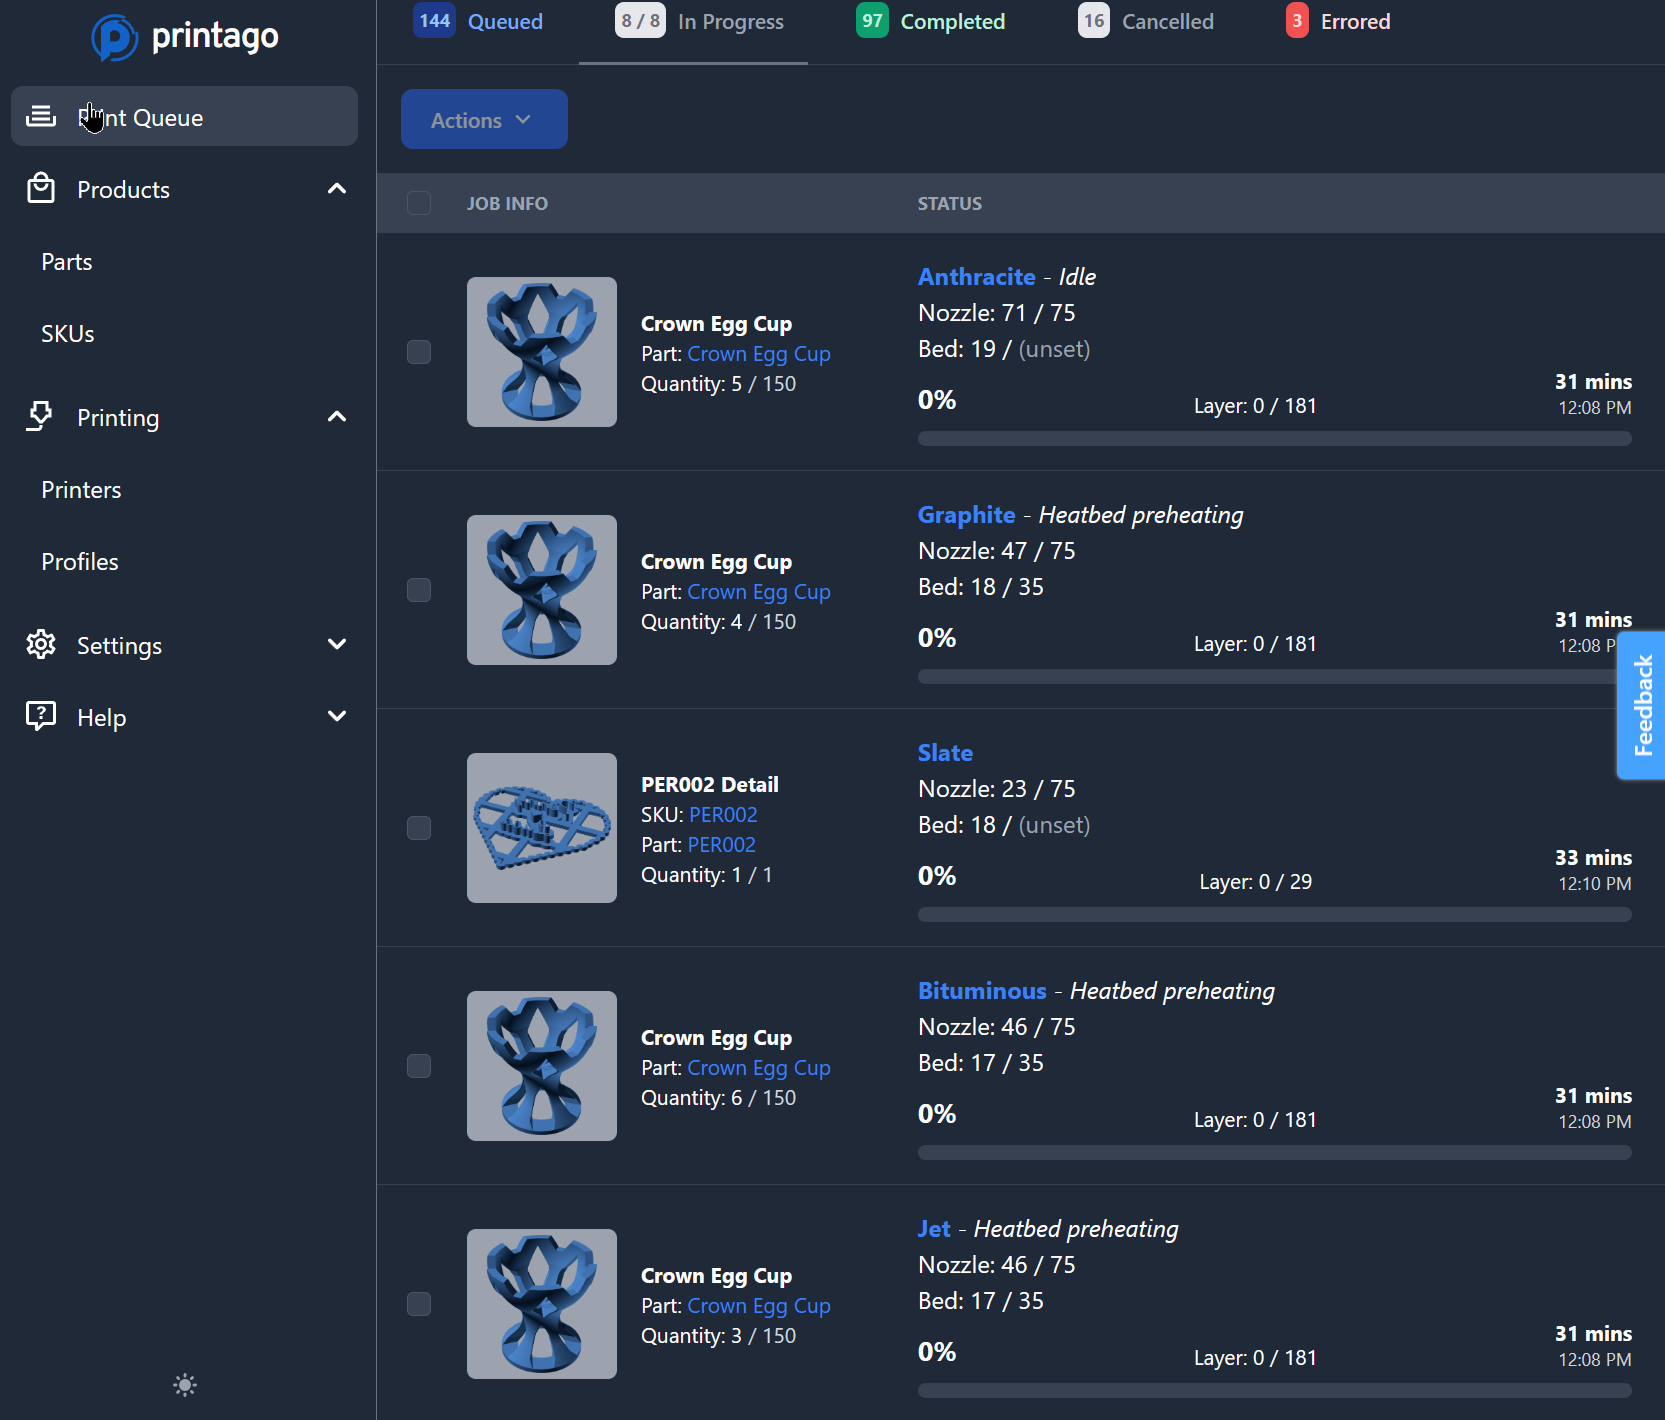
Printago automatically slices files and initiates printing on selected printers.
-
From the
In Progresstab, we can select jobs using the checkboxes. The multi-action button allows you toPause,Resume, andCancelselected jobs.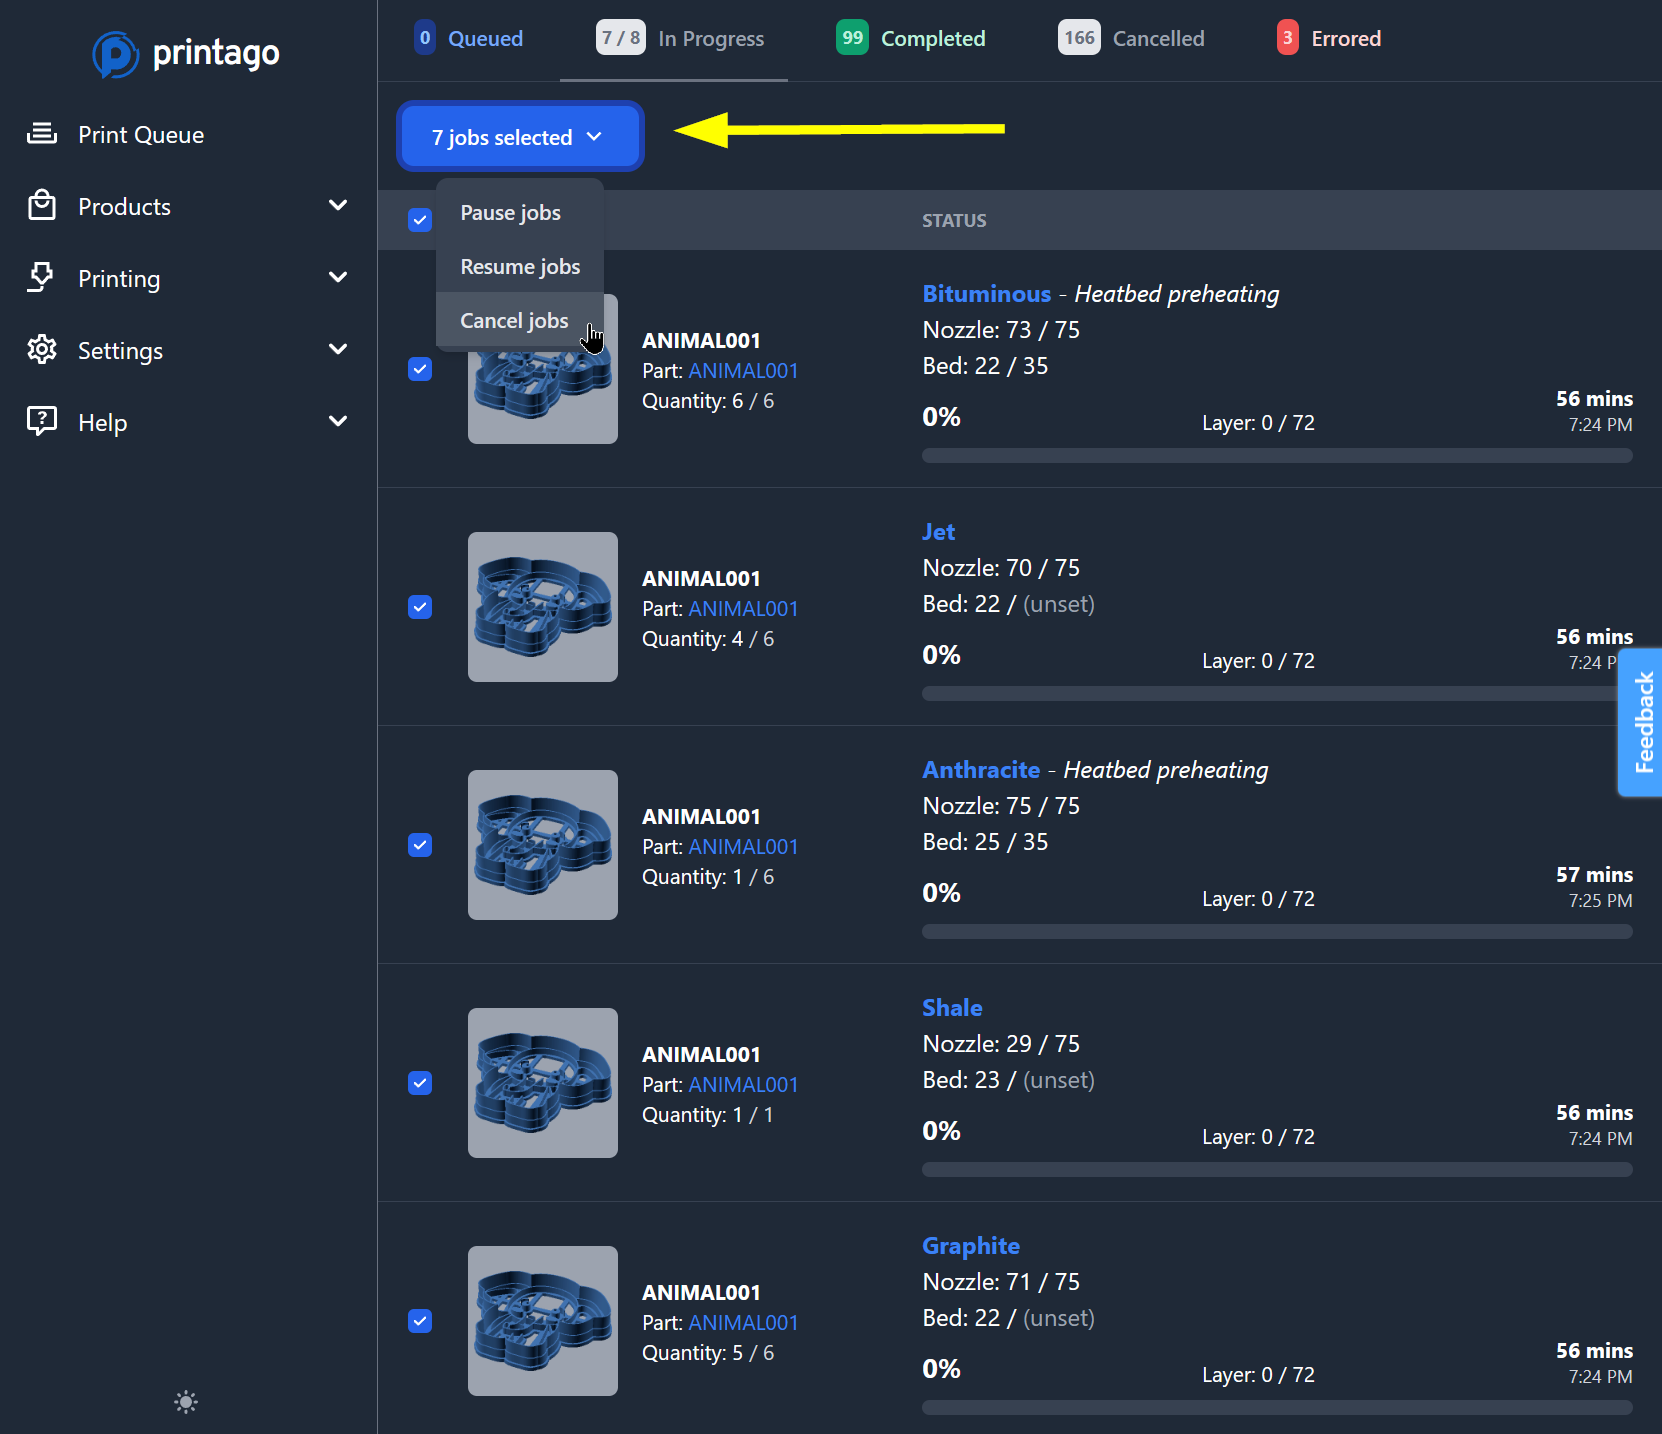
-
On the Queued screen, drag jobs to adjust their priority order. Select multiple jobs to cancel them using the multi-action button. Jobs marked as Cancelled or Errored can be moved back into the queue using the
Retryaction.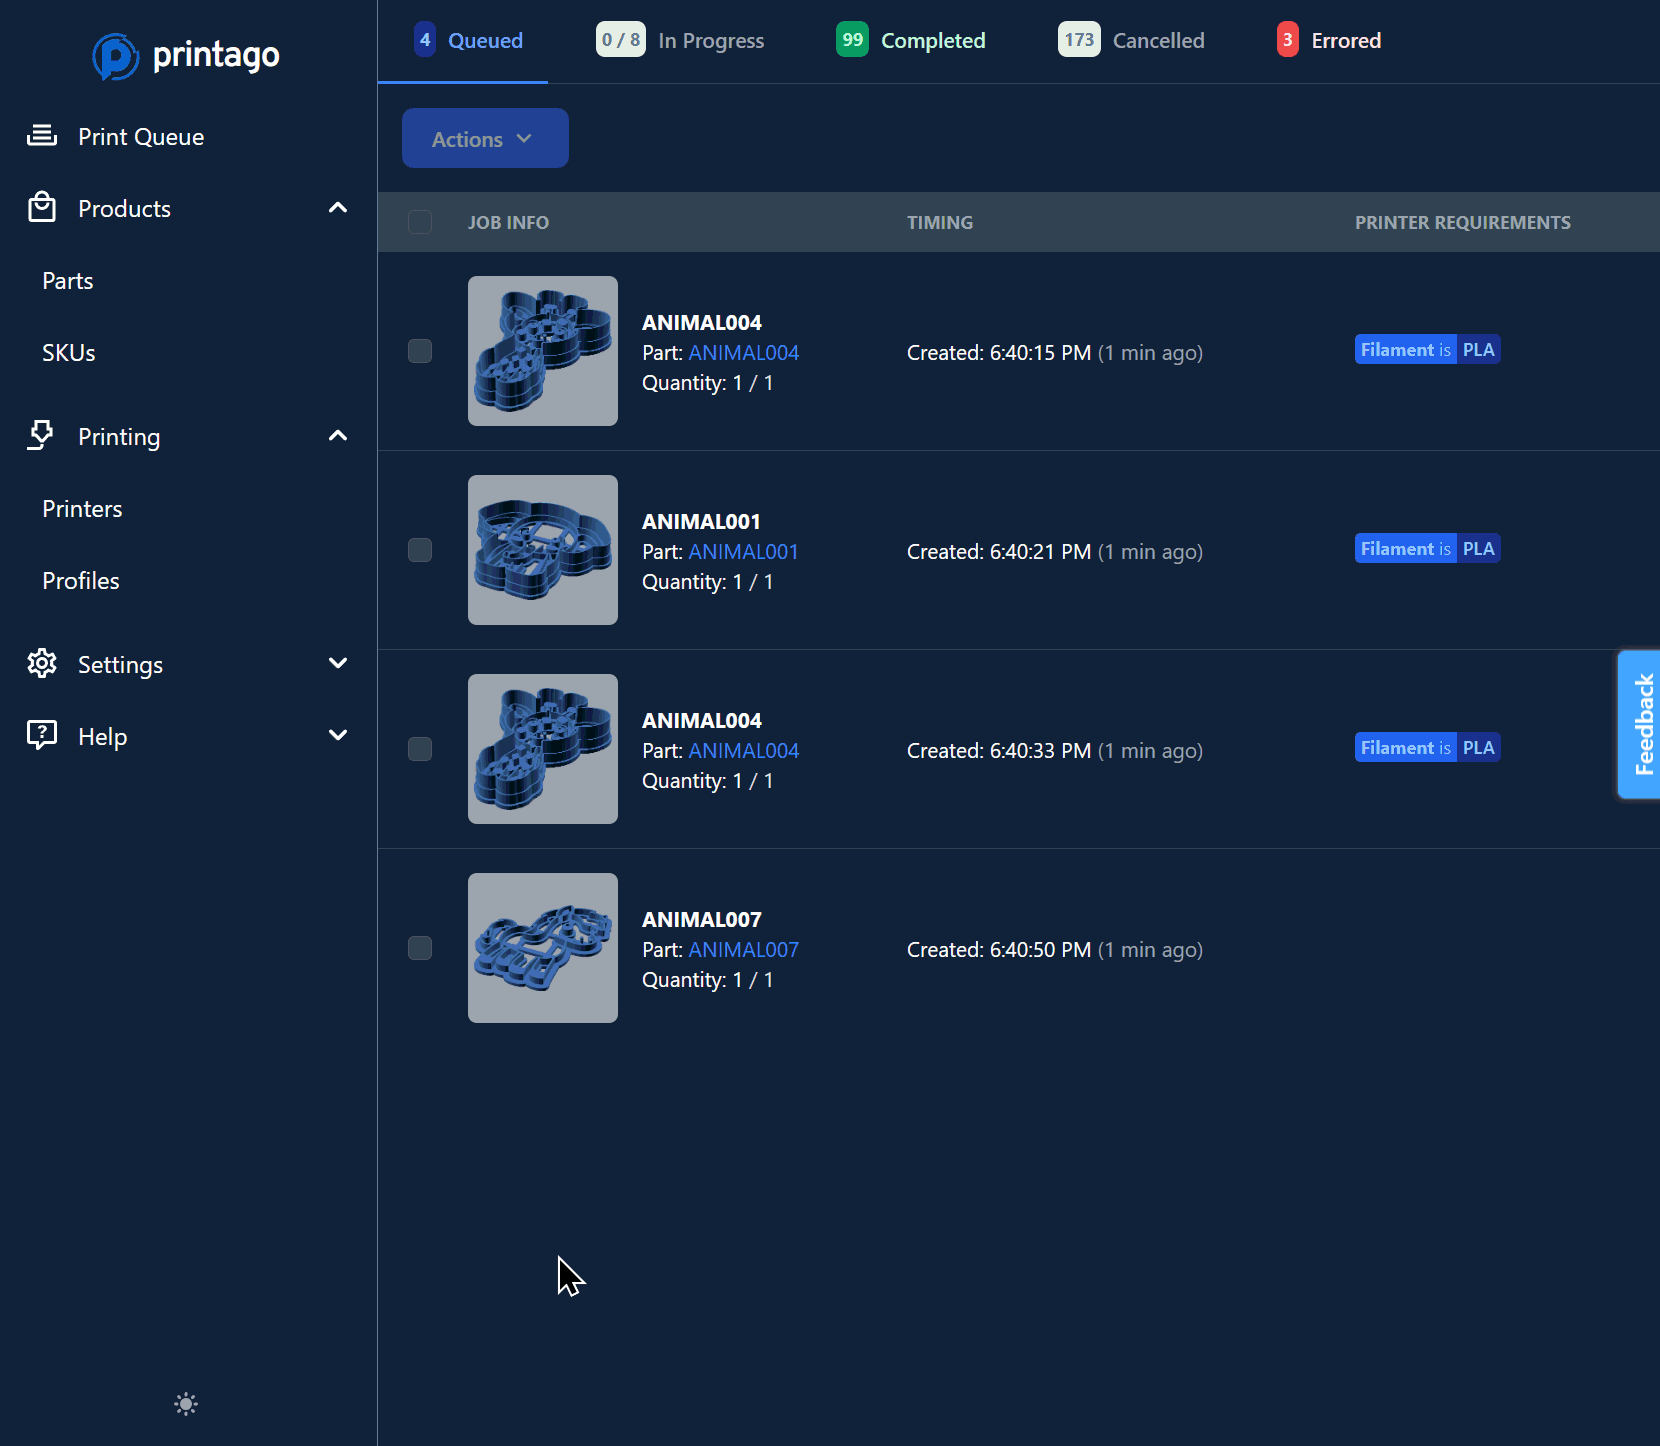 Queue Processing
The Printago Queue processes jobs top-to-bottom order.
Remember when print jobs finish, to mark the printer as Clear and Ready!
Thank You and Happy Printing!
Join our Discord community for latest info and help!