Slicing and Preview
Slicing turns a plate into the G-code a printer runs. In Printago Studio you see the result before anything prints: how long it takes, how much filament each color uses, and every layer of toolpaths.
Slicing a plate
Click Slice plate 1 in the top bar (the number follows the active plate), or press Ctrl+R (⌘R on a Mac). While it slices, the button and the plate's card show how far along it is, and Preview shows the step the engine is on and how long it has taken. When it's done, Studio switches to Preview.
On a project with more than one plate, All slices every plate that hasn't been sliced or has changed.
The slicing engine and its version are shown in the top bar.
Up to date or changed
A plate stays sliced until you change something that affects it. Then:
- its card in the plate strip says Changed,
- the Preview panel says Changed since slicing, with a Slice again button,
- the dot on the Preview tab turns amber.
When the slice matches the plate, the panel says how long it took (Sliced in 12 s) and the dot is green. A file you opened already sliced says Up to date.
When a plate doesn't slice
Studio won't start if the plate is empty or fails a plate check, such as an object hanging off the plate. It tells you which object.
If the engine can't slice the plate, the plate shows Failed and the Preview panel explains why. Common reasons:
- The prime tower overlaps an object. Click Arrange in the message, or move the tower.
- The engine couldn't slice this plate. The message and the Engine log say what went wrong, for example a setting outside the printer's limits.
Reading the preview
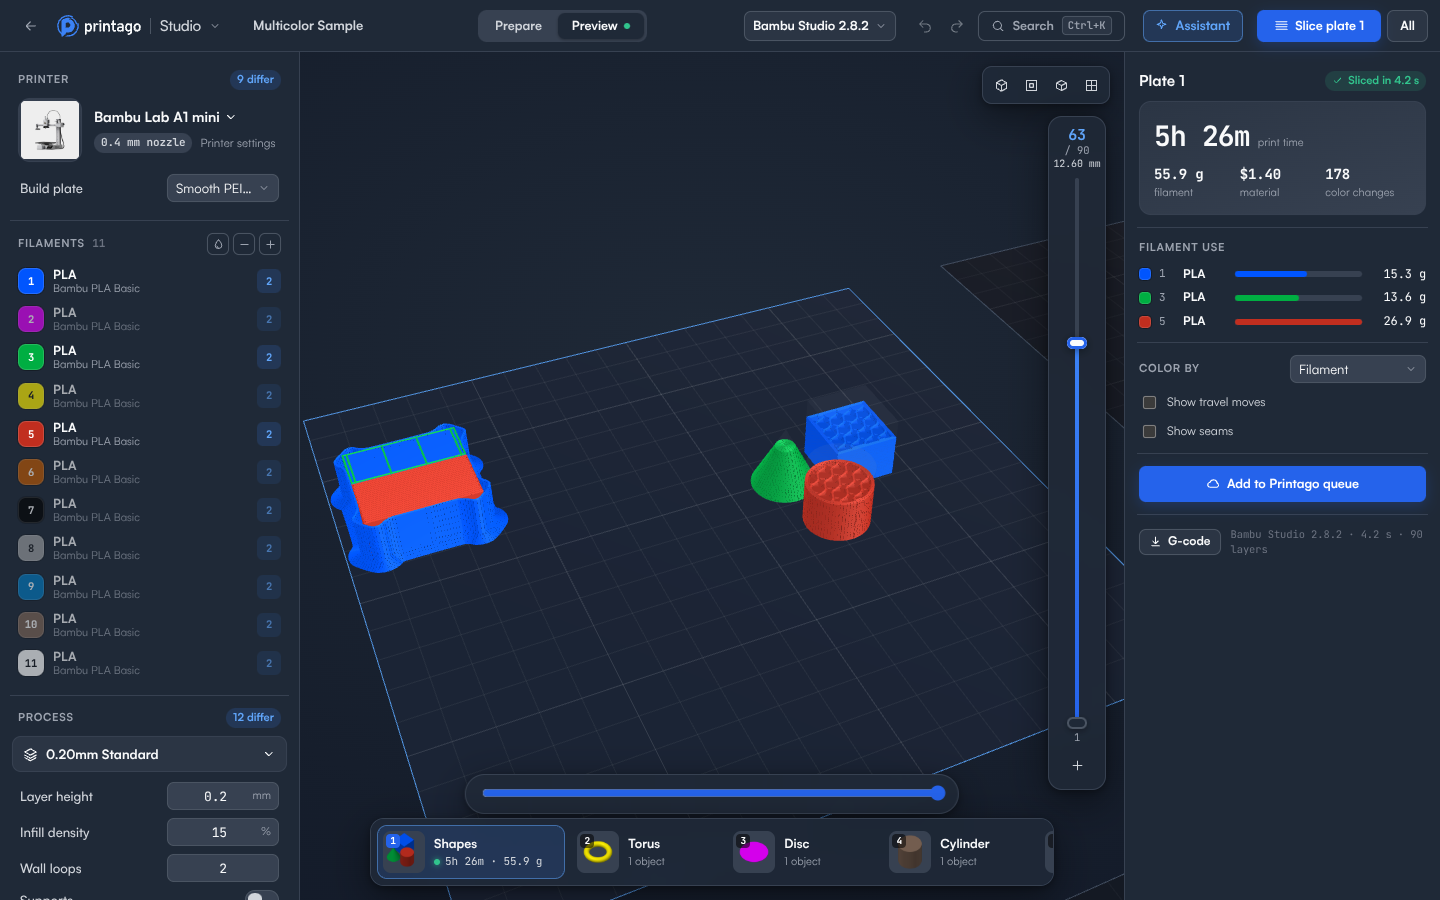
The right panel shows the plate's numbers:
- Print time, as the slicing engine estimates it.
- Filament in grams, for the whole plate.
- Material cost, from the cost per kilogram in each filament profile.
- Color changes, for multicolor plates.
- Filament use, per slot, in grams.
Layer by layer
The slider on the right of the 3D view shows the top layer you're looking at, with its number and height.
- Drag the top handle to step down through the layers. Drag the bottom handle to hide the layers below.
- In Preview, ↑ and ↓ move one layer. Hold Shift to move 5.
- Press L to see only the top layer, and L again to see them all.
The slider under the 3D view plays through the moves of the top layer, so you can follow the nozzle path. ← and → step through them too.
Colors and features
Color by switches between:
- Feature: each kind of line in its own color: outer wall, inner wall, sparse infill, top surface, supports, prime tower and so on. Each feature shows its share of the print time. Click a feature to hide or show it, for example to see the infill without the walls.
- Filament: each line in the color of its filament slot, to check a multicolor plate.
- Height: the layer height of each line, in mm.
- Width: the line width, in mm.
- Speed: how fast the nozzle moves along the line, in mm/s.
- Flow: how much plastic the nozzle pushes out per second, in mm³/s. Compare it with your filament's maximum volumetric speed to find where a print runs at its limit.
- Fan: the part cooling fan speed, in percent.
- Temperature: the nozzle temperature the G-code sets, in °C.
- Layer time: how long each layer takes, from its moves at their set speeds. Short layers on small parts show up here before they curl or sag.
For these, the legend is a bar from blue (lowest) to red (highest) with the lowest and highest values on the plate. Features you hid in Feature stay hidden and don't count toward the range.
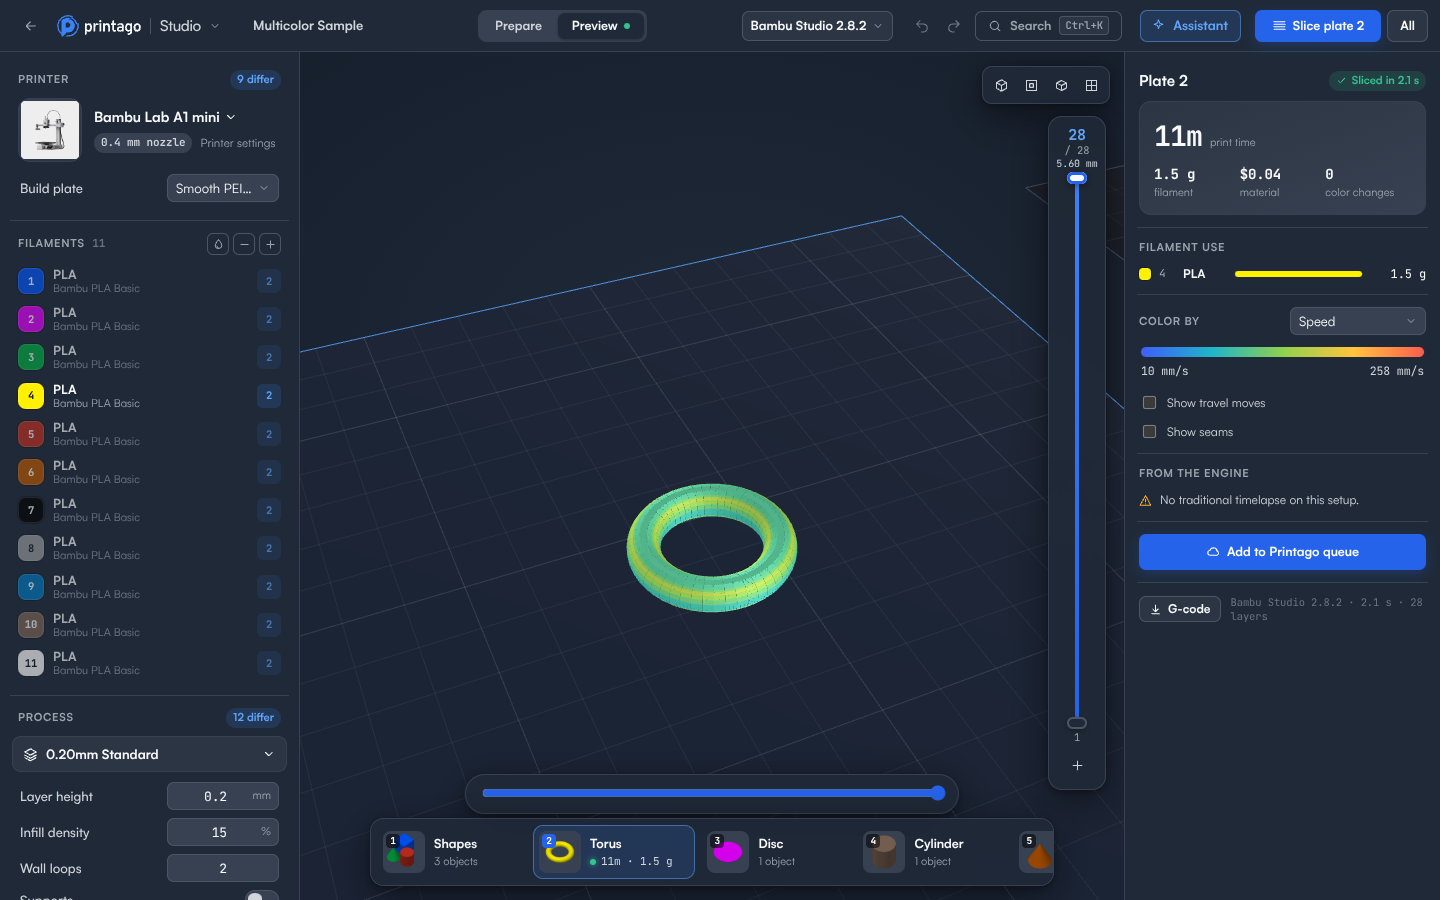
The choice stays as you move between plates and slice again.
Show travel moves adds the moves where the nozzle travels without printing.
From the engine
When the slicing engine has something to tell you about the plate, it's listed under From the engine in plain words, for example that the bed temperature is too high for a filament on the chosen build plate.
Pauses, filament changes and G-code at a layer
To do something before a layer prints:
- In Preview, move the layer slider to the layer.
- Click + under the slider.
- Choose:
- Pause: the printer pauses before the layer, for example to drop in a magnet or a nut.
- Change filament, then a slot: the plate prints with that filament from this layer up, until the next change. Use it for color bands, or a second material from a height.
- G-code…: G-code you write runs before the layer, as you typed it.
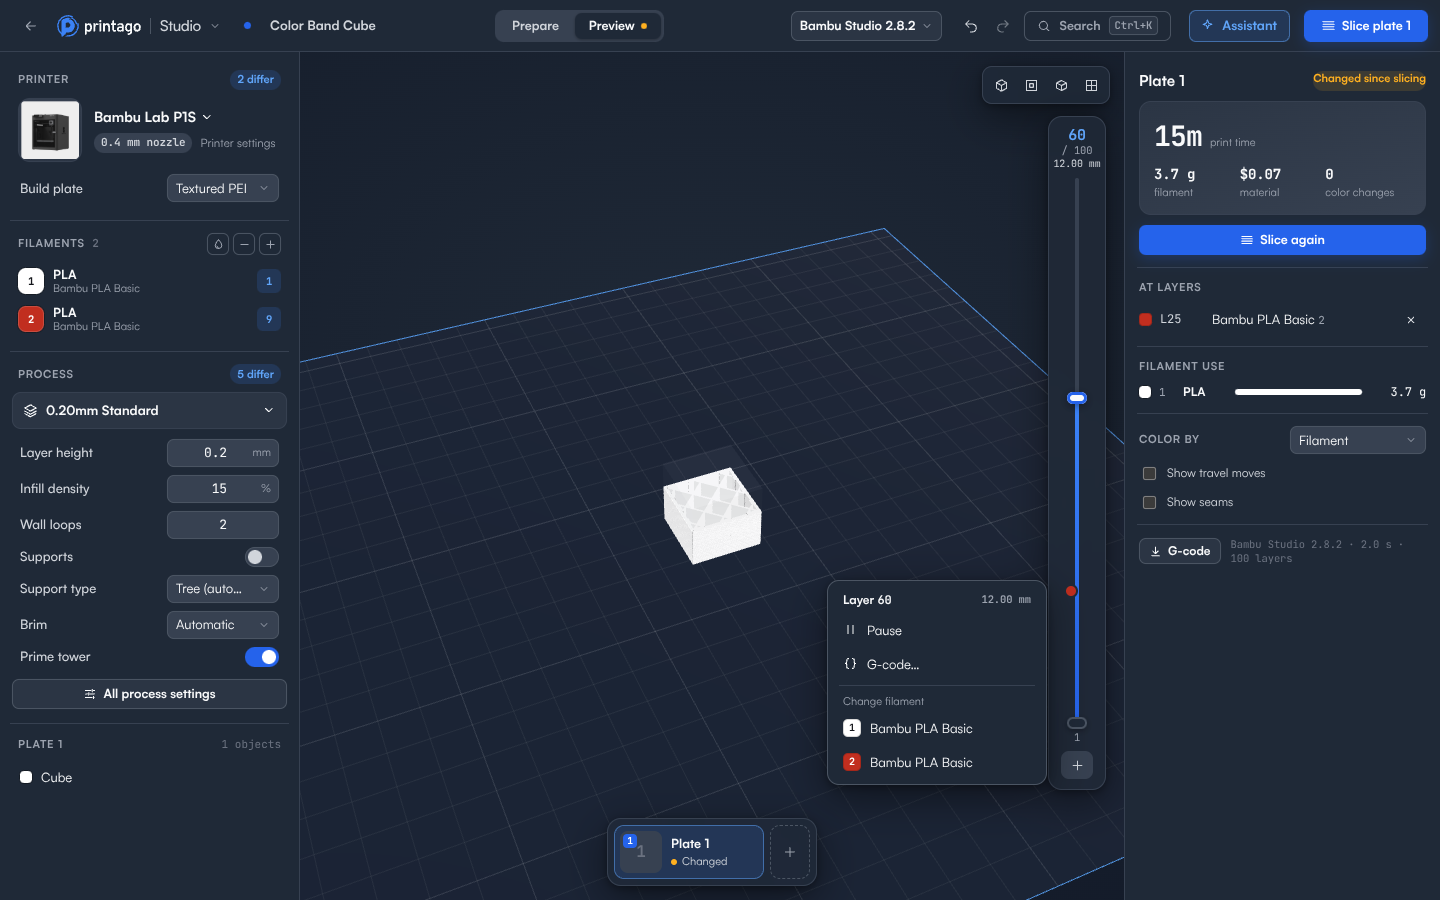
Each one shows as a mark on the slider and in the At layers list in the right panel. Click a row's layer to jump to it, click a G-code row to edit it, or × to remove it. A layer has at most one filament change, and either a pause or G-code: adding a pause where there's G-code replaces it, and the other way round.
The plate then shows Changed since slicing. The toolpaths and the slider stay on screen, so you can add several and slice once at the end. Click Slice again so the G-code includes them.
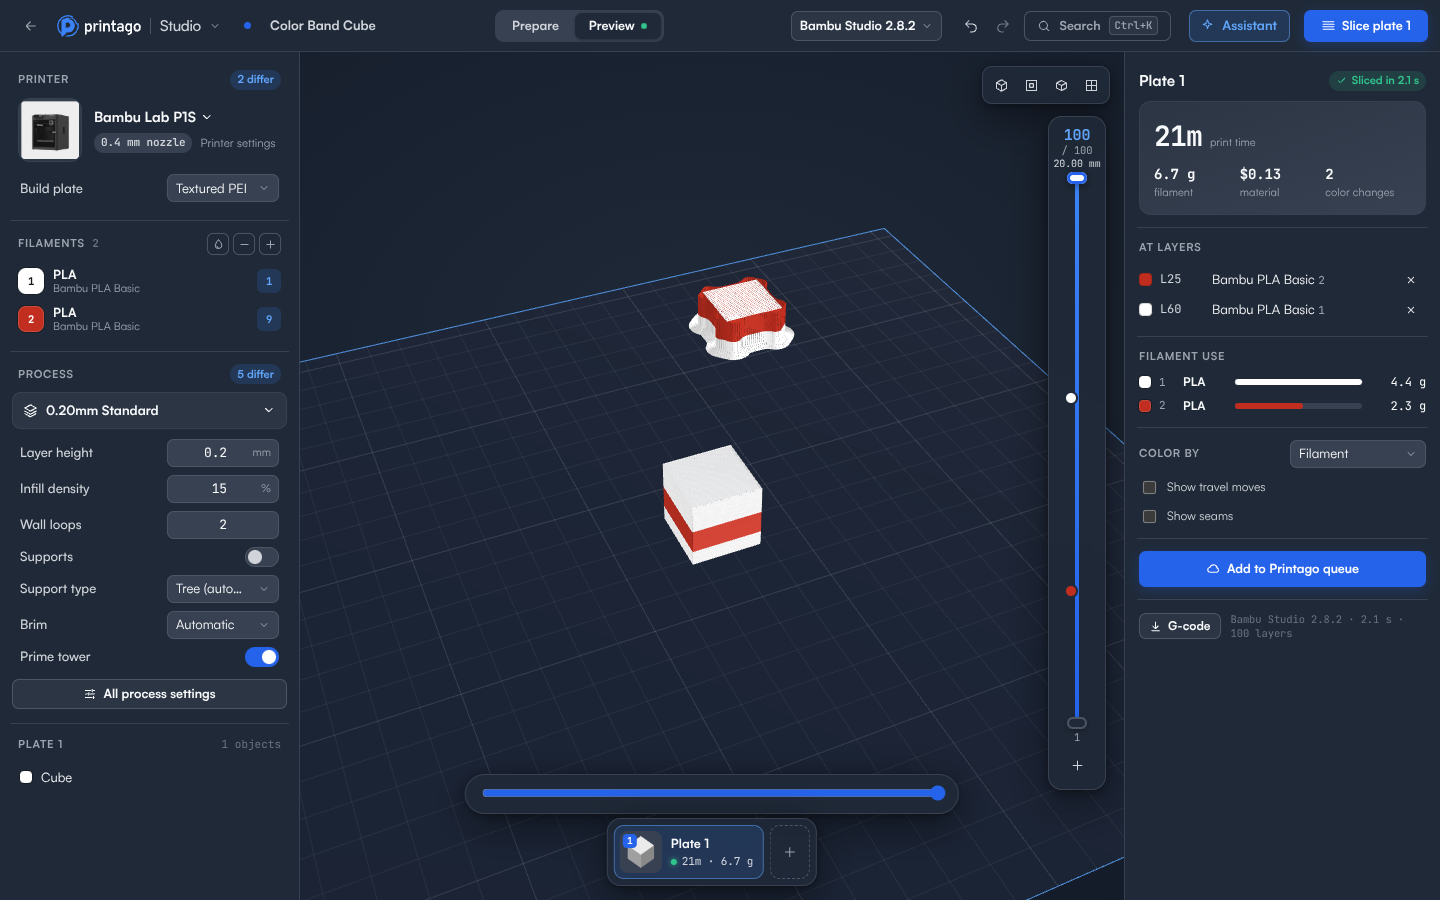
A filament change makes the plate print with more than one filament, so it gets a prime tower like any multicolor plate. If a slice doesn't change filament at the layer you chose, its row says Missing, or the slice stops with The engine didn't change filament at and the height. On a printer profile where that happens, try the other slicing engine.
Downloading the G-code
G-code at the bottom of the Preview panel downloads the plate's G-code, for printing from an SD card or for another tool. Under it, the panel shows which engine sliced the plate and how many layers it has.