Resizing
Studio can make an object longer, wider or taller while keeping its holes, pockets, corners, text and wall thickness the size they were. It does this by stretching only the object's straight sections, and you choose which ones.
How do I resize an object without stretching its holes?
Under Size in the object panel, turn on Keep features. Then do any of these:
- Type a new size for X, Y or Z.
- Type a Scale percentage.
- Drag with the Scale tool (S). The object stretches as you drag, exactly as it will be when you let go.
Keep features starts off for each object you select, so sizing scales proportionally until you turn it on. With it on, each axis changes on its own: making a bracket longer keeps its thickness. With it off, sizing and scaling scale the whole object, holes included.
Keep features works on an object with one copy. Use Separate first for an object with several. For an OpenSCAD part, change its options instead.
Straight sections
Picture slicing the object across the axis you're resizing. Anywhere the slice looks the same as you move along that axis is a straight section: a plain wall, a flat foot, a rod, the flat between two holes. Studio can make a straight section longer or shorter without changing anything else.
Everything else keeps its size and moves with its neighbors:
- Holes and pockets that cross the axis, including Studio's hardware features
- Corners, curves, slants, chamfers and lips
- Text
A straight section has to be at least as long as Shortest (next to Stretch at) to count: 1 mm unless you change it. Studio remembers the value in this browser.
Choosing where it stretches
With Keep features on, Stretch at under Size shows a strip for each axis that has straight sections. The strip is the object's length along that axis, with each straight section at its place:
- Filled: this section stretches.
- Dashed outline: this section stays the size it is.
Tap a section to switch it. Point at a strip, or click into a Size field, to see that axis's sections as bands on the object in the 3D view, filled or outlined to match. With the Scale tool, the bands show on their own for every axis, and holding one axis's handle shows just that axis.
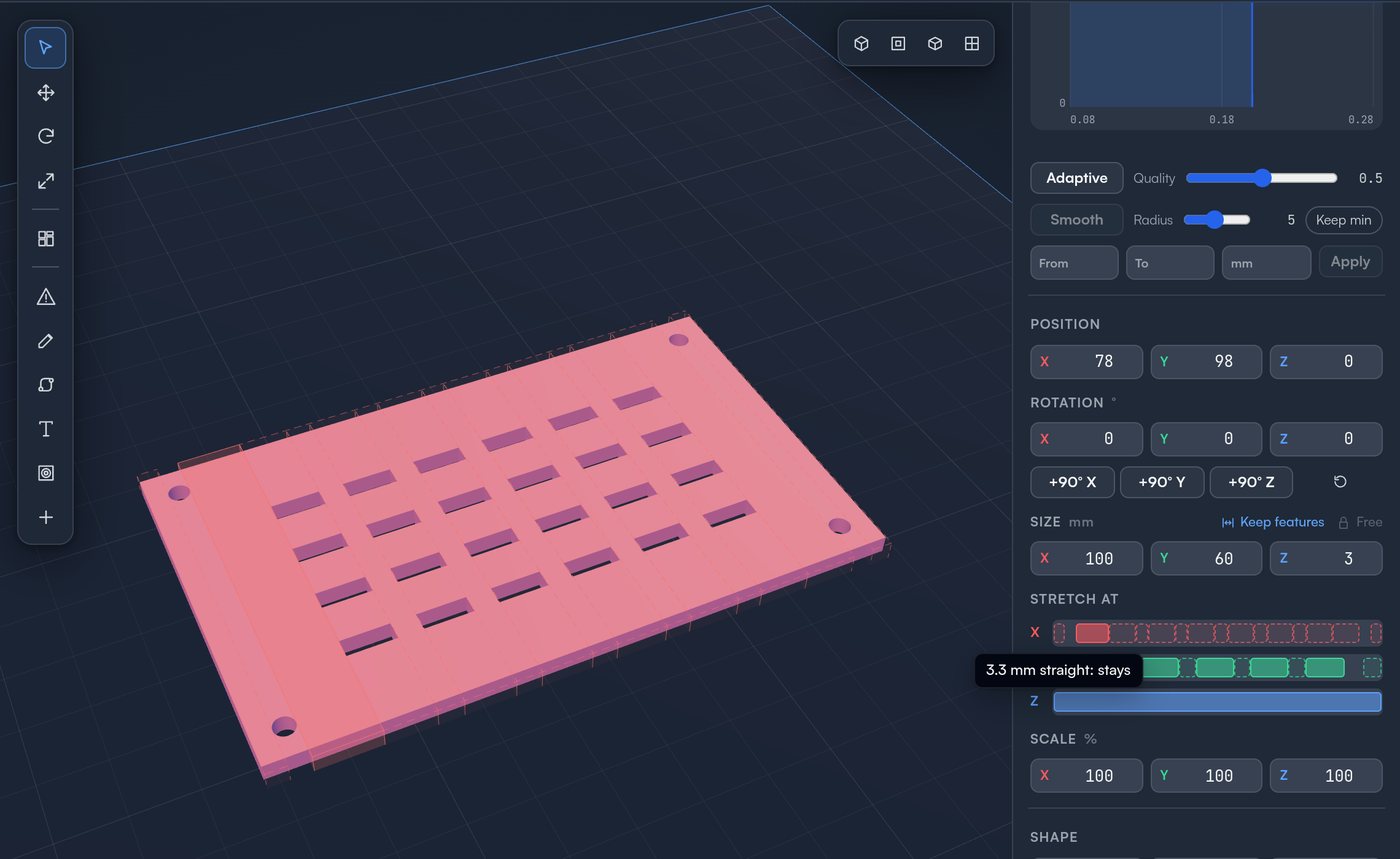
By default the longest section stretches. Sections within 5% of the longest stretch with it, so a symmetric part stays symmetric.
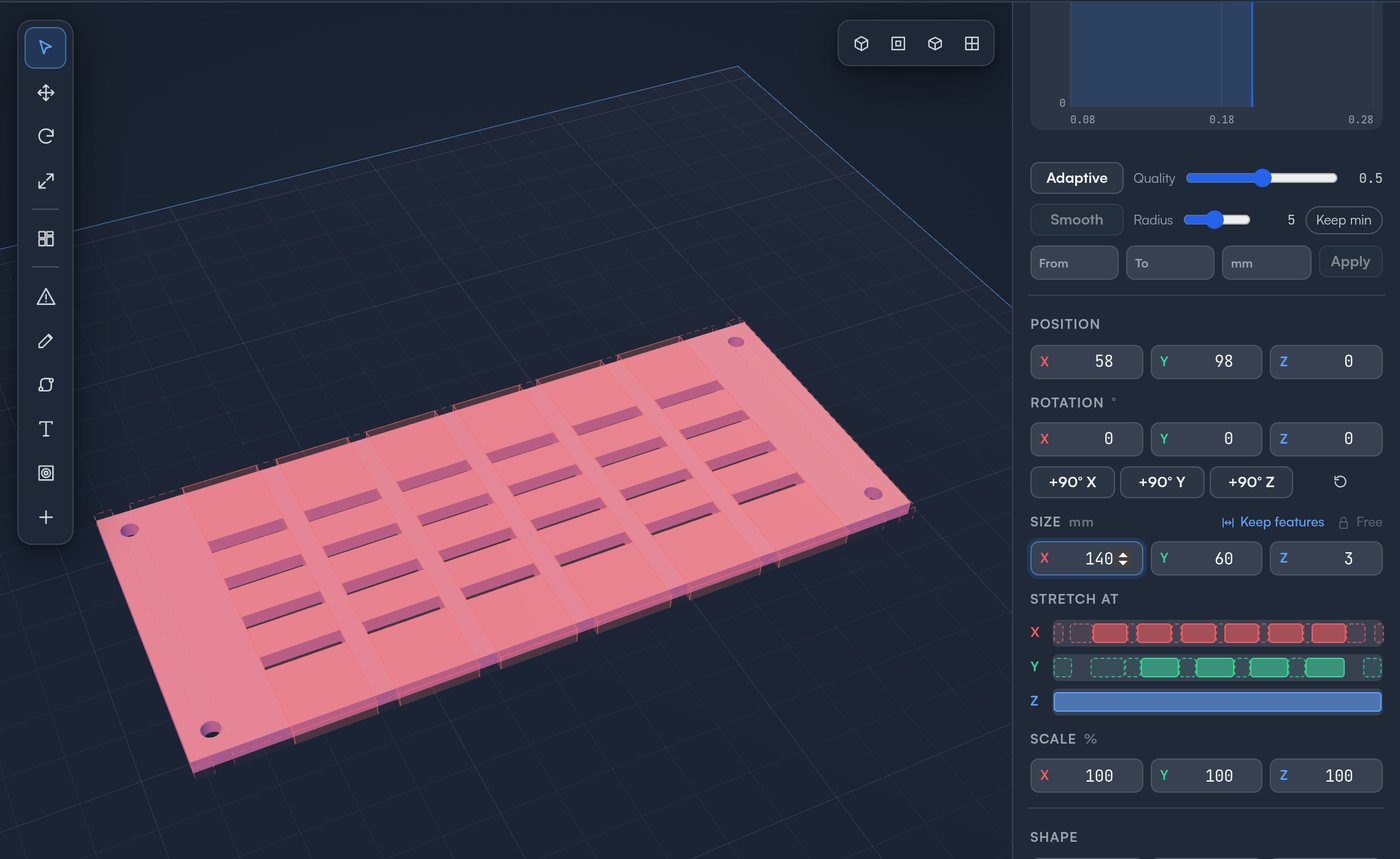
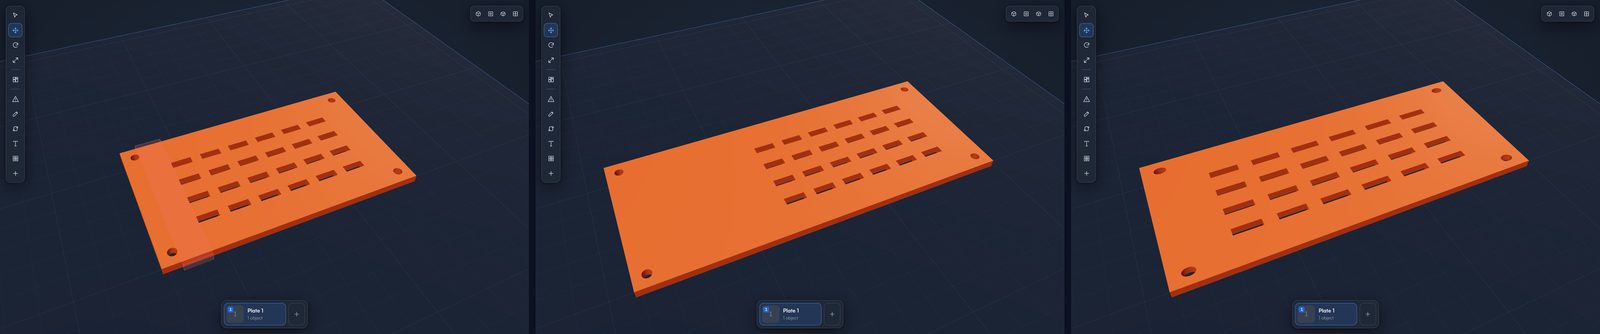
When you pick more than one section, they share the change in proportion to their length, so the picked part of the object stretches evenly. On this vented panel, picking the six bars between the slots and typing 140 mm spreads the slots out evenly instead of putting all 40 mm in the margin:
- Your pick stays for the next resize of that object.
- If an edit changes how many straight sections an axis has, the pick goes back to the default.
- Turn every section of an axis off to scale that axis instead.
- A slot with flat sides across the axis is a straight section too, and stretching it widens the slot. Leave it off, or set Shortest above the slot's width so it isn't offered.
When it scales instead
An axis with no straight section is scaled instead, such as across a sphere, a figurine, or a curve that spans the whole object. A line under Size names those axes before you type, and Studio says which axes it scaled after the resize.
How far can it shrink?
A straight section shrinks no shorter than Shortest (1 mm unless you change it). When the picked sections can't give up enough length, the other straight sections shrink too. When none of them can, Studio stops at the shortest the object can be and says so, rather than squeezing its holes and text. To go smaller than that, turn Keep features off and scale it.
Examples
Each example shows the section that stretches by default, the result with Keep features, and the same size with plain scaling.
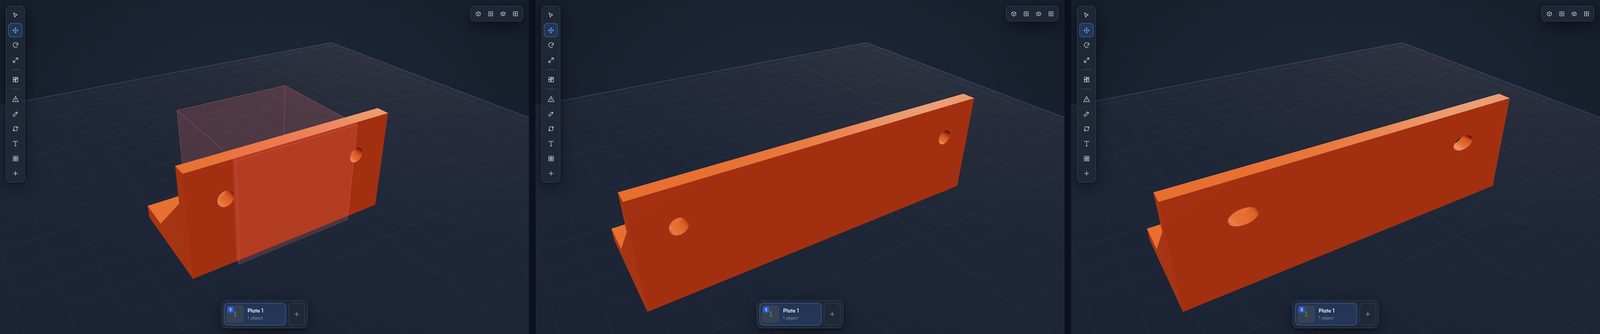
L-bracket, 60 → 100 mm along X. The holes and end gussets don't stretch, so only the plain middle grows. The holes stay round and stay 10 mm from each end. Plain scaling makes them oval and moves them out.
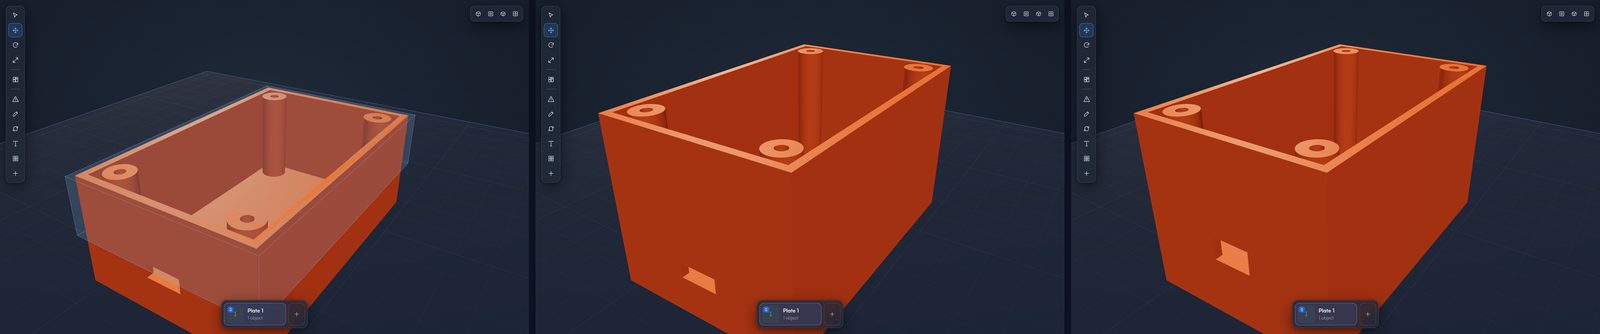
Enclosure, 30 → 45 mm along Z. Going up, the floor, the screw-hole bottoms and the USB slot's edges each cut the height into bands. The tallest band is the wall above the slot, so the new height goes there. The slot keeps its height off the bed.
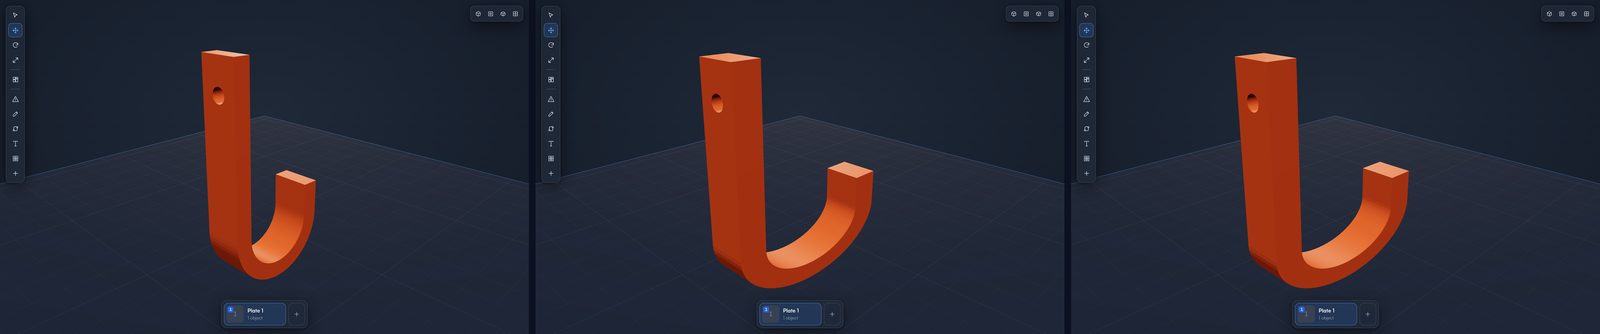
J-hook, 32 → 54 mm along X. The curve spans the hook's whole depth, so there's no straight section. Studio scales this axis instead and the round hook becomes an oval.
Vented panel, 100 → 140 mm along X. By default the longest straight run, the margin left of the slots, takes all 40 mm. Pick other sections under Stretch at to spread it, as above.
What happens to the rest of the object
- Features never stretch. A magnet, insert, screw or nut feature moves with what's around it. A screw hole that runs along the axis is measured again, so it still goes all the way through.
- Text that a stretching section runs through becomes a plain shape, and Studio says so. Text beside the sections moves and stays editable.
- Paint on stretched faces is kept.
- Height ranges and Layer heights follow the stretch along Z.
- The object stays centered where it was, and on the bed.
The assistant can resize this way too. It reads an object's straight sections and can pick which ones stretch, for example "make the tag 20 mm longer between the ring hole and the text".