Adding to the Queue and Saving
When a plate looks right, you can print it, keep your changes on the part, or both.
- Add to Printago queue prints the plate exactly as you sliced it.
- Save keeps your changes on the Printago part, so every future print of it uses them.
Adding a plate to the queue
- Slice the plate. The button appears in the Preview panel once the slice matches the plate.
- Click Add to Printago queue.
- For each filament the plate uses, choose the material from your Printago materials. Studio suggests the closest color of the same type. To pick another, click the material and type part of a color, material or brand name. The list shows only materials of the type the plate was sliced for, closest colors first. If you have none of that type, it says which type is needed and won't send until you change it.
- Set the Quantity. The dialog shows the total filament for all of them.
- Click Add to Printago queue.
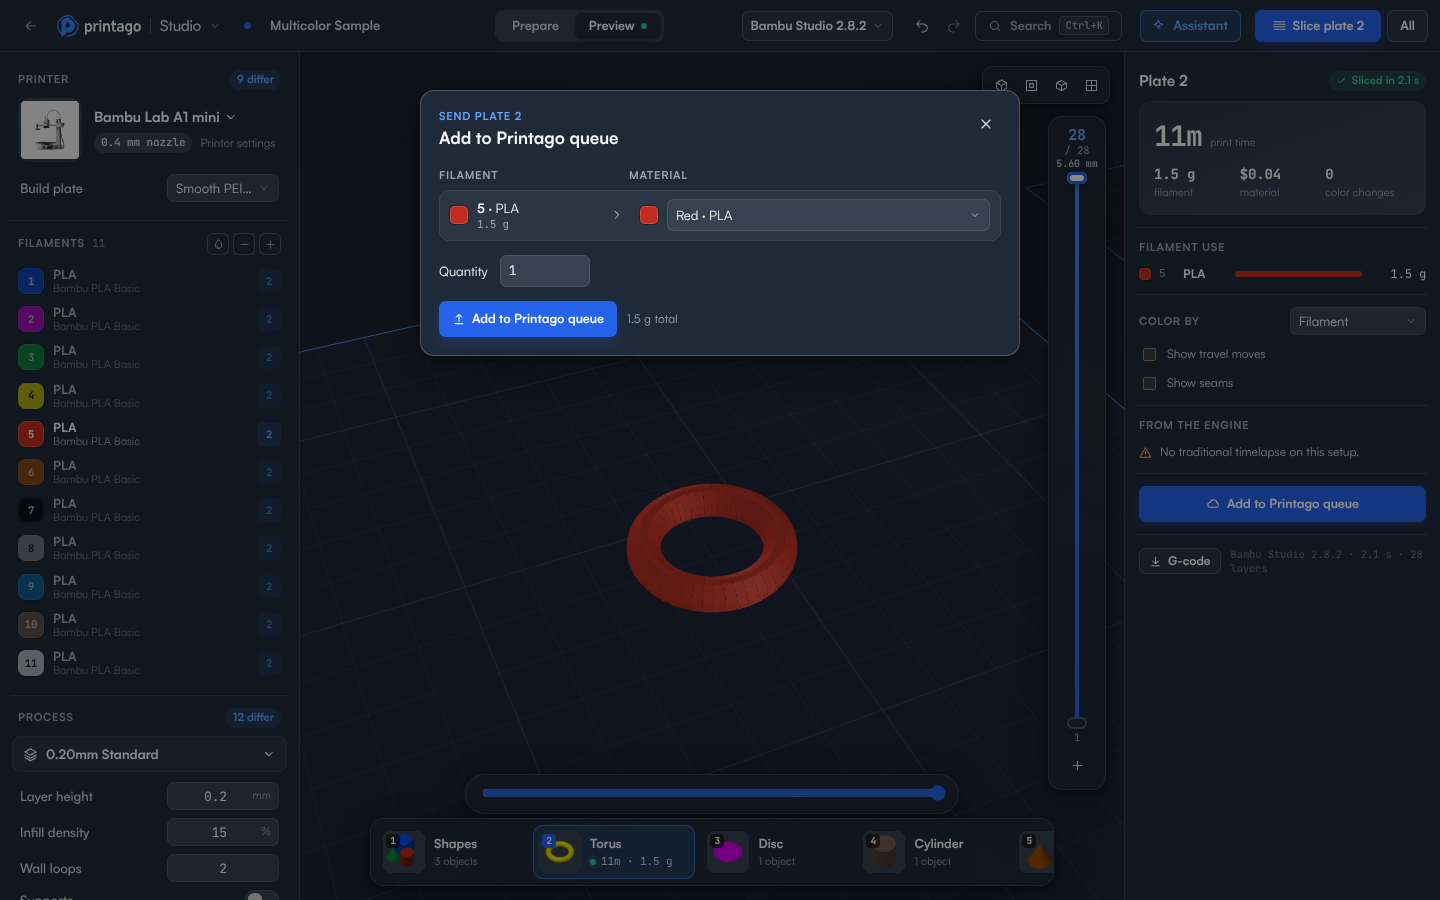
When it's done, View queue opens your Printago queue.
What gets added
The queue prints the G-code you previewed. Printago doesn't slice it again, so what you checked is what prints.
To do that, each time you add a plate Studio creates a new part in Printago named after the project and plate, for example Multicolor Sample · plate 1, holding the sliced plate as a gcode.3mf. The job in the queue prints that part on a printer like the one you sliced for, with the materials you chose.
Two things follow from this:
- The part you opened doesn't change. To change it, save.
- Because the new part is already sliced, it prints only on the printer model it was sliced for.
A sliced part you opened from Printago (gcode.3mf or G-code) that you haven't changed is added to the queue as itself, without creating a new part.
When your role can't create parts
If your role can't create parts (the Student role, for example), an OpenSCAD part is added to the queue as itself, with the options you chose and the material you pick for each of its colors. Printago then slices it for the printer it's sent to, with the part's own settings, as it does for any queued part. Changes to settings, such as a different process profile, aren't part of that job.
So that what prints is the part you checked, Add to Printago queue appears only while the plate holds just that part: one copy, not rotated or scaled, with nothing added to it. If you've added a model, a modifier or a copy, undo it, or download the G-code instead.
A plate from a file on your computer can't be added to the queue without permission to create parts. Download its G-code instead.
Saving back to Printago
Choose File > Save to Printago, or press Ctrl+S (⌘S on a Mac). Save to Printago? says what will change, then click Save.
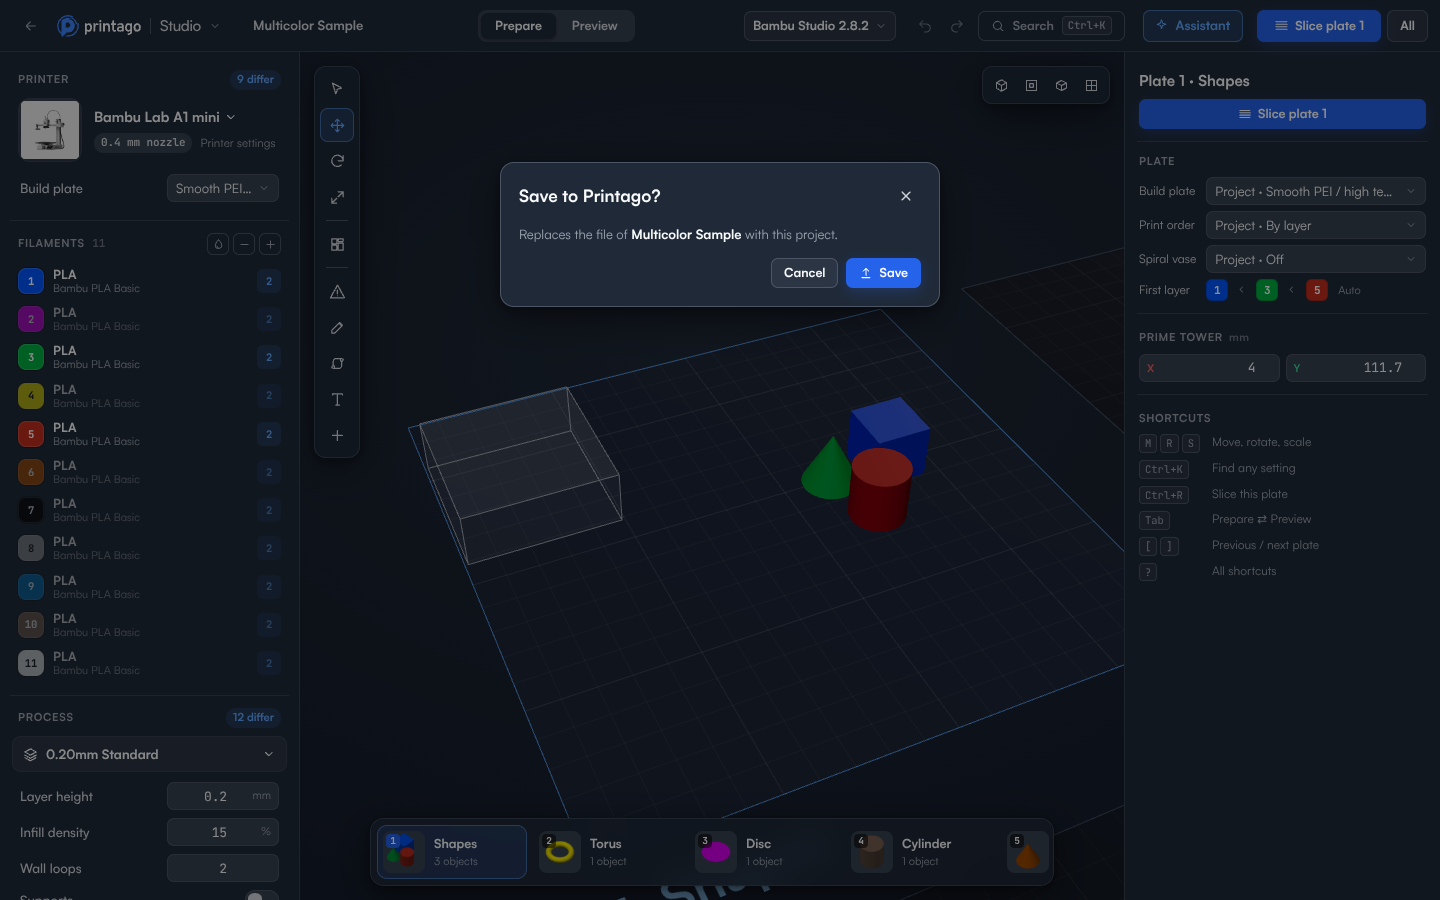
What's saved depends on the part:
| Part | What Save does |
|---|---|
| 3MF | Replaces the part's file with the project: plates, objects, colors and settings |
| STL | Replaces the part's file with the project, as a 3MF |
| OpenSCAD | Keeps the options you chose on the part. The script stays as it is |
The part keeps its name and settings in Printago, and Printago processes the new file as it does any upload. When it's done, View part opens it.
A part made of several files can't be saved back yet. Use Save as new part instead.
Saving as a new part
File > Save as new part in Printago… creates a separate part from the project. Give it a name and click Create part. After that, Save updates the new part.
A sliced 3MF opened from Printago is saved this way, as a new part.
Downloading the project
File > Download .3mf saves the project to your computer as a 3MF file. When there's no part to save to, Ctrl+S downloads it.
To download a plate's G-code, use G-code in the Preview panel. See Slicing and preview.