Preparing a Plate
Everything you set up in Prepare is what the plate is sliced with: the printer, the filaments, the process settings, and where each object sits. This page walks through each of them. Every change can be undone with Undo (Ctrl+Z, or ⌘Z on a Mac).
Printer
The Printer section at the top of the Setup panel shows the printer the project is set up for.
- Change the printer: click its picture or name. Choose a printer lists your Printago printer profiles first, under Your Printago profiles, then every printer the slicing engine knows, by brand. Type to search.
- Nozzle: the chip under the name shows the nozzle size. It comes from the printer profile, so choose the profile for the nozzle you want.
- Build plate: pick the plate type you'll print on. It sets the bed temperatures the filament profiles use for that plate. A plate can use another one; see Settings for one plate.
- Printer settings: opens every setting of the printer profile, such as retraction and custom G-code.
Choosing a different printer resets the changes you made to printer settings. Studio tells you how many it reset, with an Undo button in case you didn't mean to.
What "differ" means
A chip like 9 differ next to Printer or Process counts the settings that are different from the profile you chose. A project from a 3MF file often carries its own changes, and so does anything you edit. Click the chip to see them.
Filaments
Filaments lists one numbered slot per filament the plate can use. Objects are assigned to slots, and each slot has its own color and filament profile.
- Color: click the numbered swatch to pick the color. The preview and the plate thumbnails use it.
- Filament profile: click the material name to choose a profile. Your Printago profiles come first.
- Filament settings: the button at the end of the row opens the slot's settings, such as temperatures and cooling. A number on it counts your changes.
- Add or remove a slot: use + and − next to Filaments. A slot that an object still uses can't be removed until you move the object to another slot.
Slots that nothing on the current plate uses are dimmed.
When you add the plate to your Printago queue, you choose which of your materials goes in each slot. See Adding to the queue.
Flushing volumes
When a print changes from one filament to another, the printer purges some of the old one first, so the new color comes out clean. With more than one filament, the drop button next to − and + opens Flushing volumes: how much is purged, in mm³, for every change. Rows are the filament it changes from and columns the one it changes to.
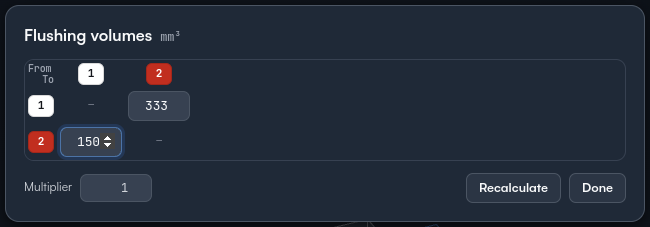
- Click a number to change it. A lower volume saves filament and time but can leave a trace of the old color.
- Multiplier scales every volume when slicing.
- Recalculate puts back the slicing engine's own volumes for the current colors.
Changing a filament's color recalculates the volumes to and from it a moment later, as its own step that Undo takes back. Volumes between the other filaments stay as you set them. A purge above 0 is never less than the printer's minimum (100 mm³ on a P1S); 0 turns it off.
Process settings
Process holds the settings for how the plate prints. Click the preset name to choose a different process profile. Choosing one resets your process changes, with an Undo button.
The most-used settings are right in the panel:
- Layer height
- Infill density
- Wall loops
- Supports, and Support type (normal or tree, automatic or only where painted)
- Brim
- Prime tower, when the plate uses more than one filament
All process settings
All process settings opens every setting, grouped into Quality, Walls, Top & bottom, Infill, Speed, Support, Adhesion, Multi-material and Special.
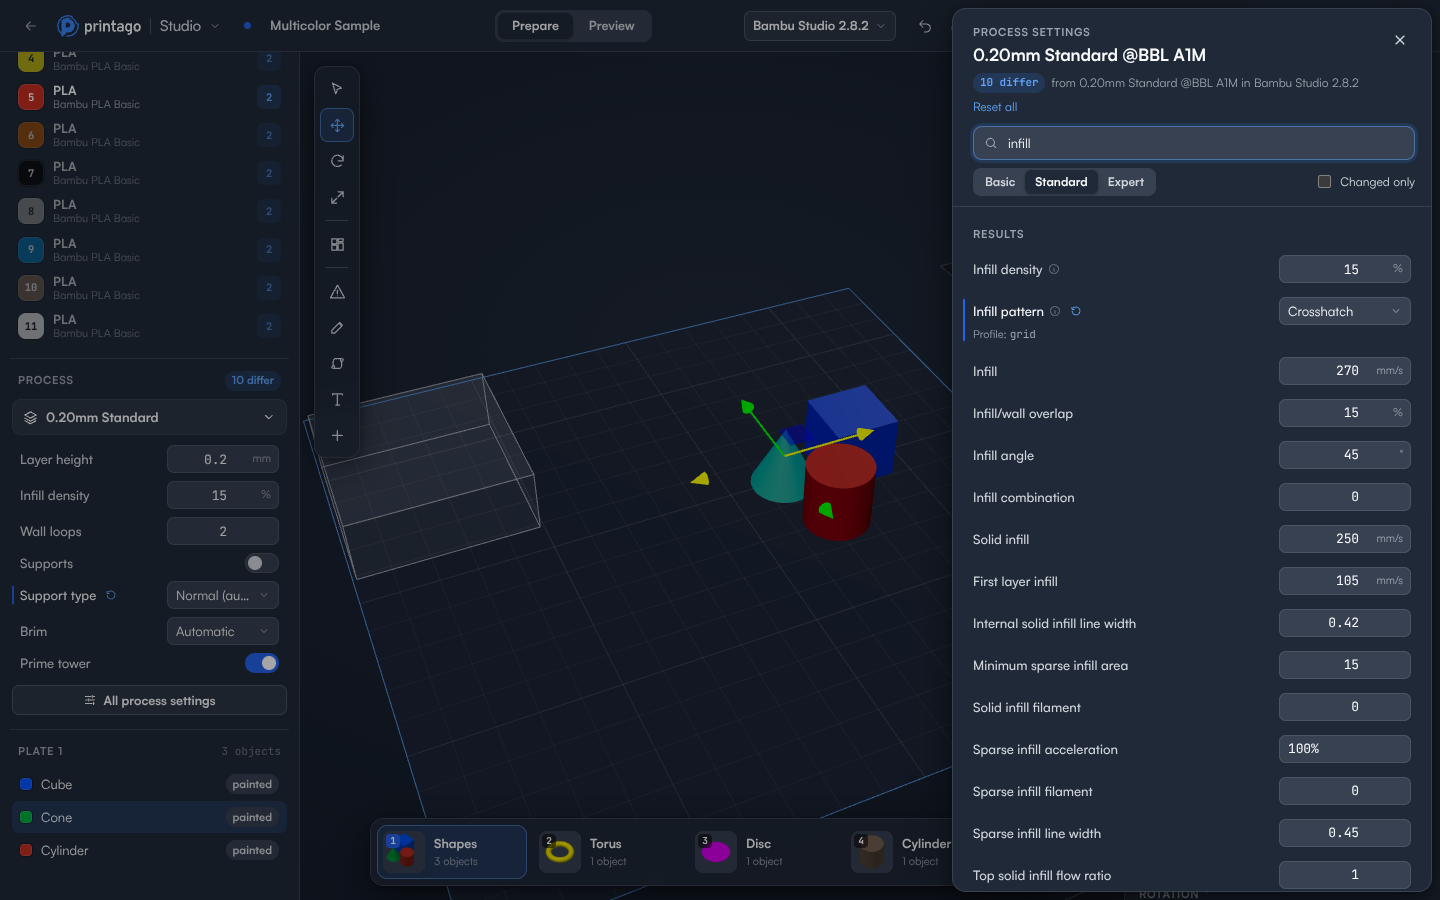
- Search finds settings by name. You can also search for what you want to fix: "stringing" finds the retraction settings.
- Basic, Standard and Expert choose how many settings are shown. Expert also lists every other setting in the profile under All settings.
- Changed only shows only what differs from the profile.
- A changed setting has an orange bar and shows the profile's value under it. Click the reset arrow next to it to put it back, or Reset all at the top to undo every change.
- Hover the ⓘ next to a setting to see what it does.
Printer and filament settings open in the same way, from Printer settings and the button on each filament row. Press Esc to close.
Press Ctrl+K (⌘K on a Mac) and type what you're looking for. Choosing a setting opens it directly. See Keyboard shortcuts and search.
Objects
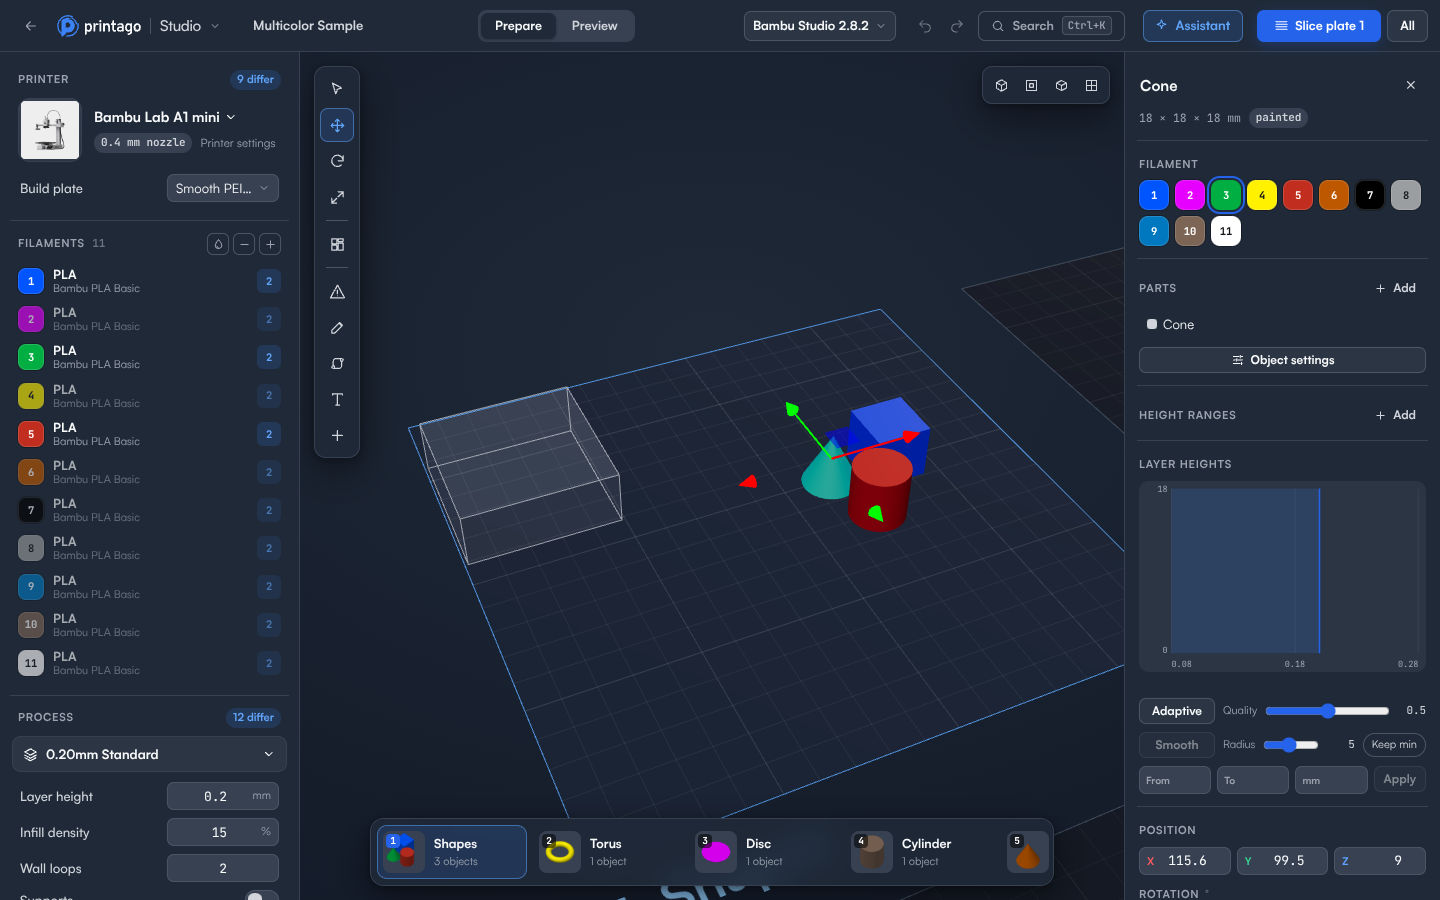
Click an object in the 3D view to select it. The right panel shows its details.
Moving, rotating and scaling
Choose a tool on the left of the 3D view, then drag the handles on the selected object:
| Tool | Key | What it does |
|---|---|---|
| Select | Select without showing handles | |
| Move | M | Slide the object across the plate |
| Rotate | R | Turn it around any axis |
| Scale | S | Make it bigger or smaller |
Press a tool's key again to go back to Select. The arrow keys move the selected object 10 mm, or 1 mm with Shift.
After you move, rotate or scale an object, it settles back onto the plate. Drag an object onto another plate to move it there.
For exact values, type them in the right panel:
- Position in mm.
- Rotation in degrees, with +90° X, +90° Y and +90° Z buttons and a reset button.
- Size in mm. Proportional keeps the shape; click it to switch to Free and size each axis on its own.
- Scale in percent.
Below those:
- Center moves the object to the middle of the plate.
- Duplicate adds a copy beside it.
- Fill plate adds as many copies as fit on the object's plate. See Filling a plate with copies.
- The plate list moves it to another plate.
- Delete removes it. Delete or Backspace on the keyboard does the same.
You can rename an object at the top of the panel. Press Esc to deselect.
Filament for an object
Under Filament, click a numbered swatch to print the whole object in that filament. Objects from a multicolor 3MF that are painted keep their painted colors and show a painted tag.
Painting seams and supports
Click Seam paint or Support paint on the toolbar beside the view, or press P or L. Select the object you want to paint (click it), then drag across it:
- Seam paint: Here puts the seam on the painted area, Not here keeps it off, Erase clears paint.
- Support paint: Enforce always supports the painted area, Block never does, Erase clears paint.
A ring under the pointer shows the brush. Change its size with Size. Smart fill paints a whole flat face with one click. Each stroke is one step for Undo. Click ×, press Esc, or pick the move, rotate or scale tool to stop painting.
On a phone, drag with one finger to paint. Use two fingers to turn or zoom the view.
Parts, modifiers and supports
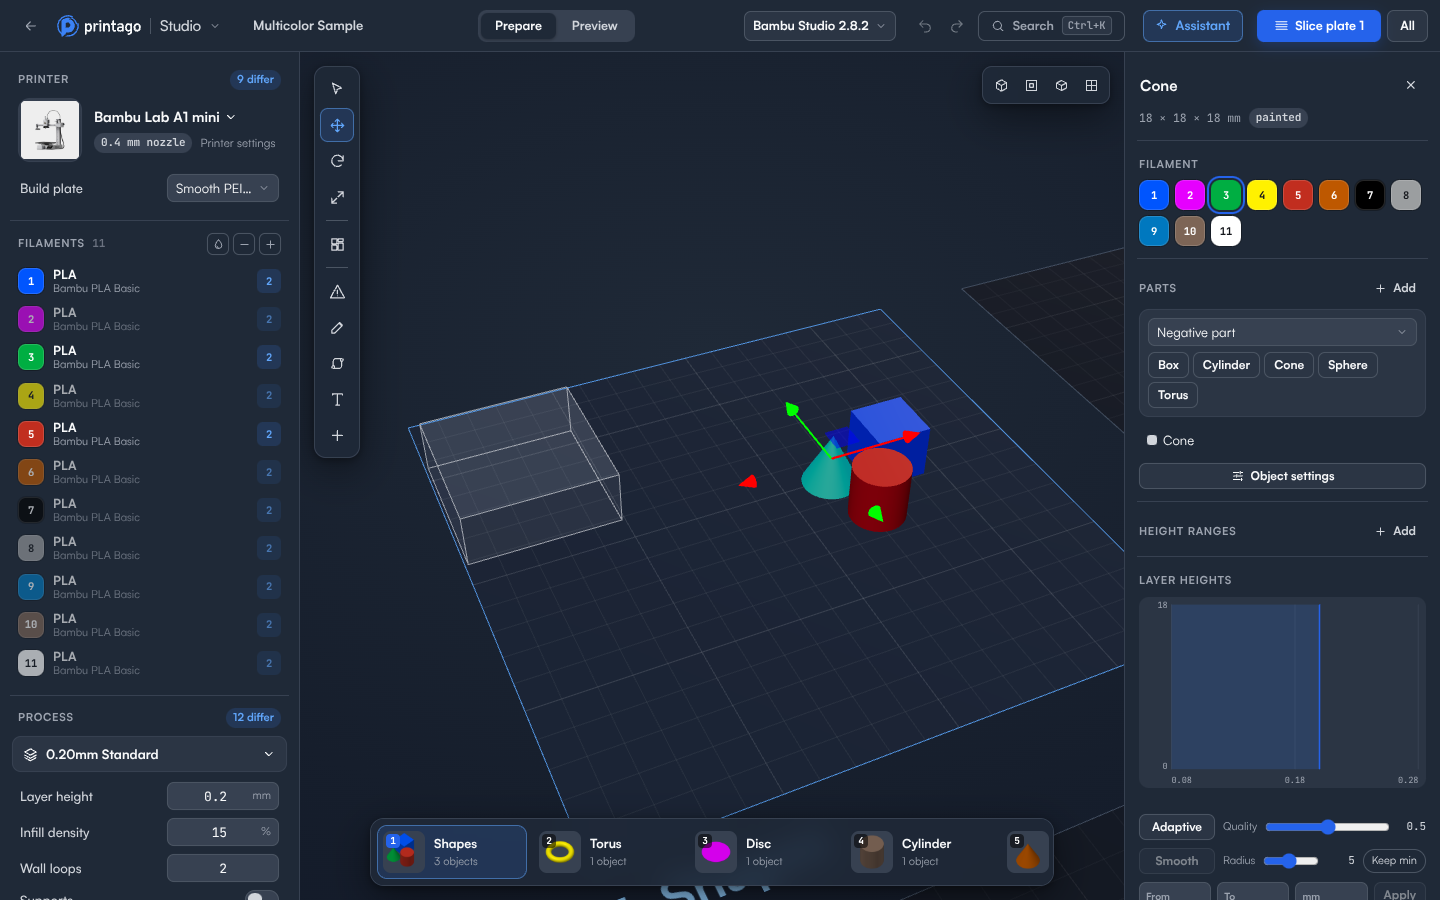
An object can be made of more than one part. Under Parts, click + Add, choose a type and then a shape (Box, Cylinder, Cone, Sphere or Torus):
| Type | What it does |
|---|---|
| Part | Adds more printed material |
| Negative part | Cuts its shape out of the object, for holes and recesses |
| Modifier | Changes settings inside its shape, such as denser infill where a screw goes |
| Support blocker | Stops supports from being generated inside it |
| Support enforcer | Makes supports where it is, even if they wouldn't be generated otherwise |
Click a part in the list to change its type, its Offset from the object's center and its Size. The settings button on a part opens settings for just that part. For a modifier, that's where you set what changes inside it. A No effect tag means the part doesn't touch the printed object, so it won't change anything.
Every object keeps at least one printed part, so the last one can't be deleted.
For lettering, use the Text tool instead: text you add is a part you can edit later (what it says, its font and size), raised, engraved or a modifier. Text parts show a T in the list, and a Parameter tag when they're a text placeholder. See Text.
Settings for one object
Object settings changes process settings for this object only, for example more walls on one part of the plate. The number on the button counts its own settings. In the drawer, each setting shows the plate's value under it, and Reset all returns the object to the plate's settings.
Height ranges
Height ranges change settings for a band of an object's height only, for example finer layers where the detail is or more walls where a screw goes. Heights are in mm above the plate.
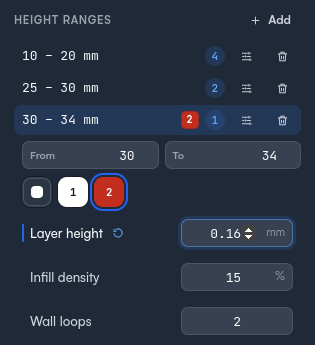
- + Add adds a range above the last one. Click a range to set its From and To heights, the filament it prints in (the first swatch keeps the object's), its Layer height, Infill density and Wall loops. The selected range shows as a band on the object.
- The settings button opens every setting for the range. Each one shows the object's or plate's value under it, and the number in the list counts the range's own settings.
- Ranges can't overlap, and a layer height must be one the printer can print.
- Copies of an object share its ranges. Cutting, splitting or combining the object removes them.
Studio checks each slice: if the engine didn't print a range in its filament, the plate checks say so.
Variable layer height
Layer heights gives an object thinner layers where its surface needs them and thicker ones where it doesn't, so curved and sloped surfaces come out smoother without slowing down the whole print.
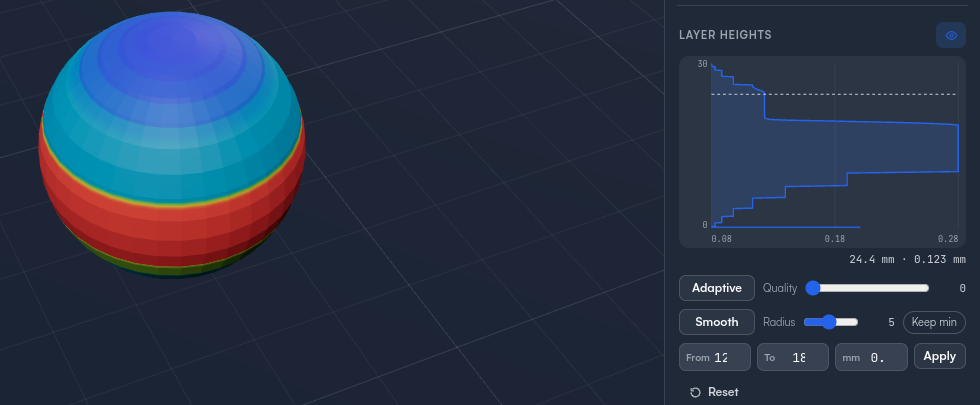
- Adaptive makes the profile from the object's shape. Quality at 0 gives the finest layers, at 1 the fastest print.
- Smooth evens the profile out over Radius layers. Keep min never makes a layer thicker.
- The chart shows the layer height (across) at each height of the object (up). Press and drag on it to paint: up and down to cover more of the object, left for thinner layers, right for thicker. Each drag is one step for Undo.
- From, To and mm set one band exactly, for example 0.12 mm from 10 to 15 mm, with Apply.
- Reset goes back to the object's single layer height.
- The eye button colours the object by layer height in the 3D view: blue for thin, through to coral for thick.
The layer heights follow the object when you scale it. Copies of an object share them. A height range's own Layer height doesn't apply while the object has variable layer heights, and shows as Variable layer height.
The slicing engine only uses layer heights that fit the object as it is, so the plate checks tell you when they can't be used: when the object was turned on its side since they were made, its parts changed, its copies have different heights, or the first layer is outside the printer's layer heights. Make them again with Adaptive, or Reset.
Plates
A project can have several plates. The plate strip at the bottom shows one card per plate with a thumbnail and its status: the print time and filament once sliced, Changed when it needs slicing again, or Failed.
- Click a card to make that plate active. Press [ and ] to go to the previous and next plate.
- Double-click a plate's name to rename it.
- + adds a plate. The × on a card deletes the plate and its objects, with Undo.
- Iso view, Top view and Front view in the top-right of the 3D view change the angle. All plates shows every plate at once. Double-click a plate to zoom to it.
Adding or deleting a plate clears the slicing results on all plates, so slice them again afterwards.
Arranging a plate
Click Arrange plate in the tool rail, or press Shift+A, to pack the active plate. A arranges every plate. Objects are placed by their real outlines and turned 90° when that fits more. If everything doesn't fit, what's left goes onto new plates, and Studio tells you how many it added.
Filling a plate with copies
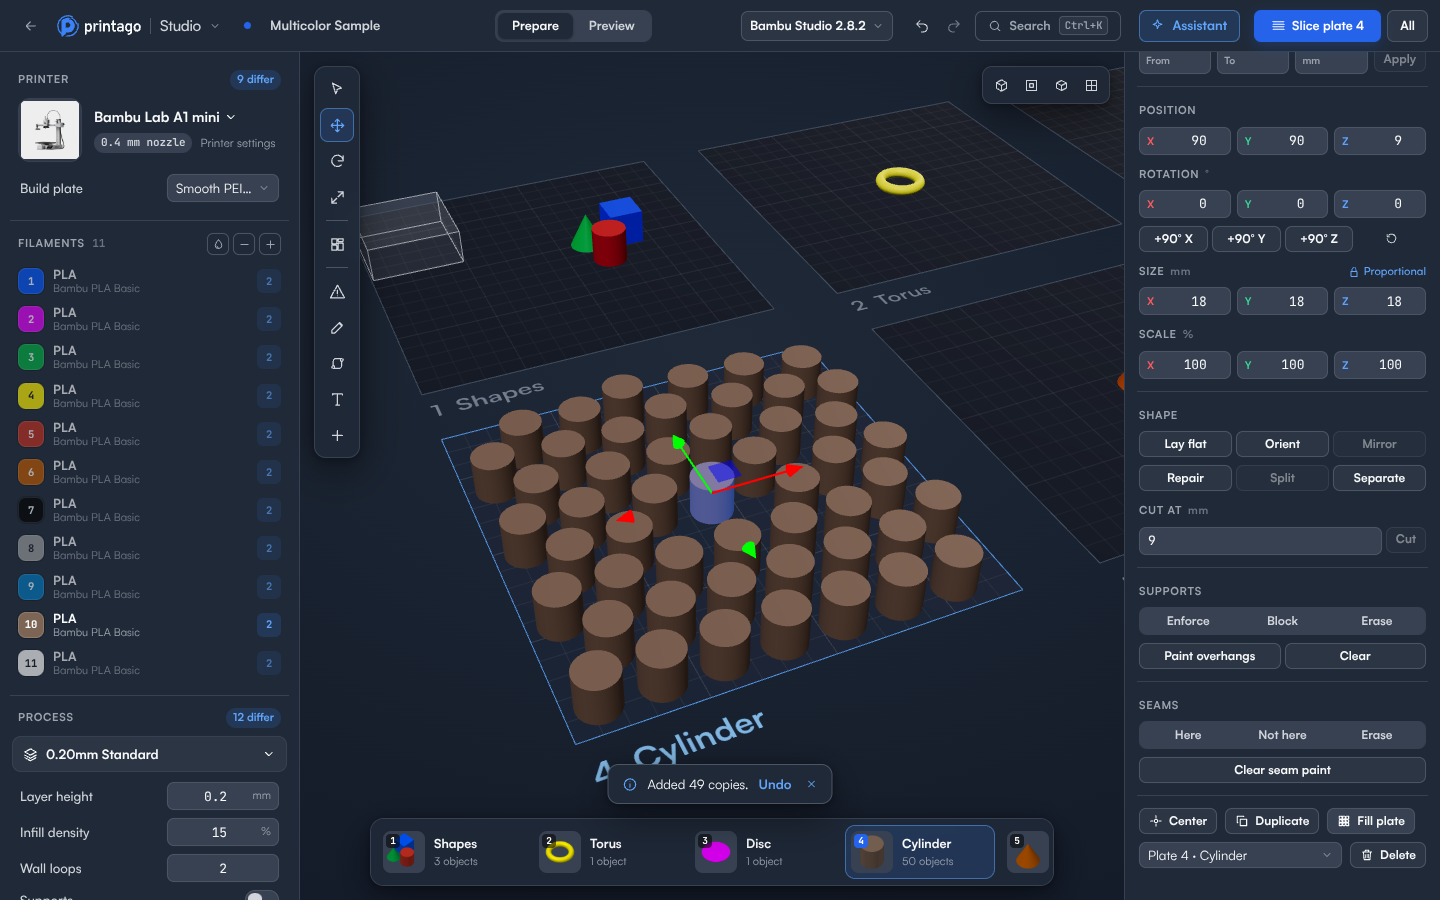
To print a batch of one part, select it and click Fill plate in the right panel (on a phone, in the Object sheet), or search for Fill plate with Ctrl+K. Studio packs as many copies as fit into the free space on that plate, by their real outlines, turning them 90° when that fits more. It leaves room for the prime tower and keeps clear of areas the printer can't print on.
Nothing already on the plate moves, and copies never go onto other plates. Studio tells you how many it added, up to 500 at a time, or that there's no room for another. Undo removes all of them at once.
Settings for one plate
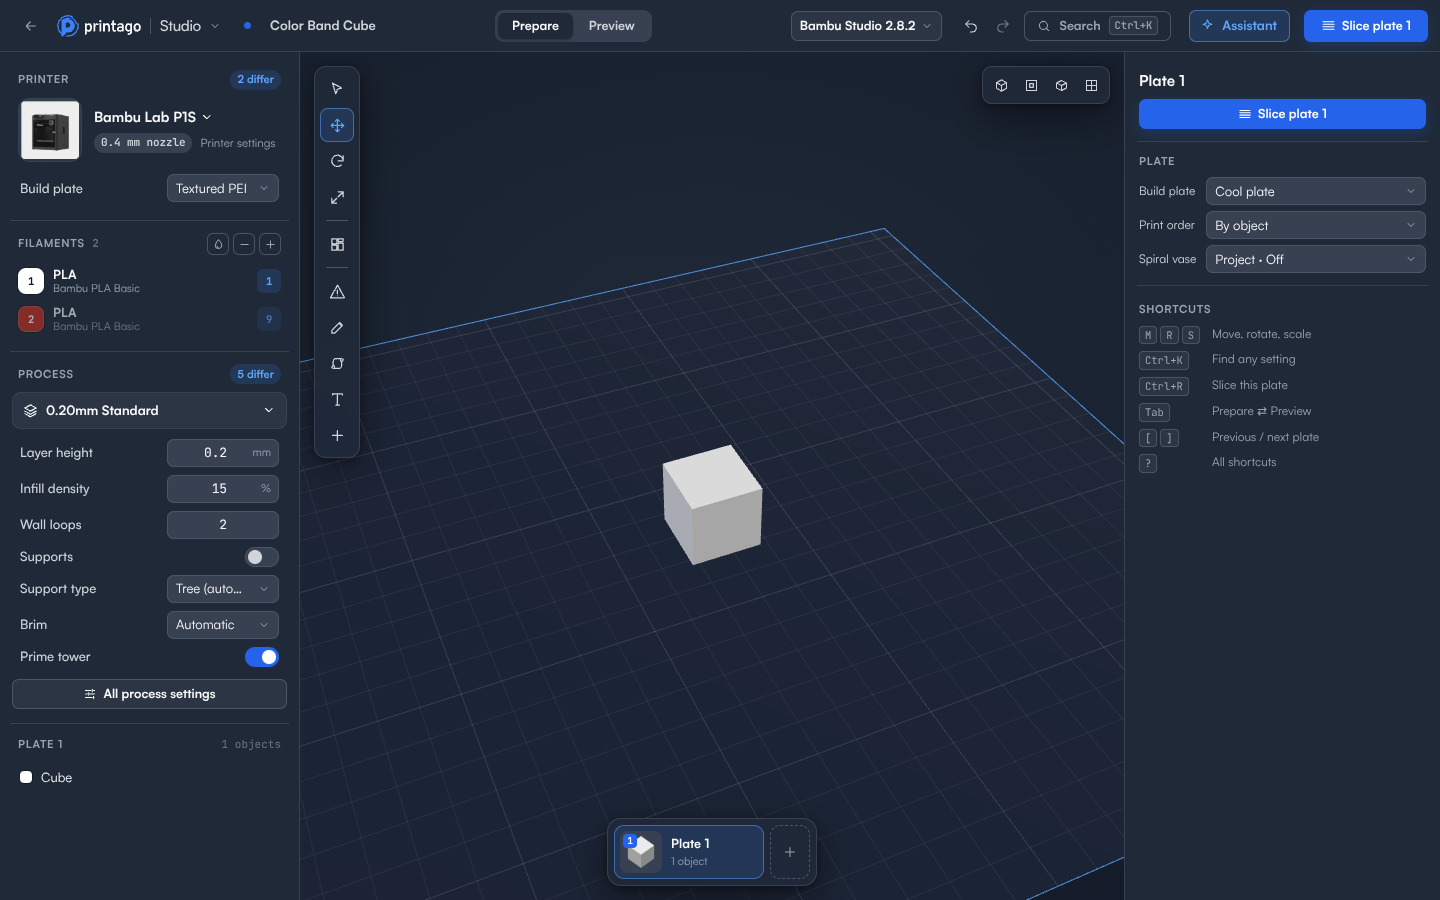
With nothing selected, the Plate section of the right panel sets these for the active plate only:
- Build plate: the plate type, and with it the bed temperatures, for this plate.
- Print order: By layer prints every object a layer at a time. By object finishes each object before starting the next.
- Spiral vase: prints this plate's objects as one continuous single wall with no top.
- First layer: on a plate with more than one filament, the order the first layer prints them in. Click the arrow between two slots to swap them; the reset button goes back to Auto.
Each one starts at Project, which uses the setting from the printer and process on the left. Choose another value for this plate, or Project to go back.
Prime tower
On a plate with more than one filament and Prime tower turned on, the tower shows as a see-through block. With nothing selected, the right panel shows its X and Y position so you can move it. Arranging the plate leaves room for it.
If the tower overlaps an object, slicing stops and tells you which object is in the way, with an Arrange button to fix it.
Plate checks
With nothing selected, the right panel lists checks for the active plate. These stop the plate from slicing until you fix them:
- An object hangs off the plate.
- An object is taller than the printer can print.
An object floating above the plate is only a warning.