Hardware Features
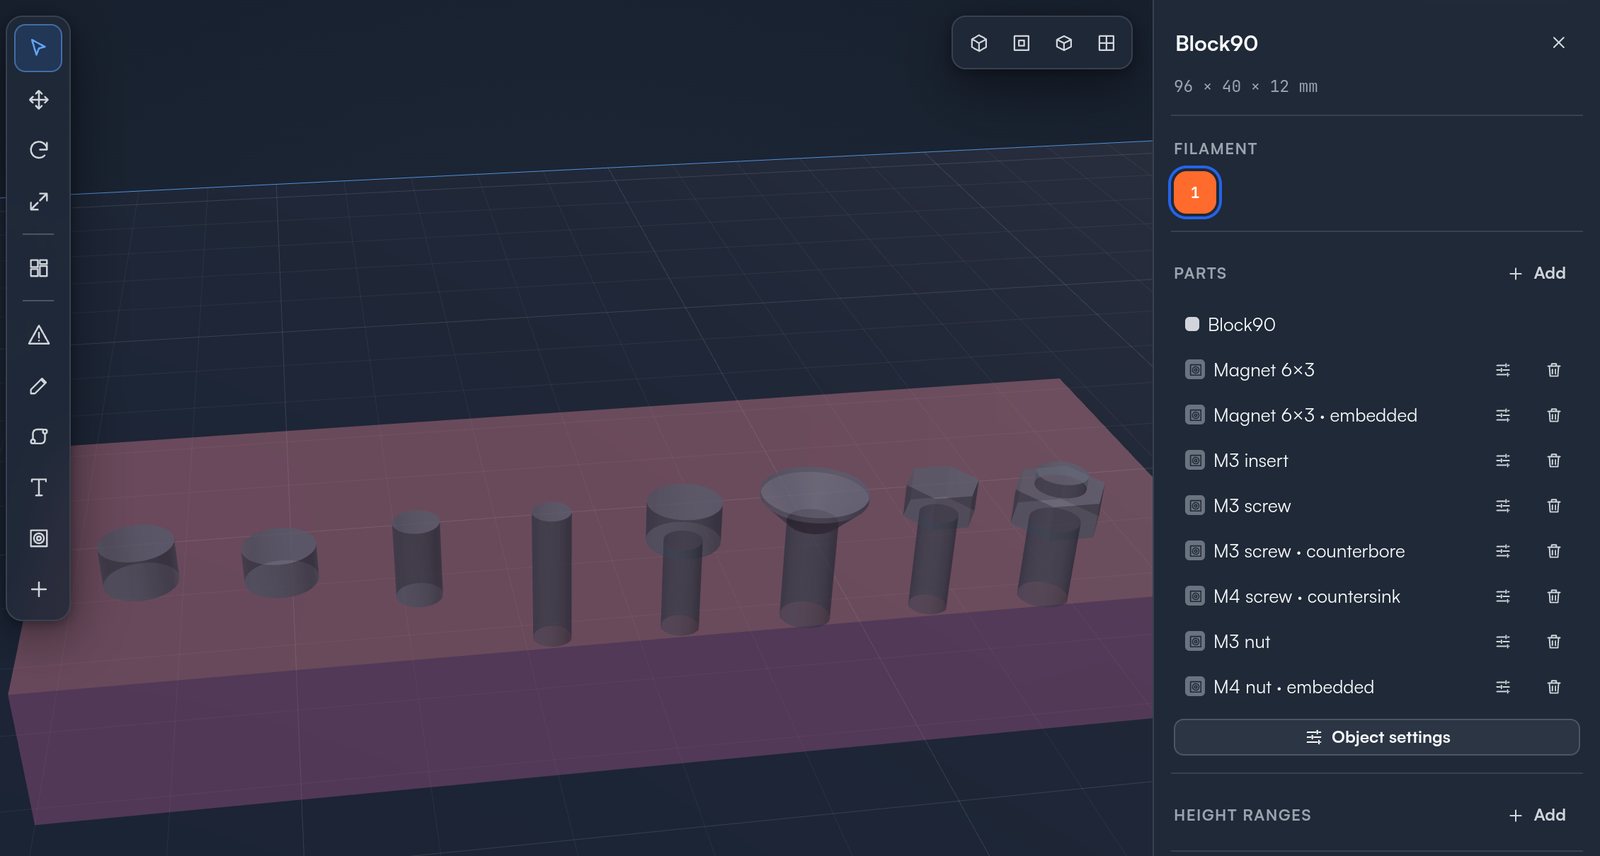
Studio cuts the holes that hardware goes into: magnet pockets, heat-set insert holes, screw holes and hex nut pockets. Each is sized from fastener standards plus room for printing, so you don't need a datasheet. An embedded magnet or nut is sealed inside the part, and the printer pauses at the layer that would close it over, so you can drop it in.
How do I add a magnet pocket or screw hole?
- Click Features in the tool bar on the left of the 3D view, or press H. A bar opens above the view.
- Pick Magnet, Insert, Screw or Nut, then the size. A screw also picks its head (Plain, Counterbore or Countersink). A magnet or nut picks Open or Embedded.
- Move over a model. A ring shows where the feature goes and how wide it is.
- Click a face. The feature goes straight into the material there, and its settings open in the object panel.
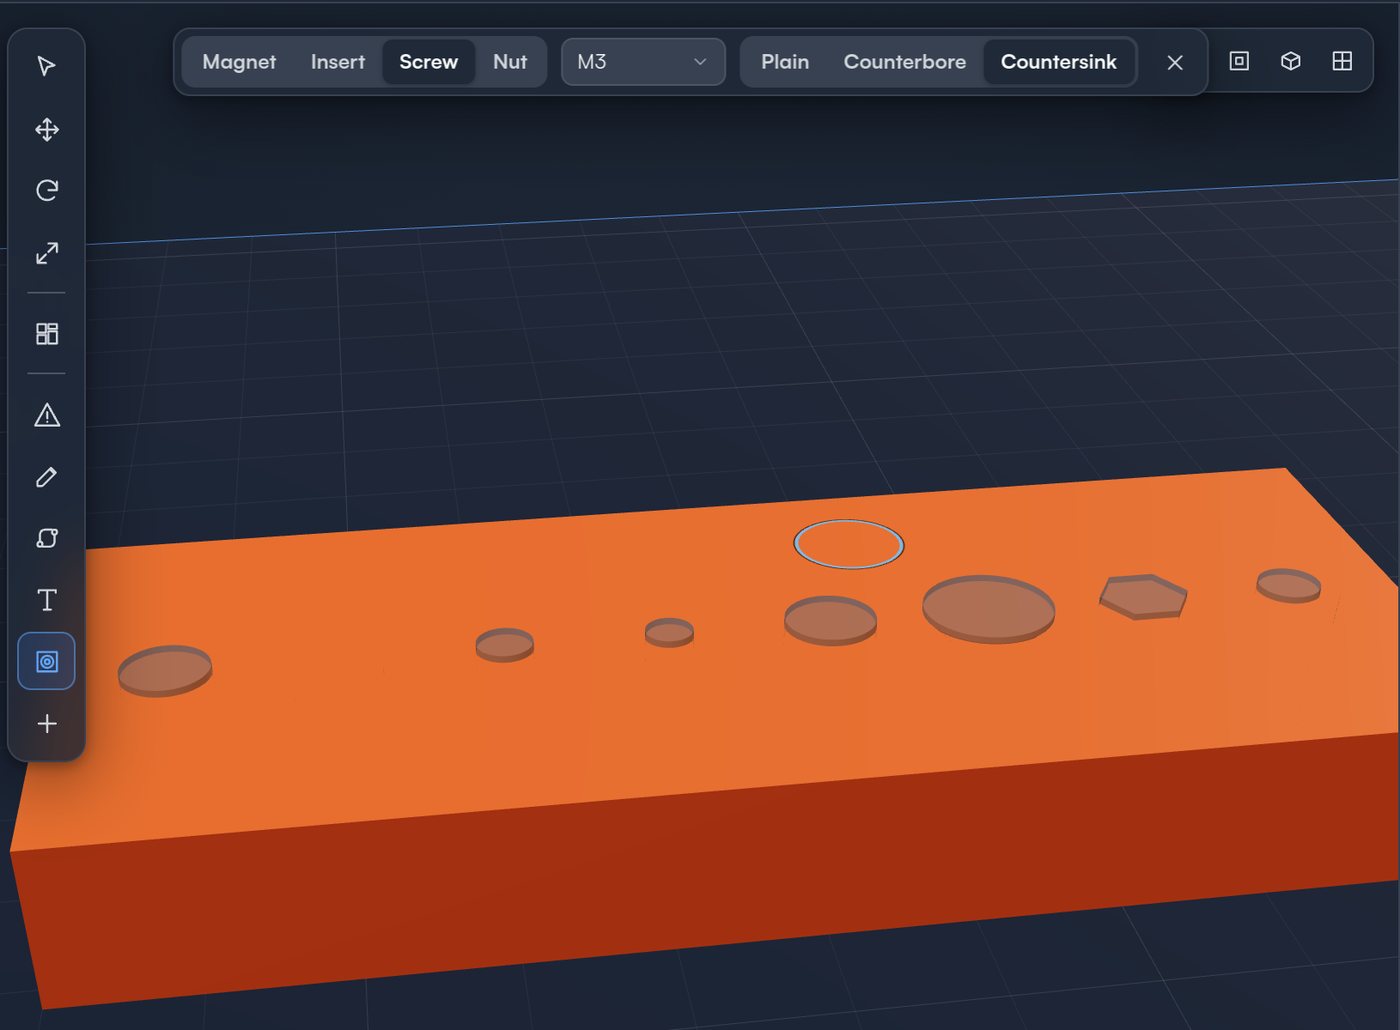
- Each click adds another feature, so a row of four screw holes is four clicks.
- Drag a feature to move it to another spot on the object.
- Click a feature, including an embedded one under its cover, to select it and change it in its panel.
- Press Esc, or click Features again, to turn the tool off.
You can also ask the assistant, for example "put four 6×3 magnets in the bottom, embedded" or "add M3 countersunk screw holes in each corner". It finds the faces and places the features with the same checks.
Magnets
Disc magnets in 3×2, 4×2, 5×2, 6×2, 6×3, 8×2, 8×3, 10×2, 10×3 and 12×3 mm (diameter × height), or type your own Diameter and Height (up to 100 mm).
The pocket is the magnet's diameter plus the fit, and its height plus 0.2 mm:
| Fit | Added across | Example: 6×3 magnet |
|---|---|---|
| Tight | 0.1 mm | Ø6.1 × 3.2 mm |
| Normal | 0.2 mm | Ø6.2 × 3.2 mm |
| Loose | 0.4 mm | Ø6.4 × 3.2 mm |
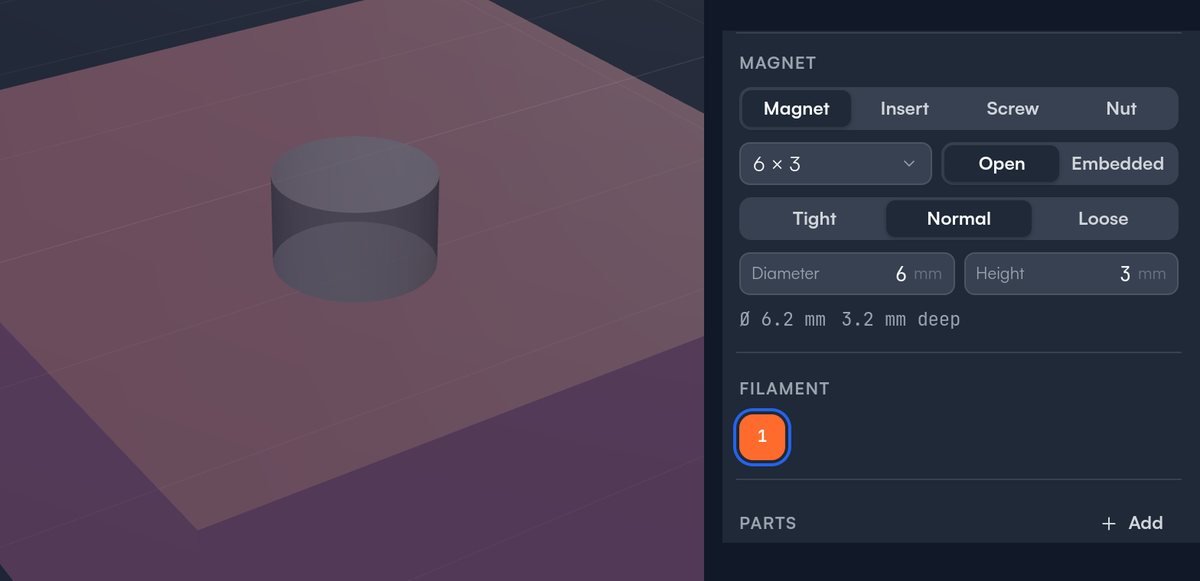
Open
A pocket open at the face. Press or glue the magnet in after printing. An open pocket goes on any face.
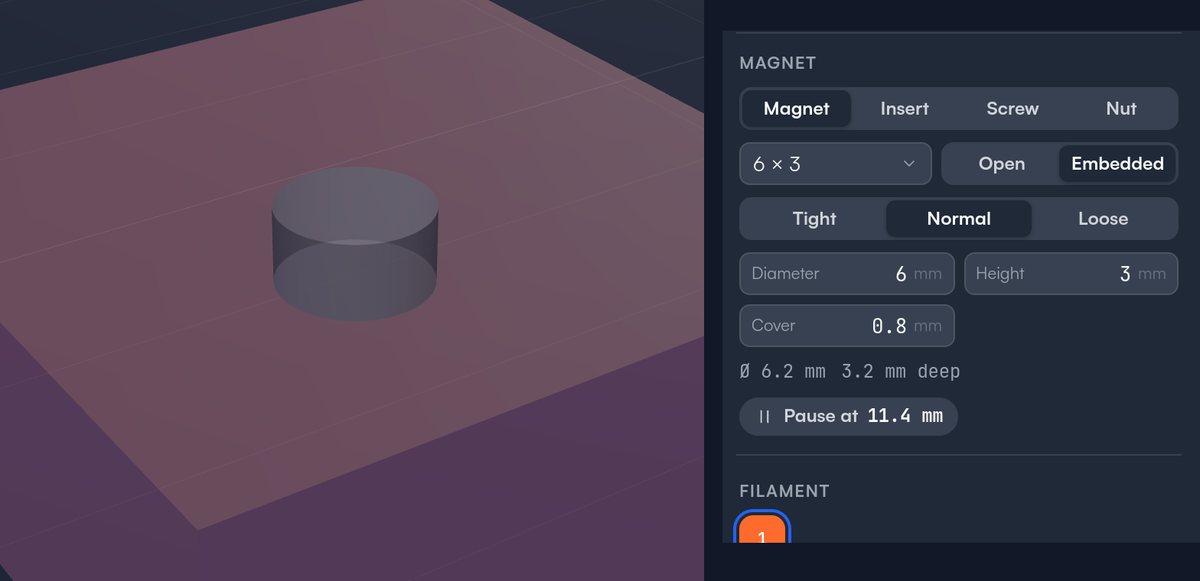
Embedded
A sealed pocket under Cover of material (0.8 mm by default, 0.3 to 50 mm). The printer pauses, you drop the magnet in, and the next layers close over it. See Embedded magnets and nuts.
Heat-set inserts
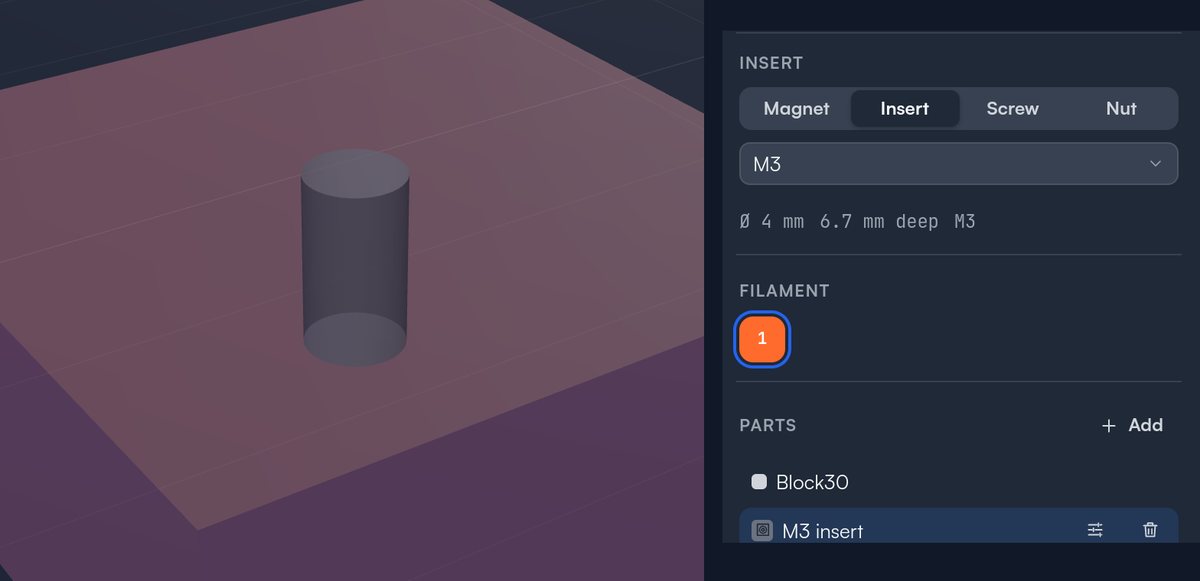
The hole size insert makers give for the common short brass inserts, 1 mm deeper than the insert so the melted plastic has somewhere to go. Press the insert in with a soldering iron.
| Size | Hole diameter | Hole depth |
|---|---|---|
| M2 | 3.2 mm | 4.0 mm |
| M2.5 | 3.6 mm | 5.0 mm |
| M3 | 4.0 mm | 6.7 mm |
| M4 | 5.6 mm | 9.1 mm |
| M5 | 6.4 mm | 10.5 mm |
| M6 | 8.0 mm | 13.7 mm |
Screws
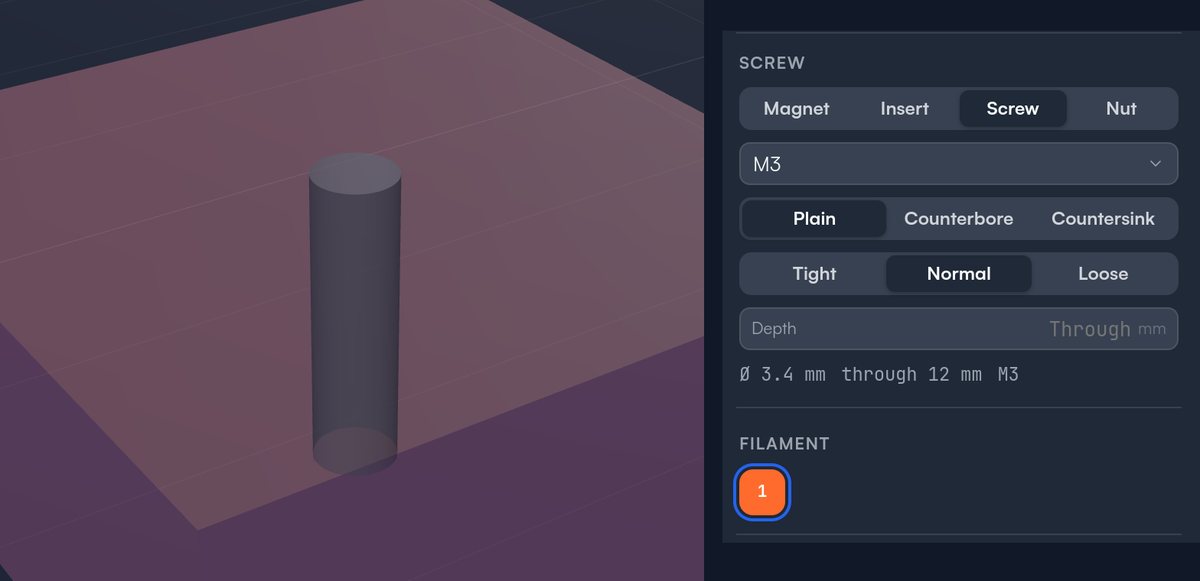
A clearance hole from ISO 273, through the part where you put it. Type a Depth to stop it short, for example for a self-tapping screw; clear the field to make it go through again. Through holes measure the part, so they reach the far side and stop there.
| Size | Tight | Normal | Loose |
|---|---|---|---|
| M2 | 2.2 mm | 2.4 mm | 2.6 mm |
| M2.5 | 2.7 mm | 2.9 mm | 3.1 mm |
| M3 | 3.2 mm | 3.4 mm | 3.6 mm |
| M4 | 4.3 mm | 4.5 mm | 4.8 mm |
| M5 | 5.3 mm | 5.5 mm | 5.8 mm |
| M6 | 6.4 mm | 6.6 mm | 7.0 mm |
Counterbore
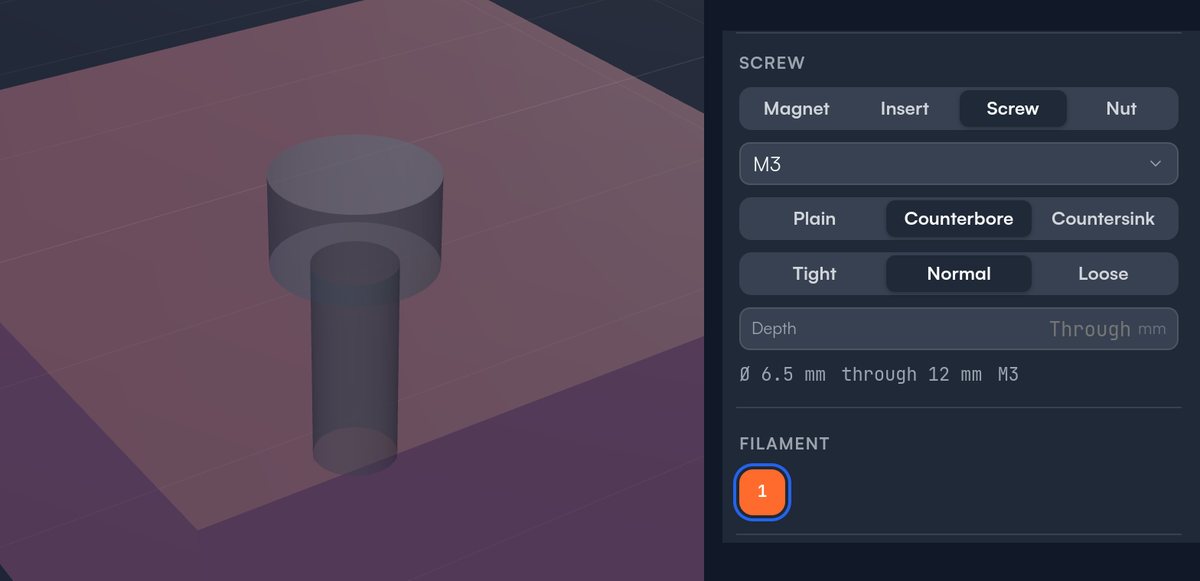
A wide step at the face so a socket-head screw (ISO 4762) sits below the surface: the head's diameter plus 1 mm across, and its height plus 0.3 mm deep.
| Size | M2 | M2.5 | M3 | M4 | M5 | M6 |
|---|---|---|---|---|---|---|
| Step | Ø4.8 × 2.3 | Ø5.5 × 2.8 | Ø6.5 × 3.3 | Ø8 × 4.3 | Ø9.5 × 5.3 | Ø11 × 6.3 |
Countersink
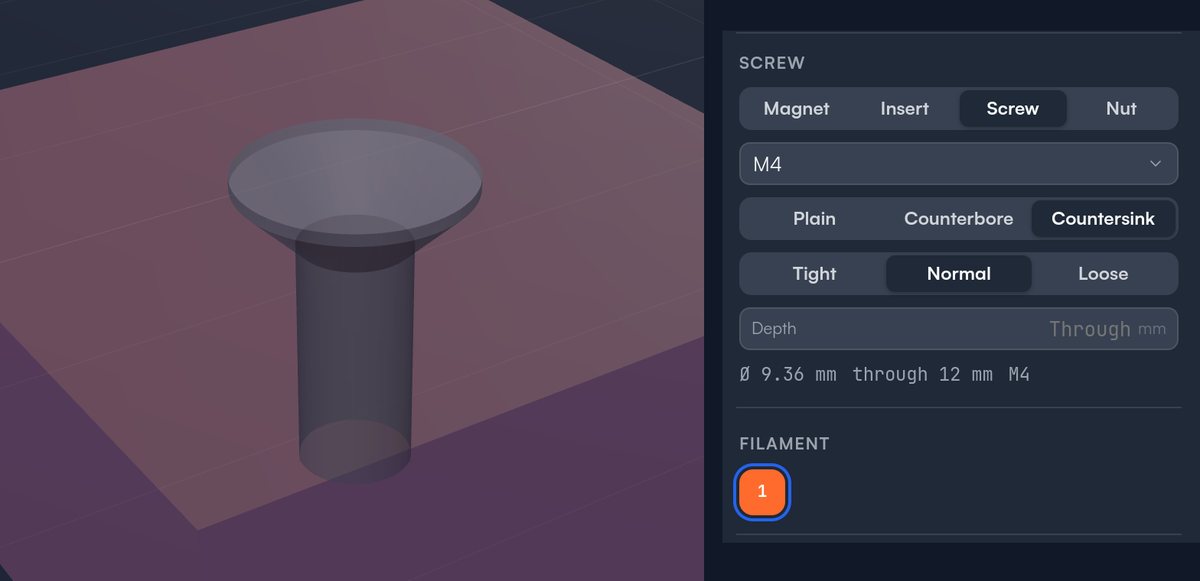
A 90° cone at the face for a flat-head screw (ISO 10642), the head's diameter plus 0.4 mm at the face.
| Size | M2 | M2.5 | M3 | M4 | M5 | M6 |
|---|---|---|---|---|---|---|
| Cone at the face | Ø4.8 | Ø5.9 | Ø7.12 | Ø9.36 | Ø11.6 | Ø13.84 |
Nuts
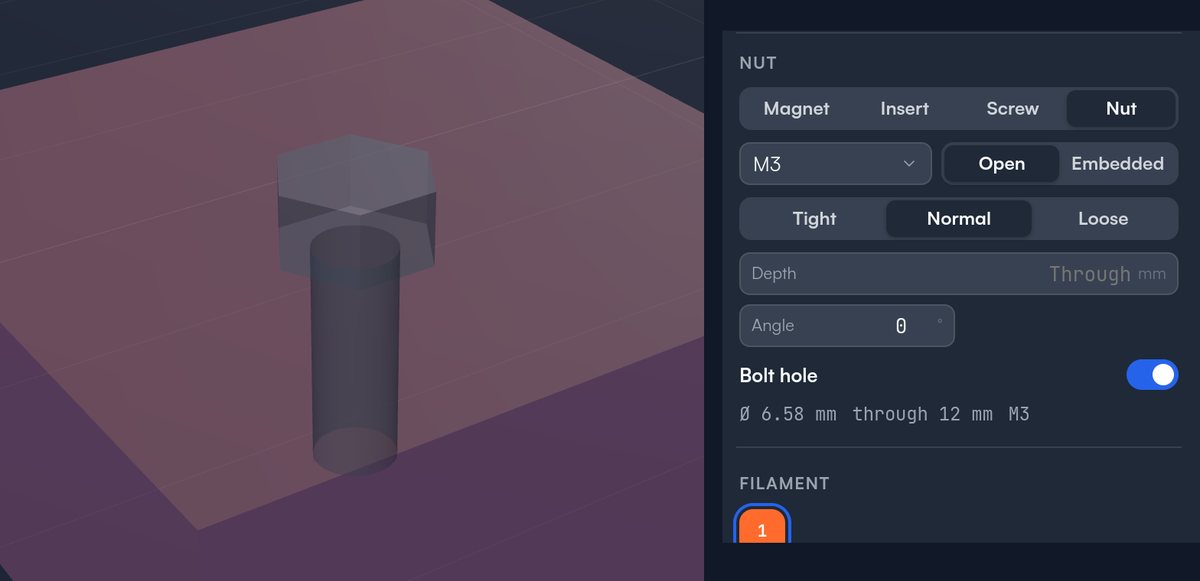
A hex pocket for an ISO 4032 nut: the width across flats plus the fit (as for magnets), and the nut's height plus 0.2 mm. Angle turns the flats. Bolt hole, on by default, adds a Normal clearance hole through the nut and the part.
| Size | Nut across flats × height | Pocket at Normal |
|---|---|---|
| M2 | 4 × 1.6 mm | 4.2 × 1.8 mm |
| M2.5 | 5 × 2 mm | 5.2 × 2.2 mm |
| M3 | 5.5 × 2.4 mm | 5.7 × 2.6 mm |
| M4 | 7 × 3.2 mm | 7.2 × 3.4 mm |
| M5 | 8 × 4.7 mm | 8.2 × 4.9 mm |
| M6 | 10 × 5.2 mm | 10.2 × 5.4 mm |
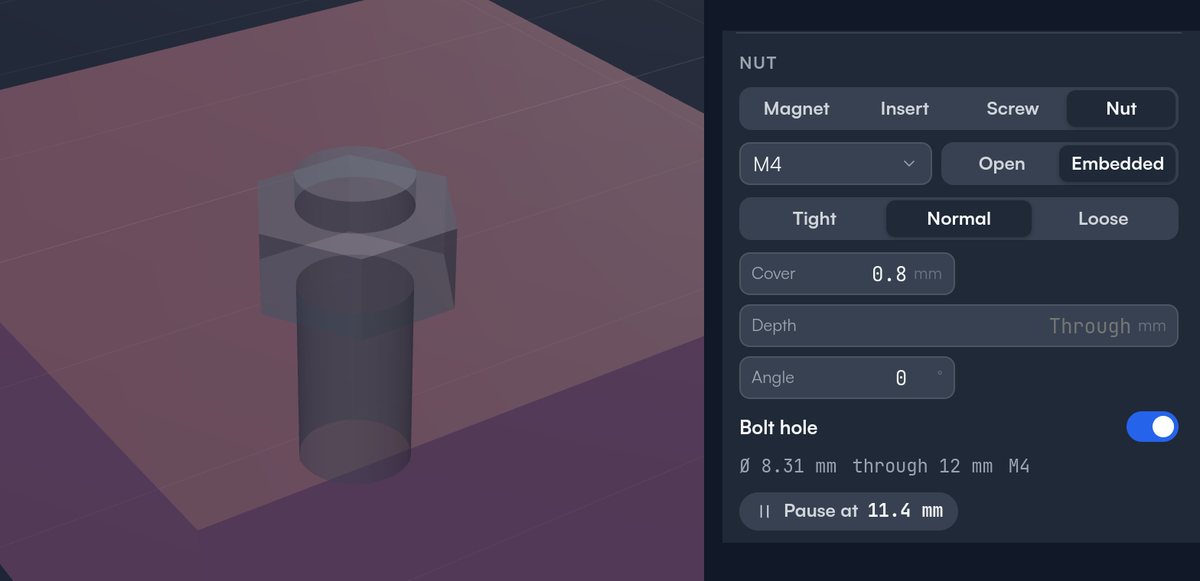
The panel shows the pocket's width across corners, which is what the ring shows (7.2 mm across flats is 8.31 mm across corners).
Open
A nut trap open at the face. Push the nut in after printing; the flats stop it turning.
Embedded
The nut is sealed inside, so it can't fall out or spin, and the bolt hole runs through it. Drop it in at the pause.
Embedded magnets and nuts
An embedded magnet or nut is sealed under the face, with Cover of material over it. When the print reaches the layer that would close the pocket, the printer pauses. Drop the magnet or nut in, then resume, and the next layer bridges over it.
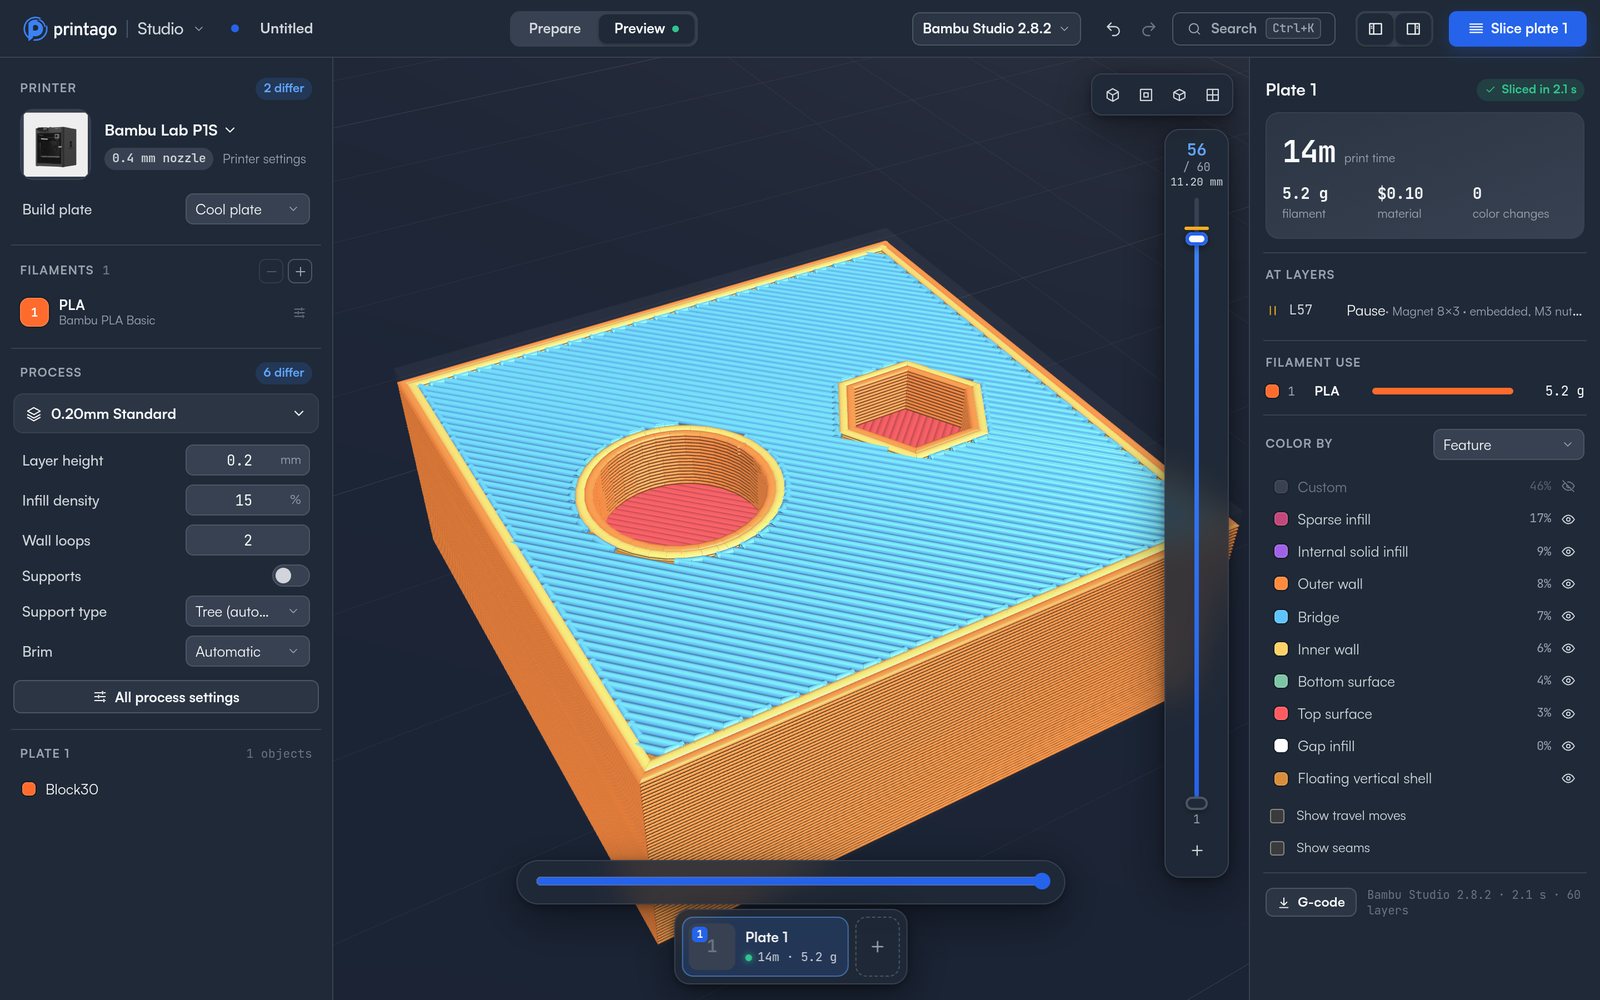
- The panel shows Pause at with the height, before you slice. The pause is in Preview's layer slider and in the At layers list there, named for the feature.
- Pockets that close on the same layer share one pause.
- The pause follows the layer height. Change from 0.2 mm to 0.12 mm layers and it moves to the matching layer on its own.
- The pause goes when you delete the feature or switch it to Open.
- Saved projects carry the pause as a normal printer pause, so Bambu Studio and OrcaSlicer run it as is. When Studio opens the file again, it works the pause out again from the features.
Where features can go
-
Open features go on any face, pointing straight into it.
-
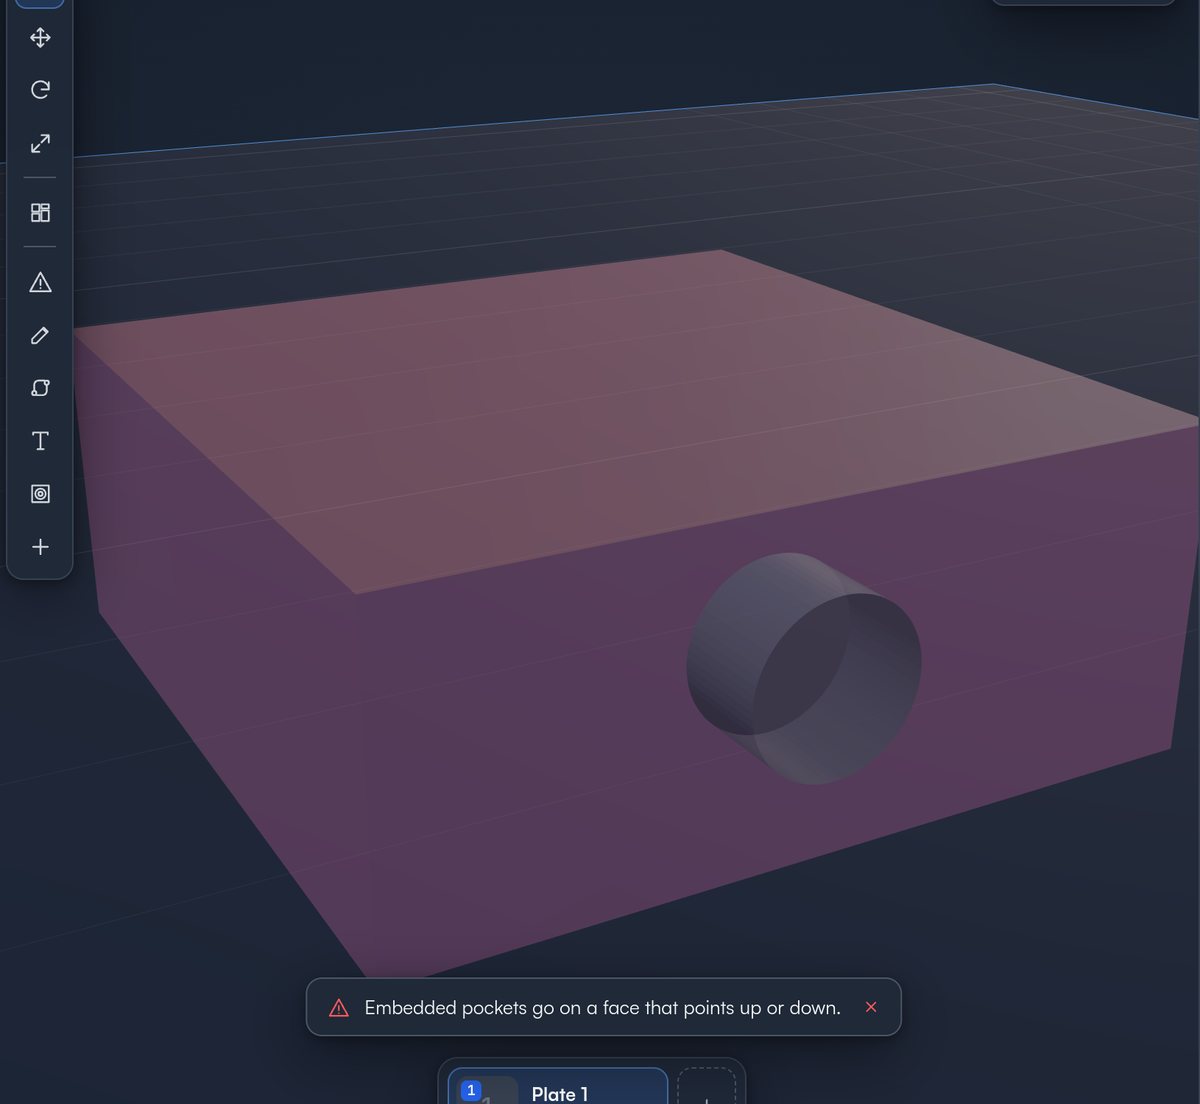
Embedded pockets go on a face that points up or down (within 5°), so the pocket is open from above until it's covered. On a side face, use Open.
-
An embedded pocket needs at least 0.3 mm of material on every side, from the model's outside and from other holes. A pocket that would break through isn't added: "breaks through here: it needs 0.3 mm of material all around. Move it away from the edge or other holes."
-
Features go on the model, not on its text.
What Studio checks before slicing
Studio checks features before it slices a plate or adds it to the queue.
These stop the slice, with what to change:
- An embedded pocket isn't sealed any more.
- The object was turned so a pocket can't be filled from above. Place again in the feature's panel stands it upright again.
- The pocket closes before the first layer is done. Give it more cover.
- The plate's Print order is by object, where a pause can't go. Print by layer.
- The plate has custom G-code at the same layer as a pause.
- The feature was changed from a negative part to a printed part.
These warn, and the plate still slices:
- Less than two layers of cover.
- At these layer heights the pocket closes a little short of the magnet's or nut's height. Add depth or use thinner layers.
- The object was scaled, so the feature was too and the hardware won't fit. Fix size in the feature's panel puts it back to size.
Features are parts
A feature is a Negative part of the object, shown in Parts with its own icon and name, such as "Magnet 6×3 · embedded". Click it to open its panel. Delete it with the trash button. Every add, move and change is one step of undo.
- Moving or rotating the object takes its features with it.
- Mirror puts them on the mirrored side.
- Split and Repair keep them.
- A Cut that misses a feature keeps it whole. A cut through an open feature leaves a plain hole. Studio won't cut through an embedded one.
- Keep features in the object's Size stretches the object and leaves features their size. See Resizing.
Projects you save keep their features editable in Studio. In Bambu Studio and OrcaSlicer they open as ordinary negative parts, with their pauses.