Importing Profiles Manually
In addition to syncing profiles via the Bambu Lab Integration, you can manually import slicer profiles directly from Bambu Studio or OrcaSlicer. This is useful when you want to:
- Import custom profiles that aren't synced to the cloud
- Keep specific profiles without enabling cloud sync
- Import profiles from OrcaSlicer directly, since there can be minor differences
Supported File Formats
Printago supports importing the following file types:
| Format | Description |
|---|---|
.bbscfg | Bambu Studio configuration bundle |
.bbsflmt | Bambu Studio filament preset |
.orca_printer | OrcaSlicer printer preset |
.orca_filament | OrcaSlicer filament preset |
.zip | ZIP archive containing any of the above |
Step 1: Export Profiles from Your Slicer
Exporting from Bambu Studio and OrcaSlicer
The instructions for Bambu Studio and OrcaSlicer are essentially the same.
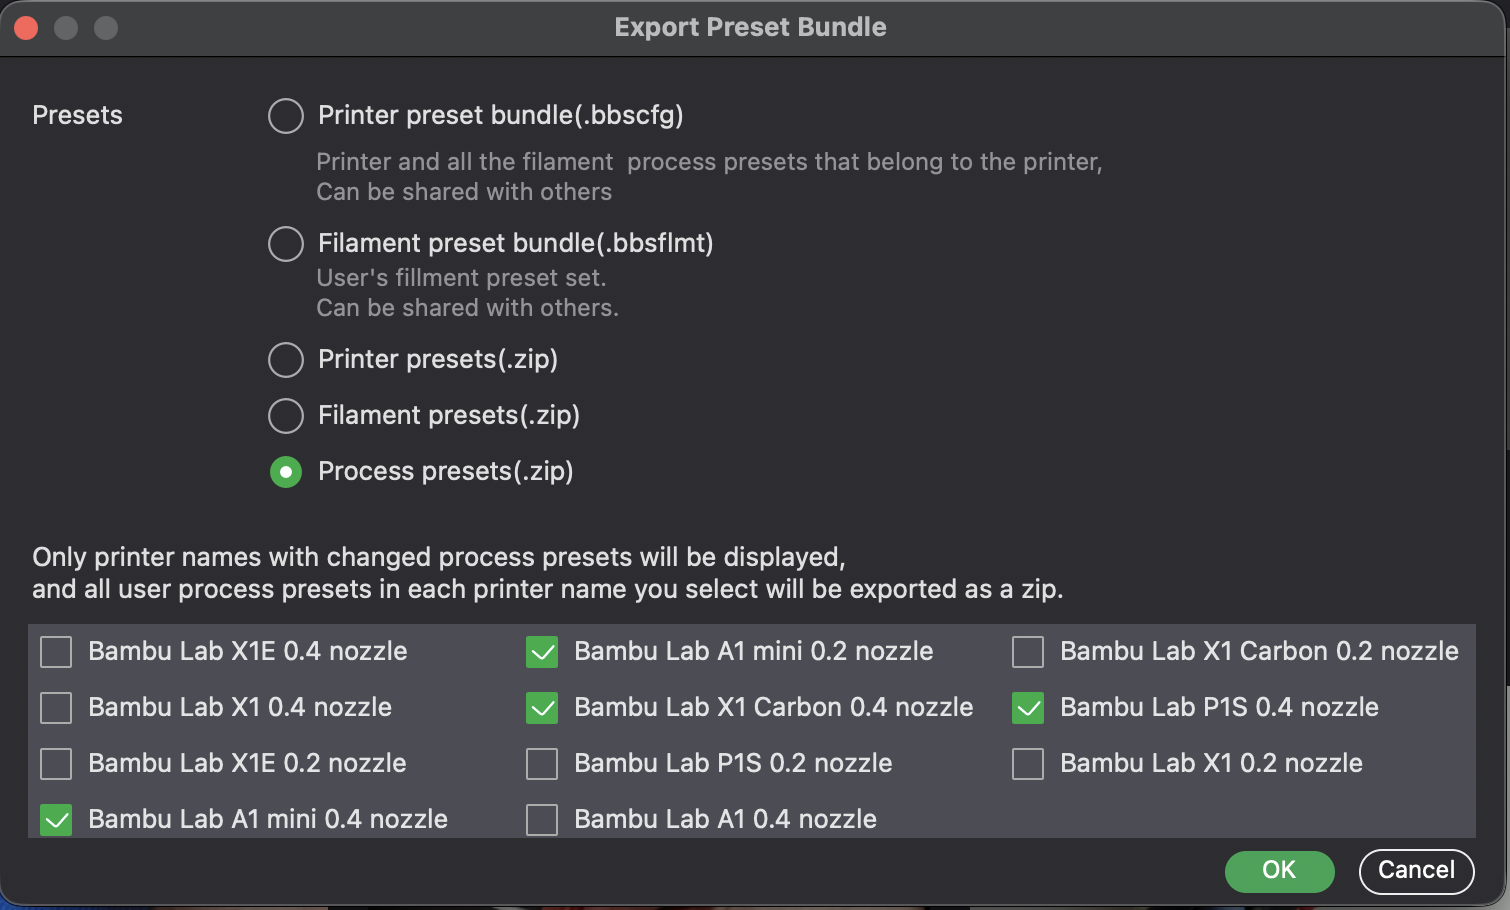
- Open Bambu Studio and go to the File menu
- Select Export > Export Preset Bundle...
- Choose which profiles to export (machine, filament, and/or process profiles)
- Save the exported file(s) to your computer
Step 2: Upload to Printago
Navigate to Printing > Profiles and click Import Profiles (or go directly to /profiles/new).
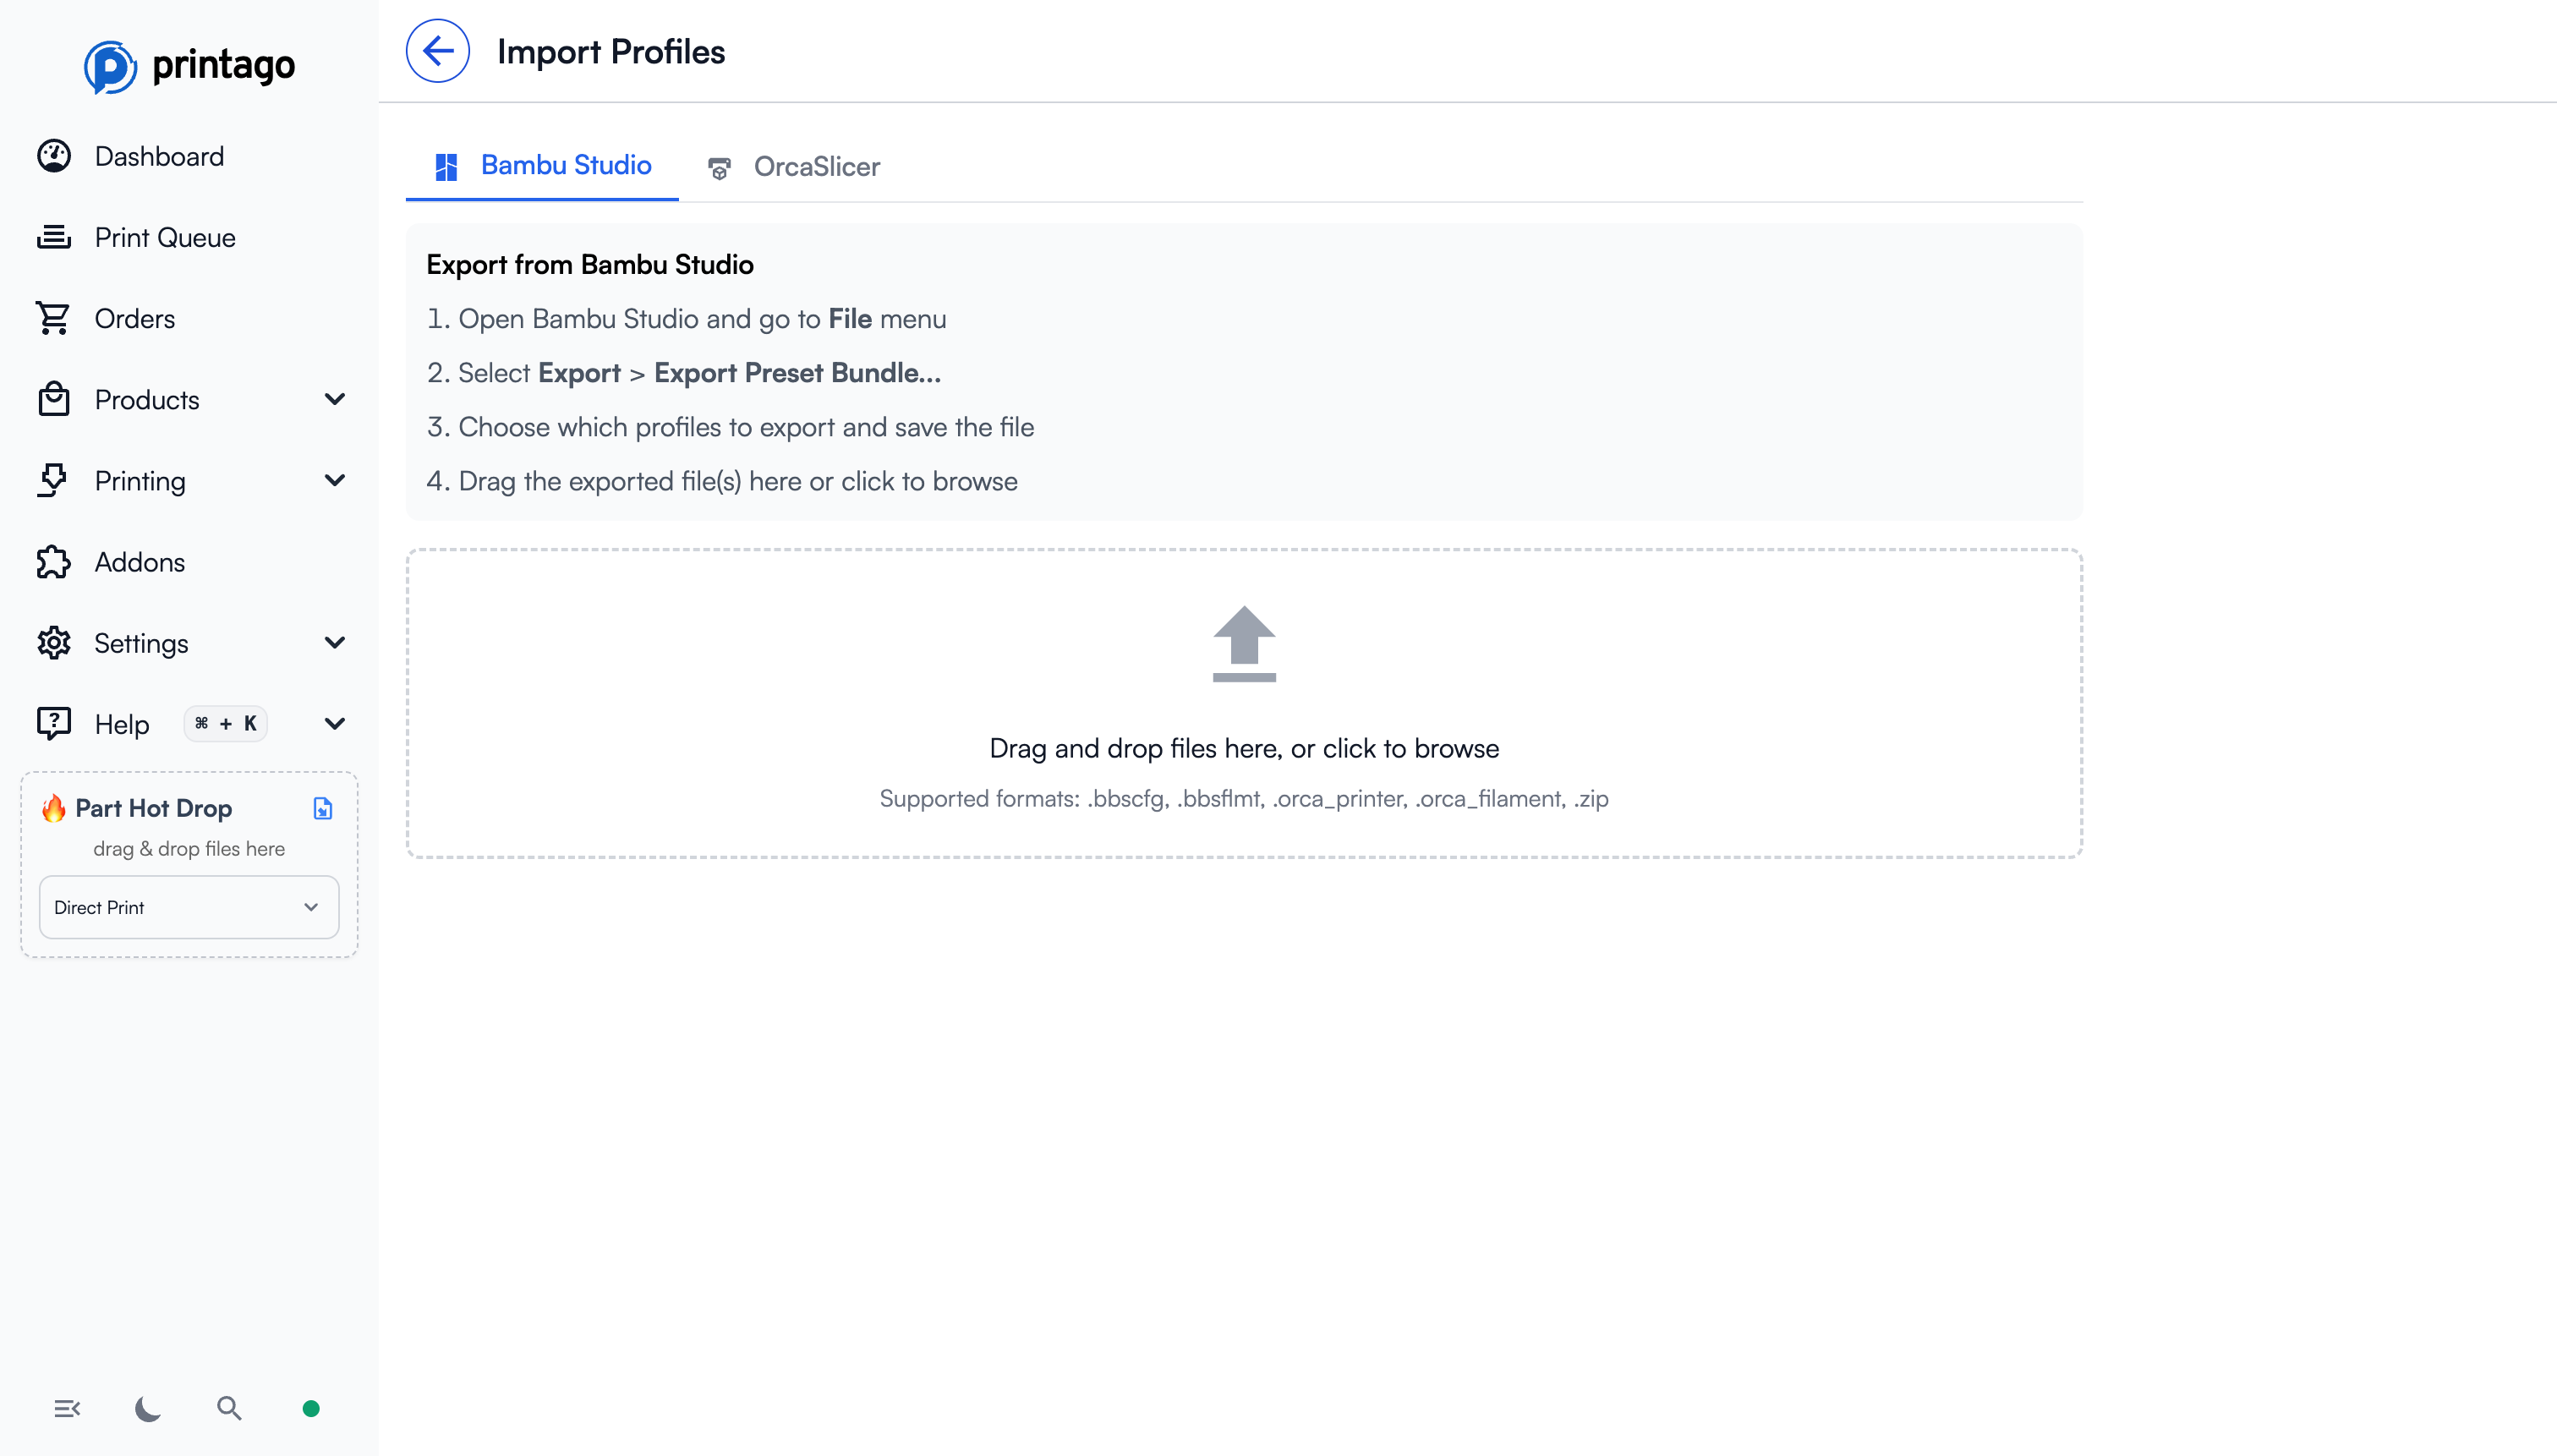
You can upload files in two ways:
- Drag and drop files directly onto the upload zone
- Click to browse and select files from your computer
You can upload multiple files at once, including ZIP archives containing multiple presets. Printago will parse all supported files and extract the profiles automatically. If the same profile appears in multiple files, only the first occurrence is used.
Step 3: Select Profiles to Import
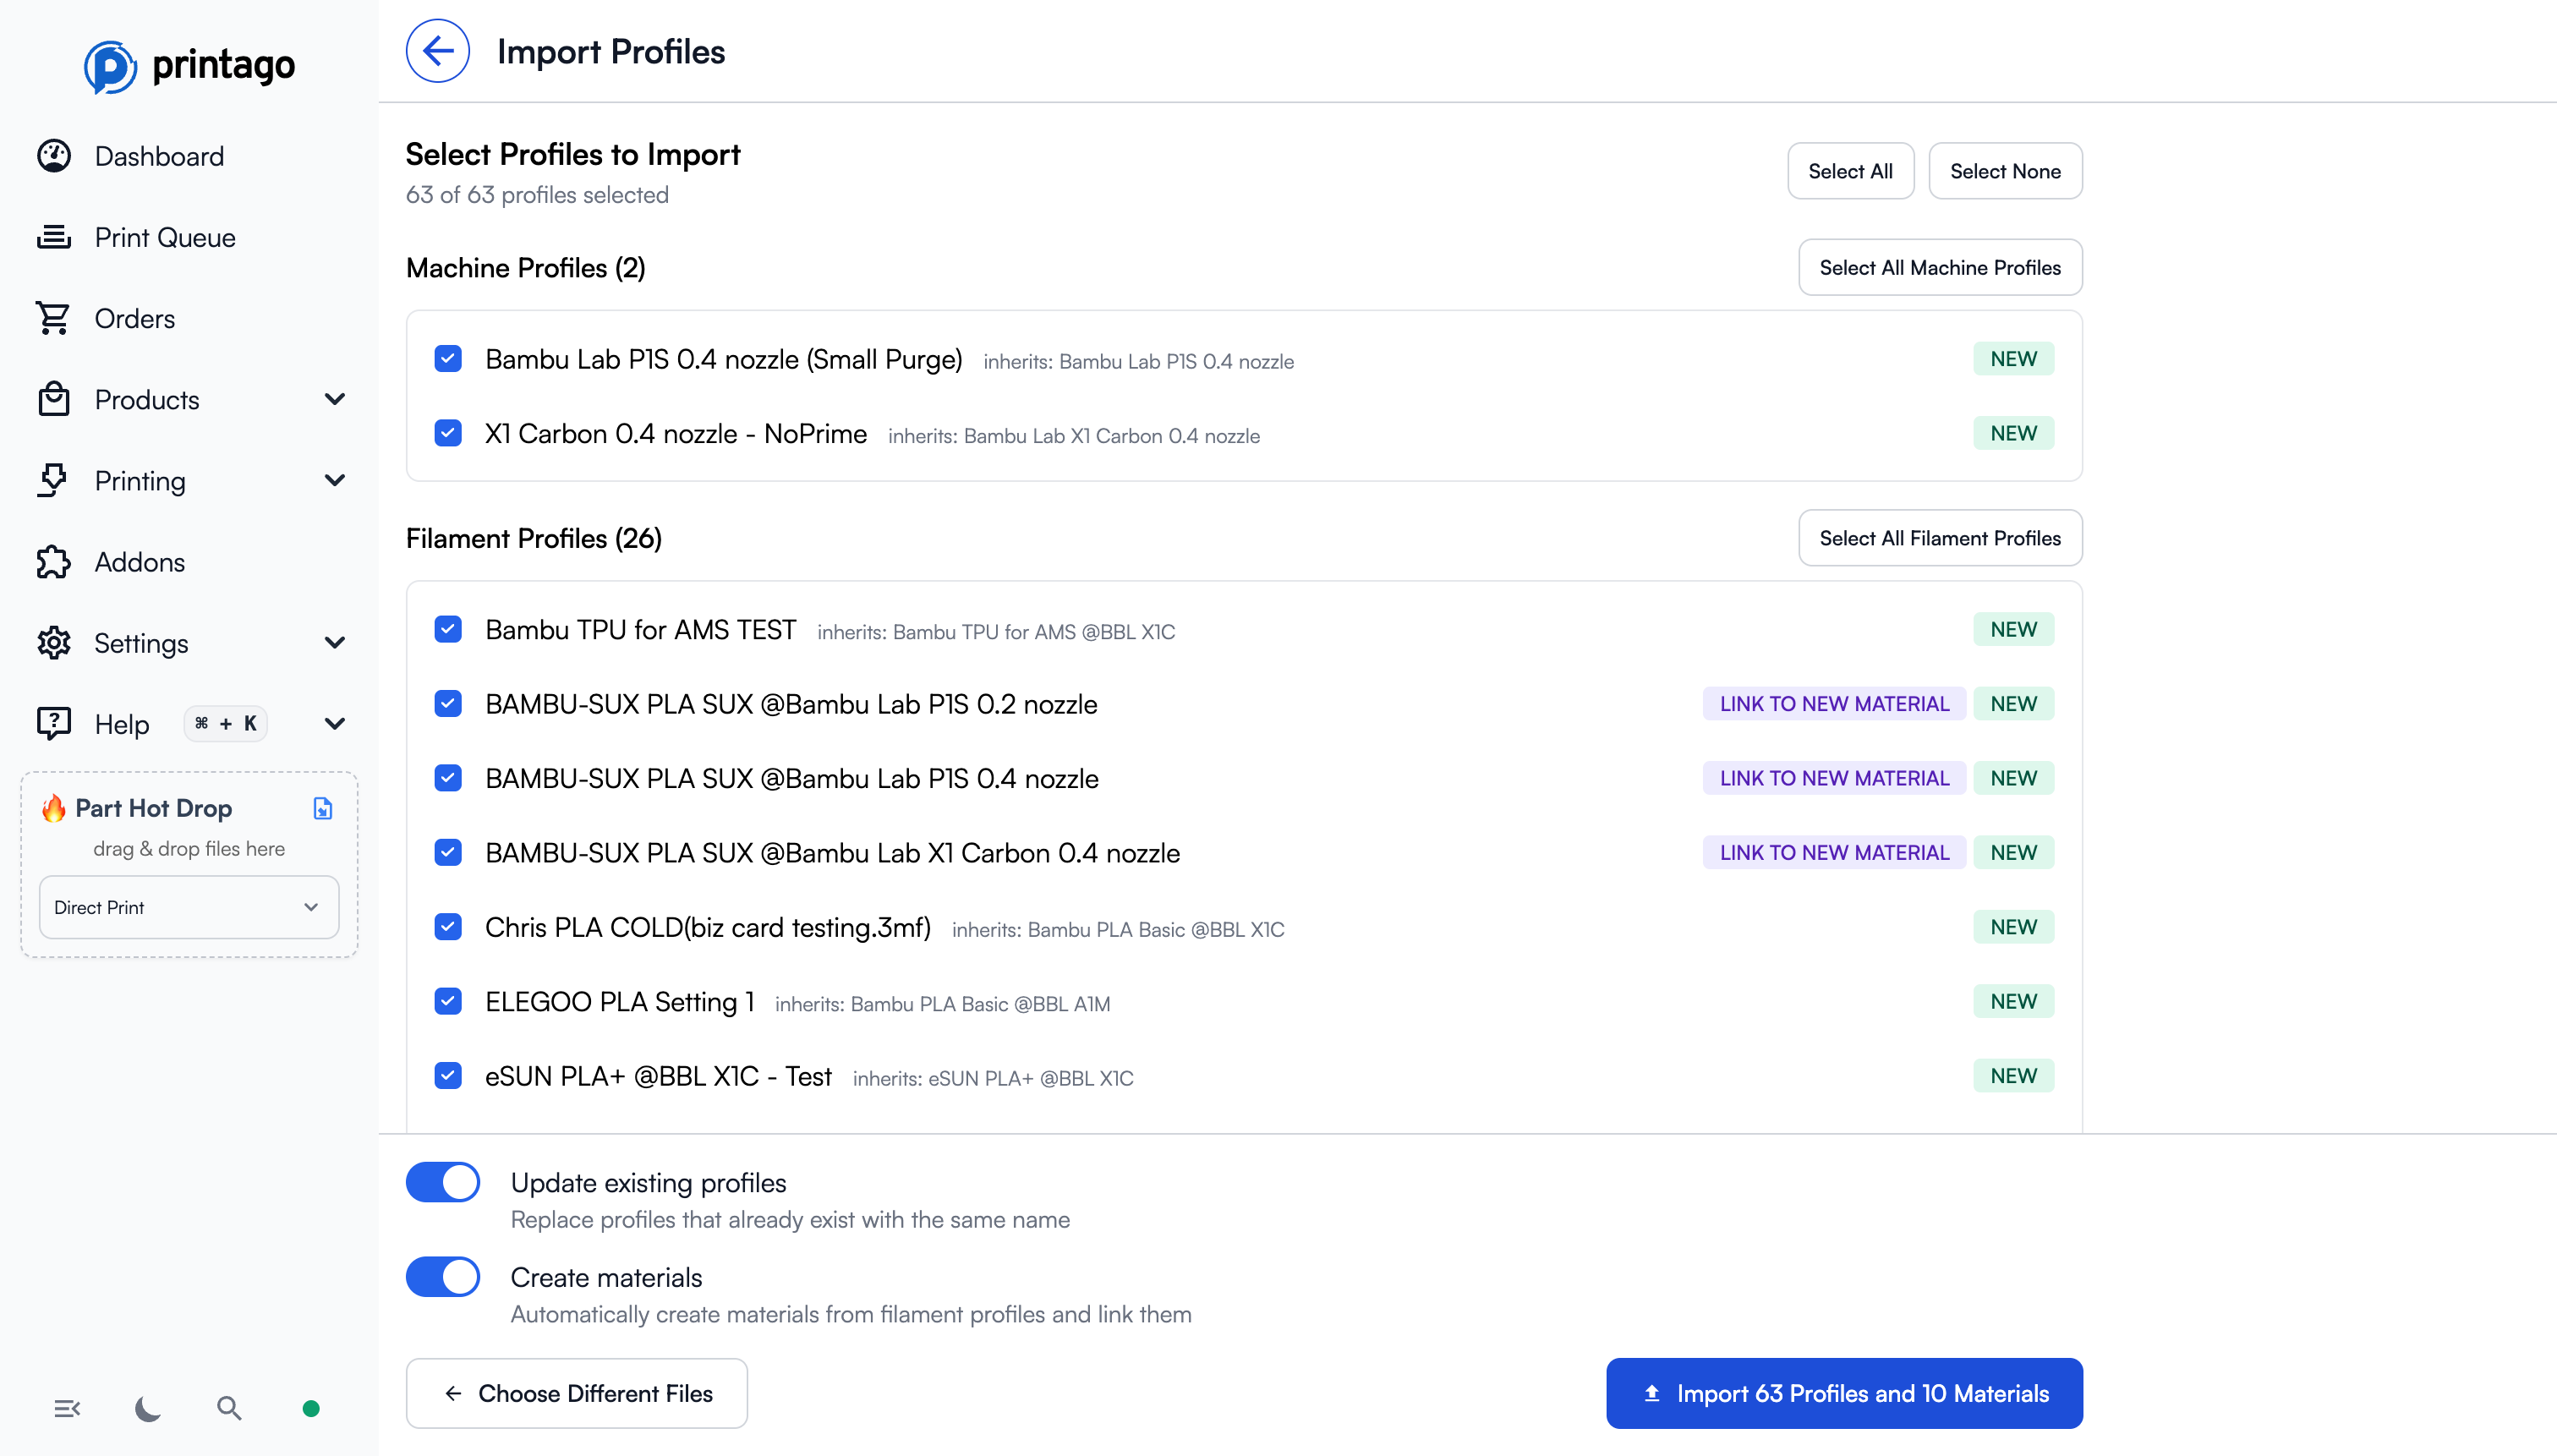
After uploading, Printago parses the files and displays all discovered profiles organized by type:
Profile Categories
Profiles are grouped into three categories:
- Machine Profiles - Printer-specific settings (bed size, nozzle configuration, etc.)
- Filament Profiles - Material settings (temperatures, speeds, cooling, etc.)
- Process Profiles - Print quality settings (layer height, infill, supports, etc.)
Profile Status Badges
Each profile shows a status badge:
| Badge | Meaning |
|---|---|
| New | This profile doesn't exist in Printago yet |
| Update | A profile with this name already exists and will be updated |
| No Change | The profile is identical to an existing one (cannot be selected) |
| Link to New Material | This filament profile will be linked to the custom material after creation |
Selection Controls
- Select All / Select None - Toggle all selectable profiles
- Select All [Type] Profiles - Select all profiles of a specific type
- Individual checkboxes to select specific profiles
New Materials Section
When importing filament profiles, Printago can automatically create corresponding materials in your inventory. The New Materials section shows:
- Material name and type (PLA, PETG, etc.)
- Material identifier (used for AMS matching)
- Compatible printer models
Import Options
At the bottom of the page, you'll find two toggles:
- Update existing profiles - When enabled, profiles with matching names will be replaced with the imported version. When disabled, only new profiles are imported.
- Create materials - When enabled, new materials are automatically created from filament profiles and linked to them. This is useful for AMS compatibility and ease of importing your custom materials.
Step 4: Complete Import
Click the Import button to import your selected profiles. You'll see a summary showing:
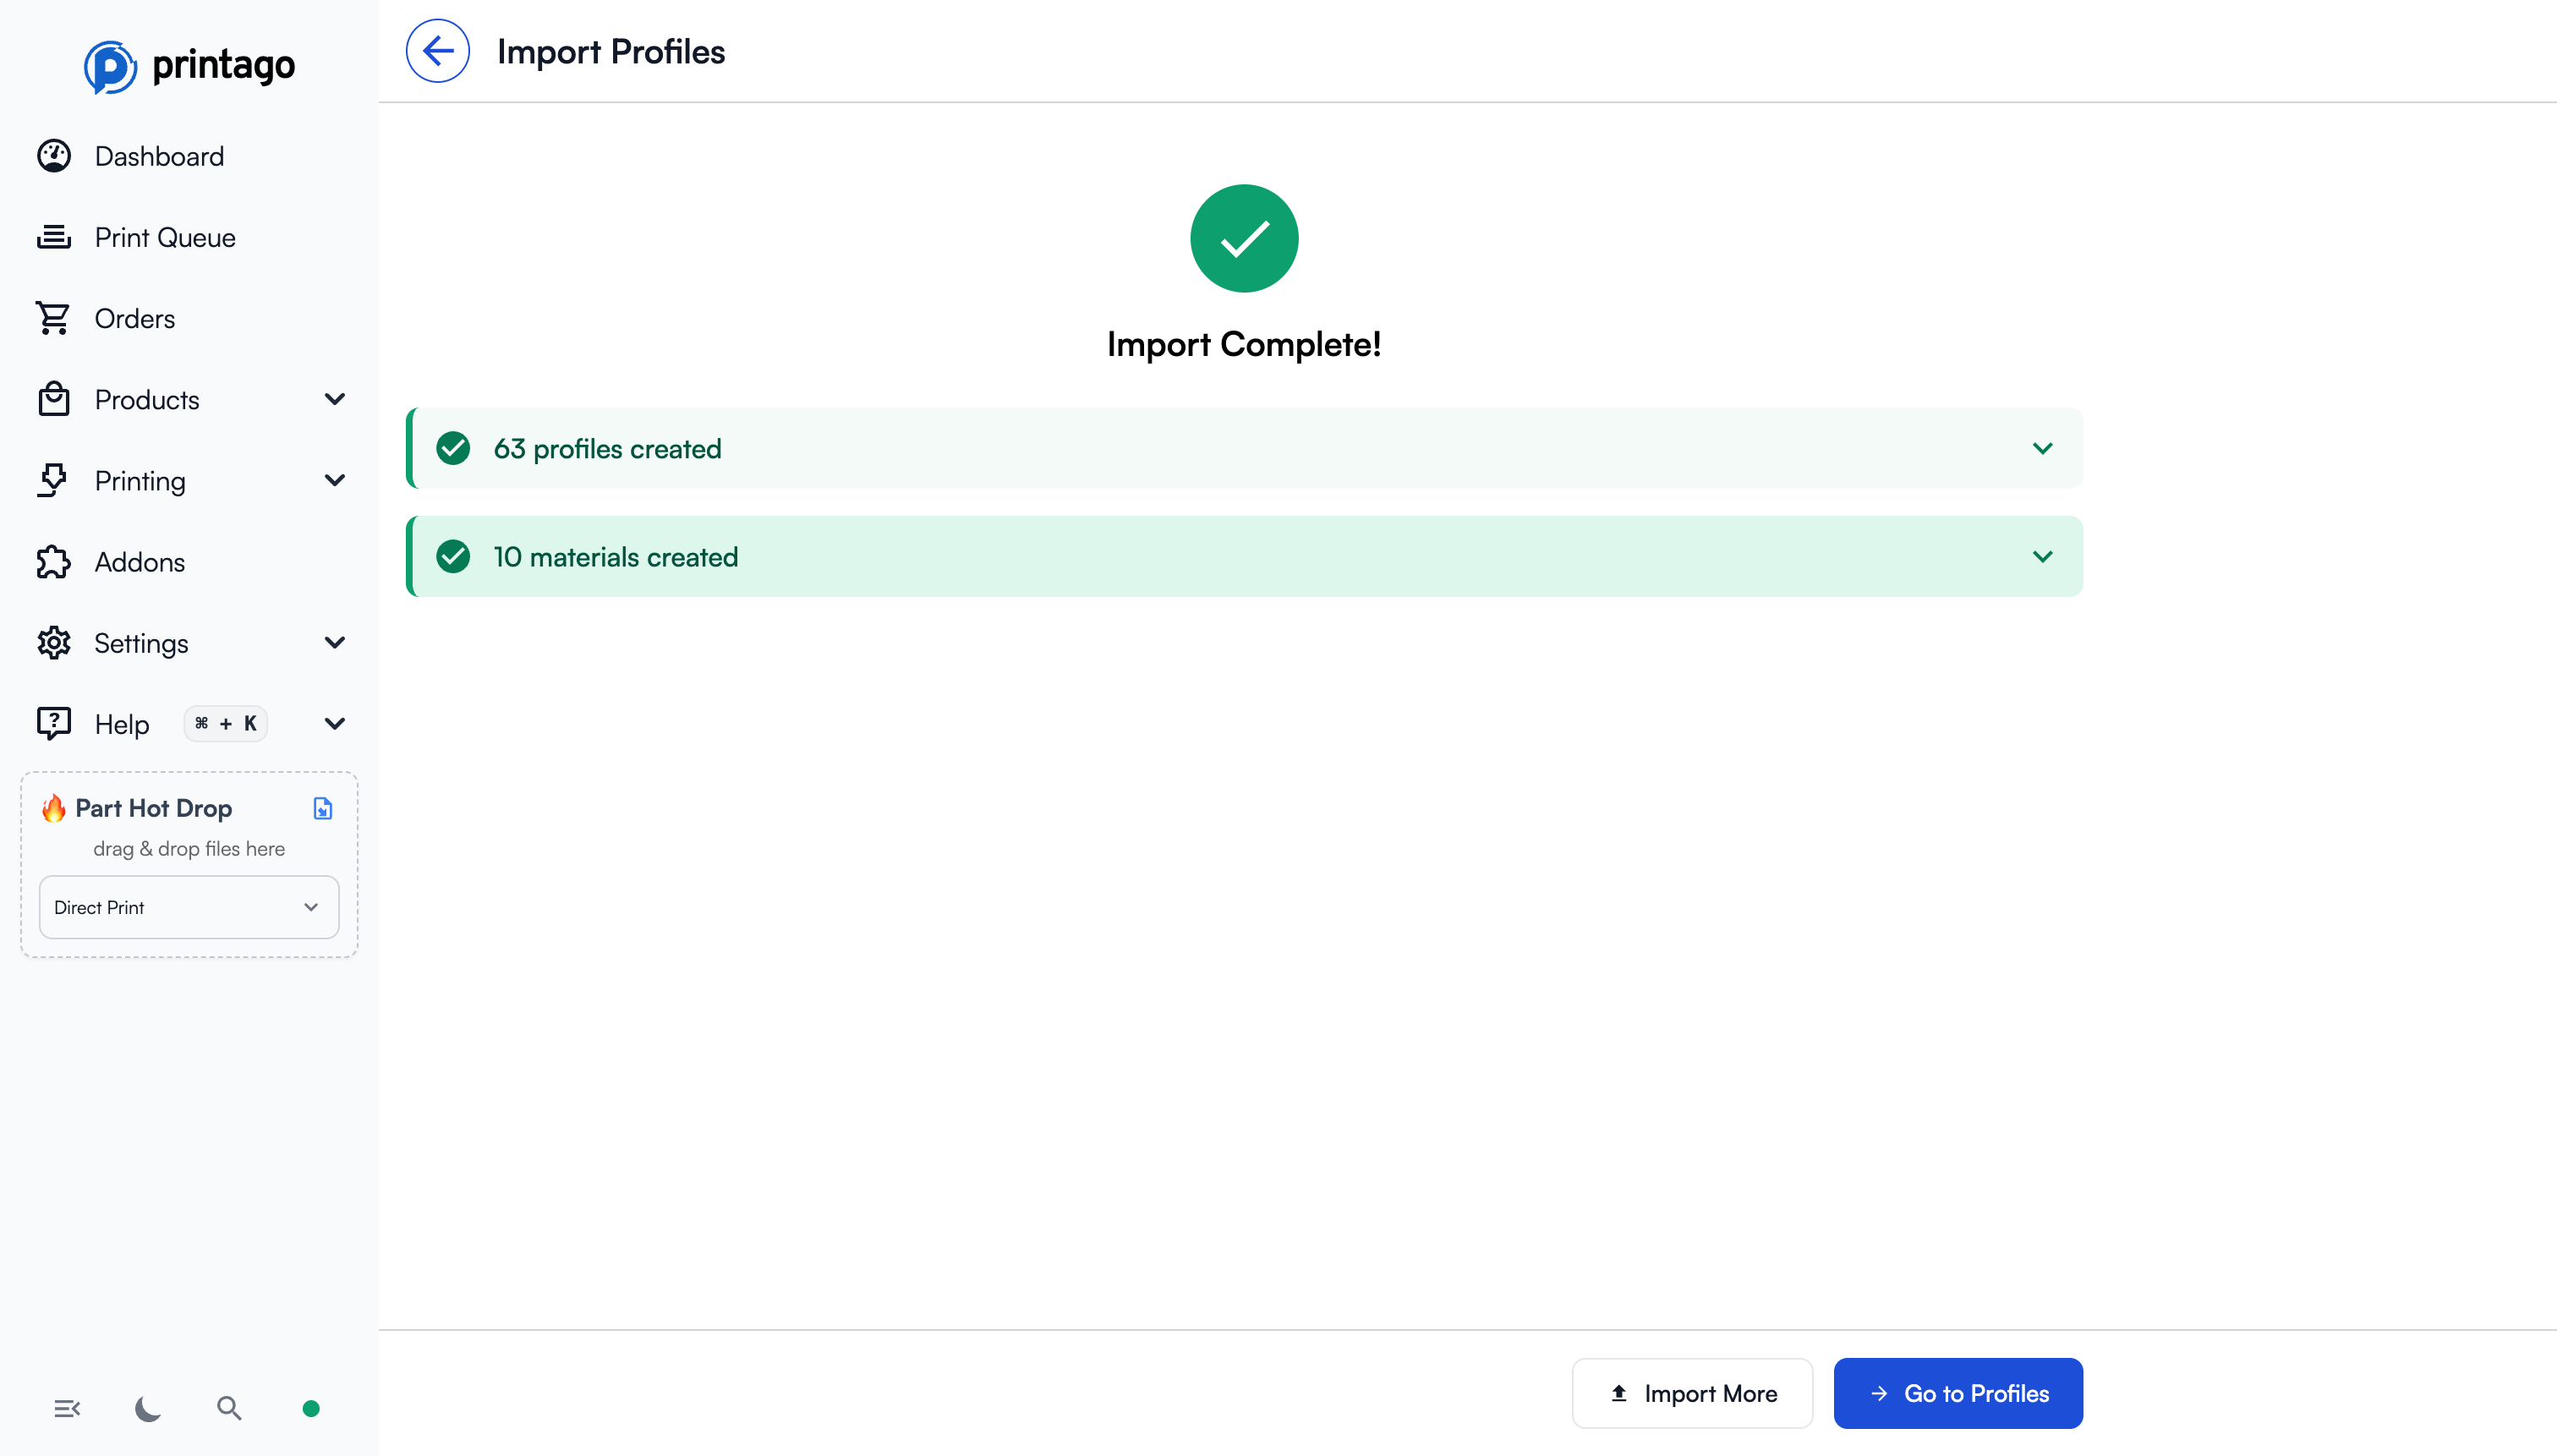
- Number of profiles created
- Number of profiles updated (if any)
- Number of materials created (if enabled)
From here you can:
- Import More - Start another import
- Go to Profiles - View your imported profiles
Tips
- Bulk Import: You can drag and drop entire folders of preset files, and Printago will recursively find and parse all supported files.
- Duplicate Handling: If the same profile appears in multiple files, only the first occurrence is used.
- Profile Inheritance: Profiles that inherit from built-in Bambu/Orca profiles will show the parent profile name for reference.
- Filament Profile Linking: When you import filament profiles with "Create materials" enabled, the profiles are automatically linked to the corresponding material.