WooCommerce Integration
Integrations require a Commercial subscription. Learn more
Key Concepts
The WooCommerce integration connects your WordPress store to Printago so paid orders turn into print jobs without retyping anything. When a customer checks out, your store tells Printago right away. Printago imports the order, matches each product's SKU to your Printago SKUs, and (if you turn on auto-print) queues the jobs for your printers.
You connect by approving Printago from your own WordPress admin, the same way you would approve any other WooCommerce app. Printago never sees your WordPress password, and you can connect several WooCommerce stores to one Printago store.
What You Get
- Orders import within seconds of payment, with a backup check every 3 hours in case your host delays a notification
- Automatic SKU matching, including variable products (Color, Material, Size and so on)
- Automatic queueing (optional) for newly imported orders
- Cancellations and refunds in WooCommerce cancel the order in Printago
- Auto-close (optional) when you mark the order completed in WooCommerce
- Multiple WooCommerce stores in one Printago store
- On-demand Sync Orders whenever you want to check for new orders right now
Before You Start
- You are an administrator of your WordPress site
- Your store uses https and runs WooCommerce 3.5 or newer
- WordPress permalinks are not set to "Plain" (Settings → Permalinks in your WordPress admin)
- The WooCommerce REST API is reachable. Some security plugins and firewalls block
/wp-json; if yours does, allow it for Printago - Your WooCommerce SKUs match SKUs in Printago (see SKU Matching)
Connect WooCommerce to Printago
1. Open the WooCommerce add-on
In Printago, open Marketplace, find WooCommerce, and click Manage.
2. Enter your store URL
Click Connect WooCommerce Store and enter the address of your store, for example https://shop.yourstore.com. Then click Continue to your store.
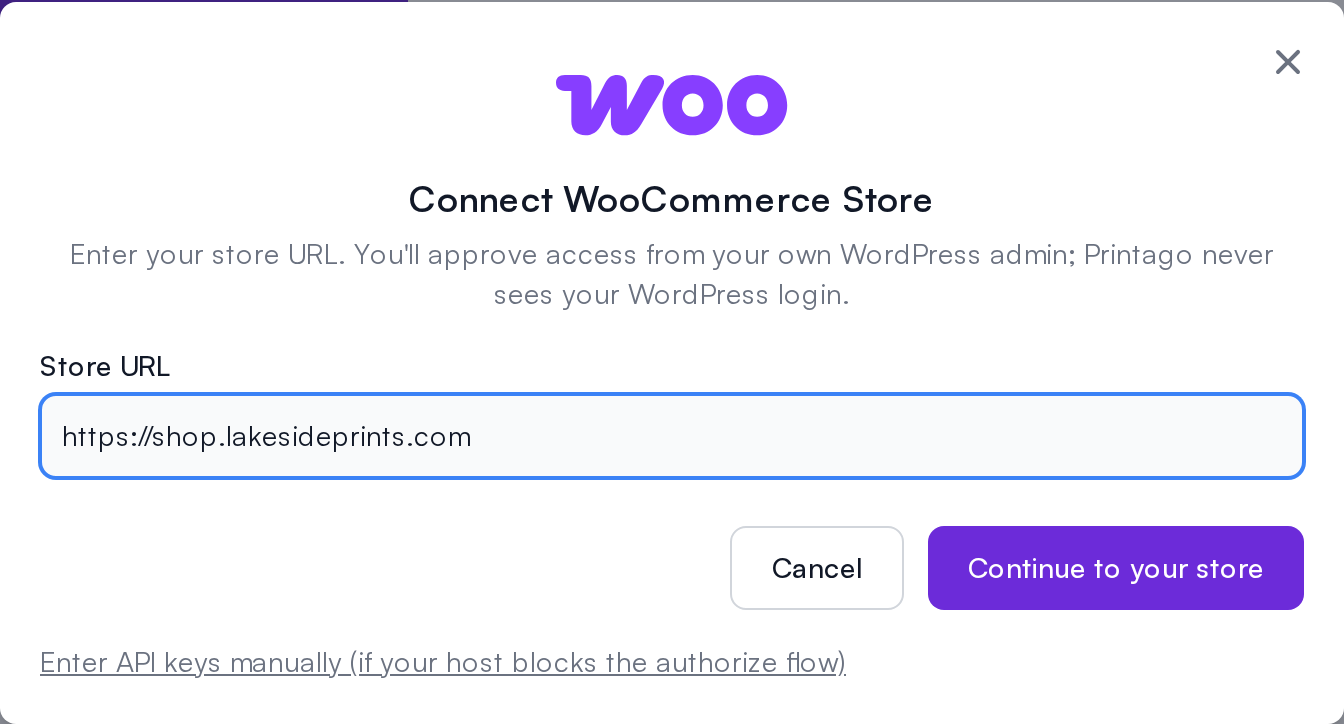
3. Approve Printago on your store
A window opens on your own WordPress site. Log in if asked, check the details, and click Approve.
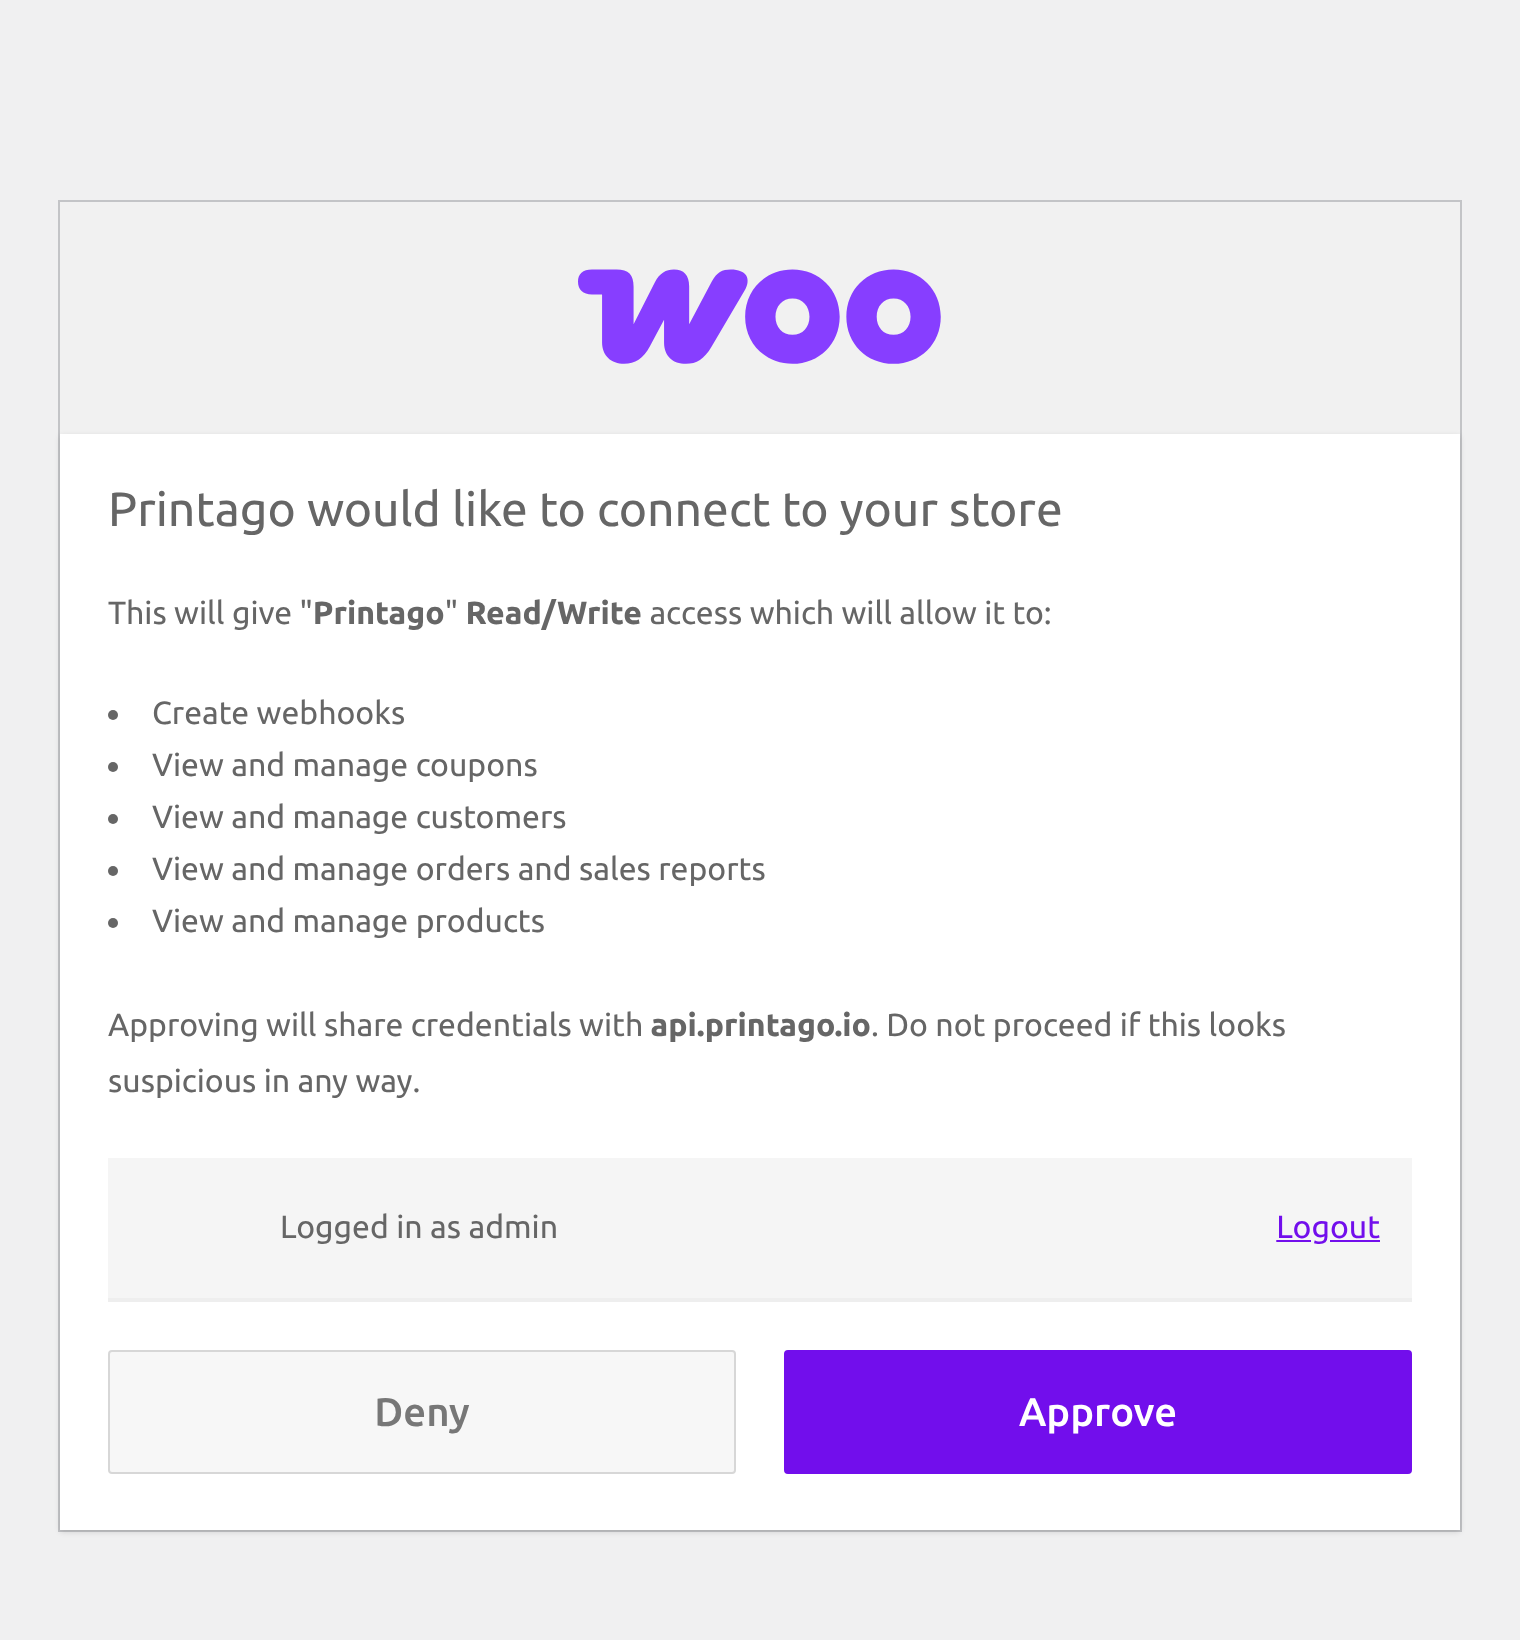
Printago asks for Read/Write access. It reads your orders, and it writes only the two webhooks that tell it about new and updated orders. The screen names api.printago.io as the address your keys are sent to. If it names anything else, don't approve.
4. Done
Your store creates API keys and sends them straight to Printago, then shows a confirmation. The window closes on its own.
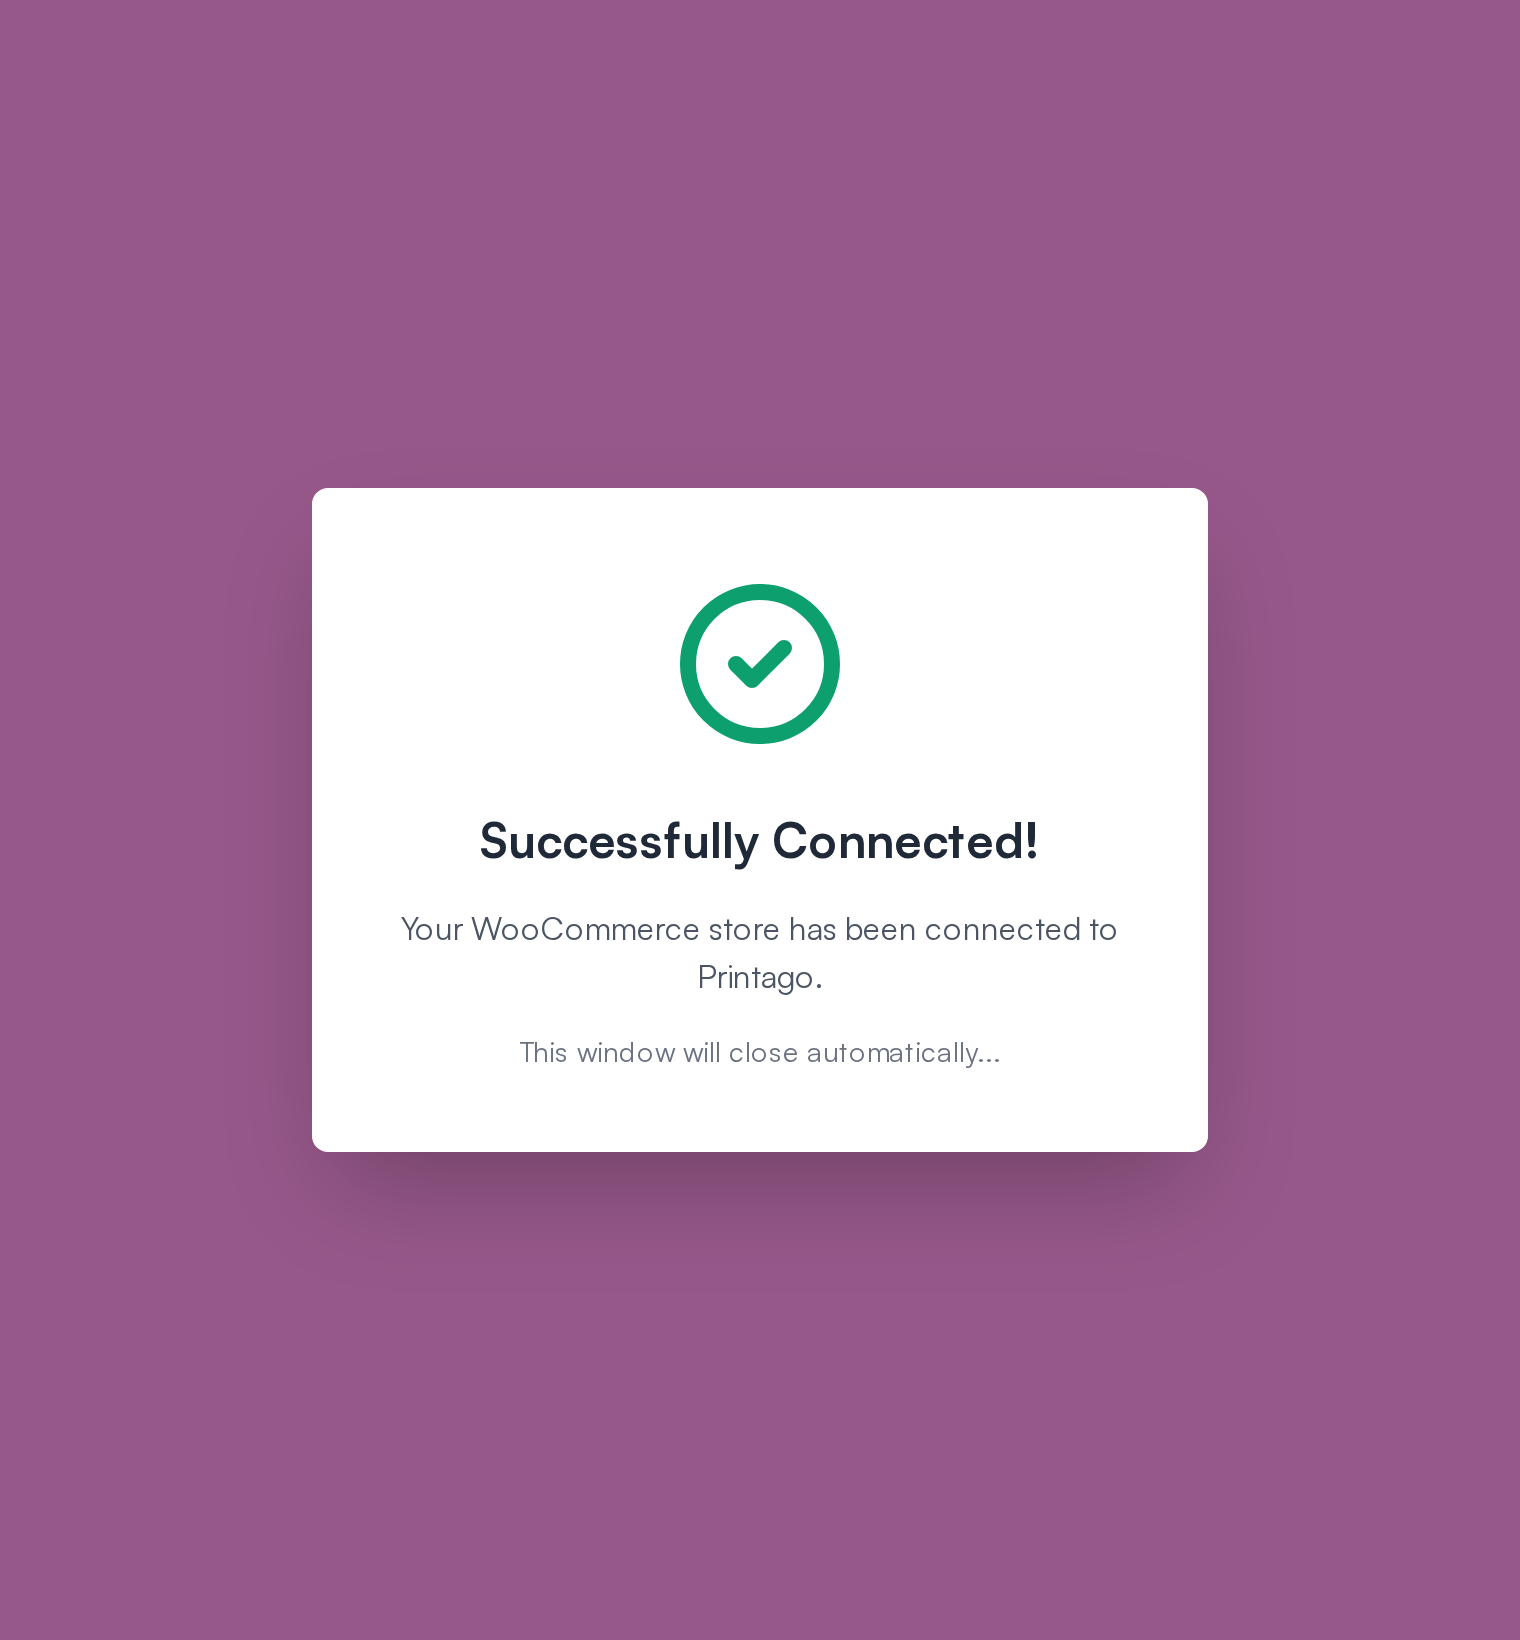
Printago checks that the keys work, registers its webhooks on your store, and shows the store as Connected.
Connecting with API keys instead
Some hosts block the approval window. If yours does, create keys yourself and paste them in:
-
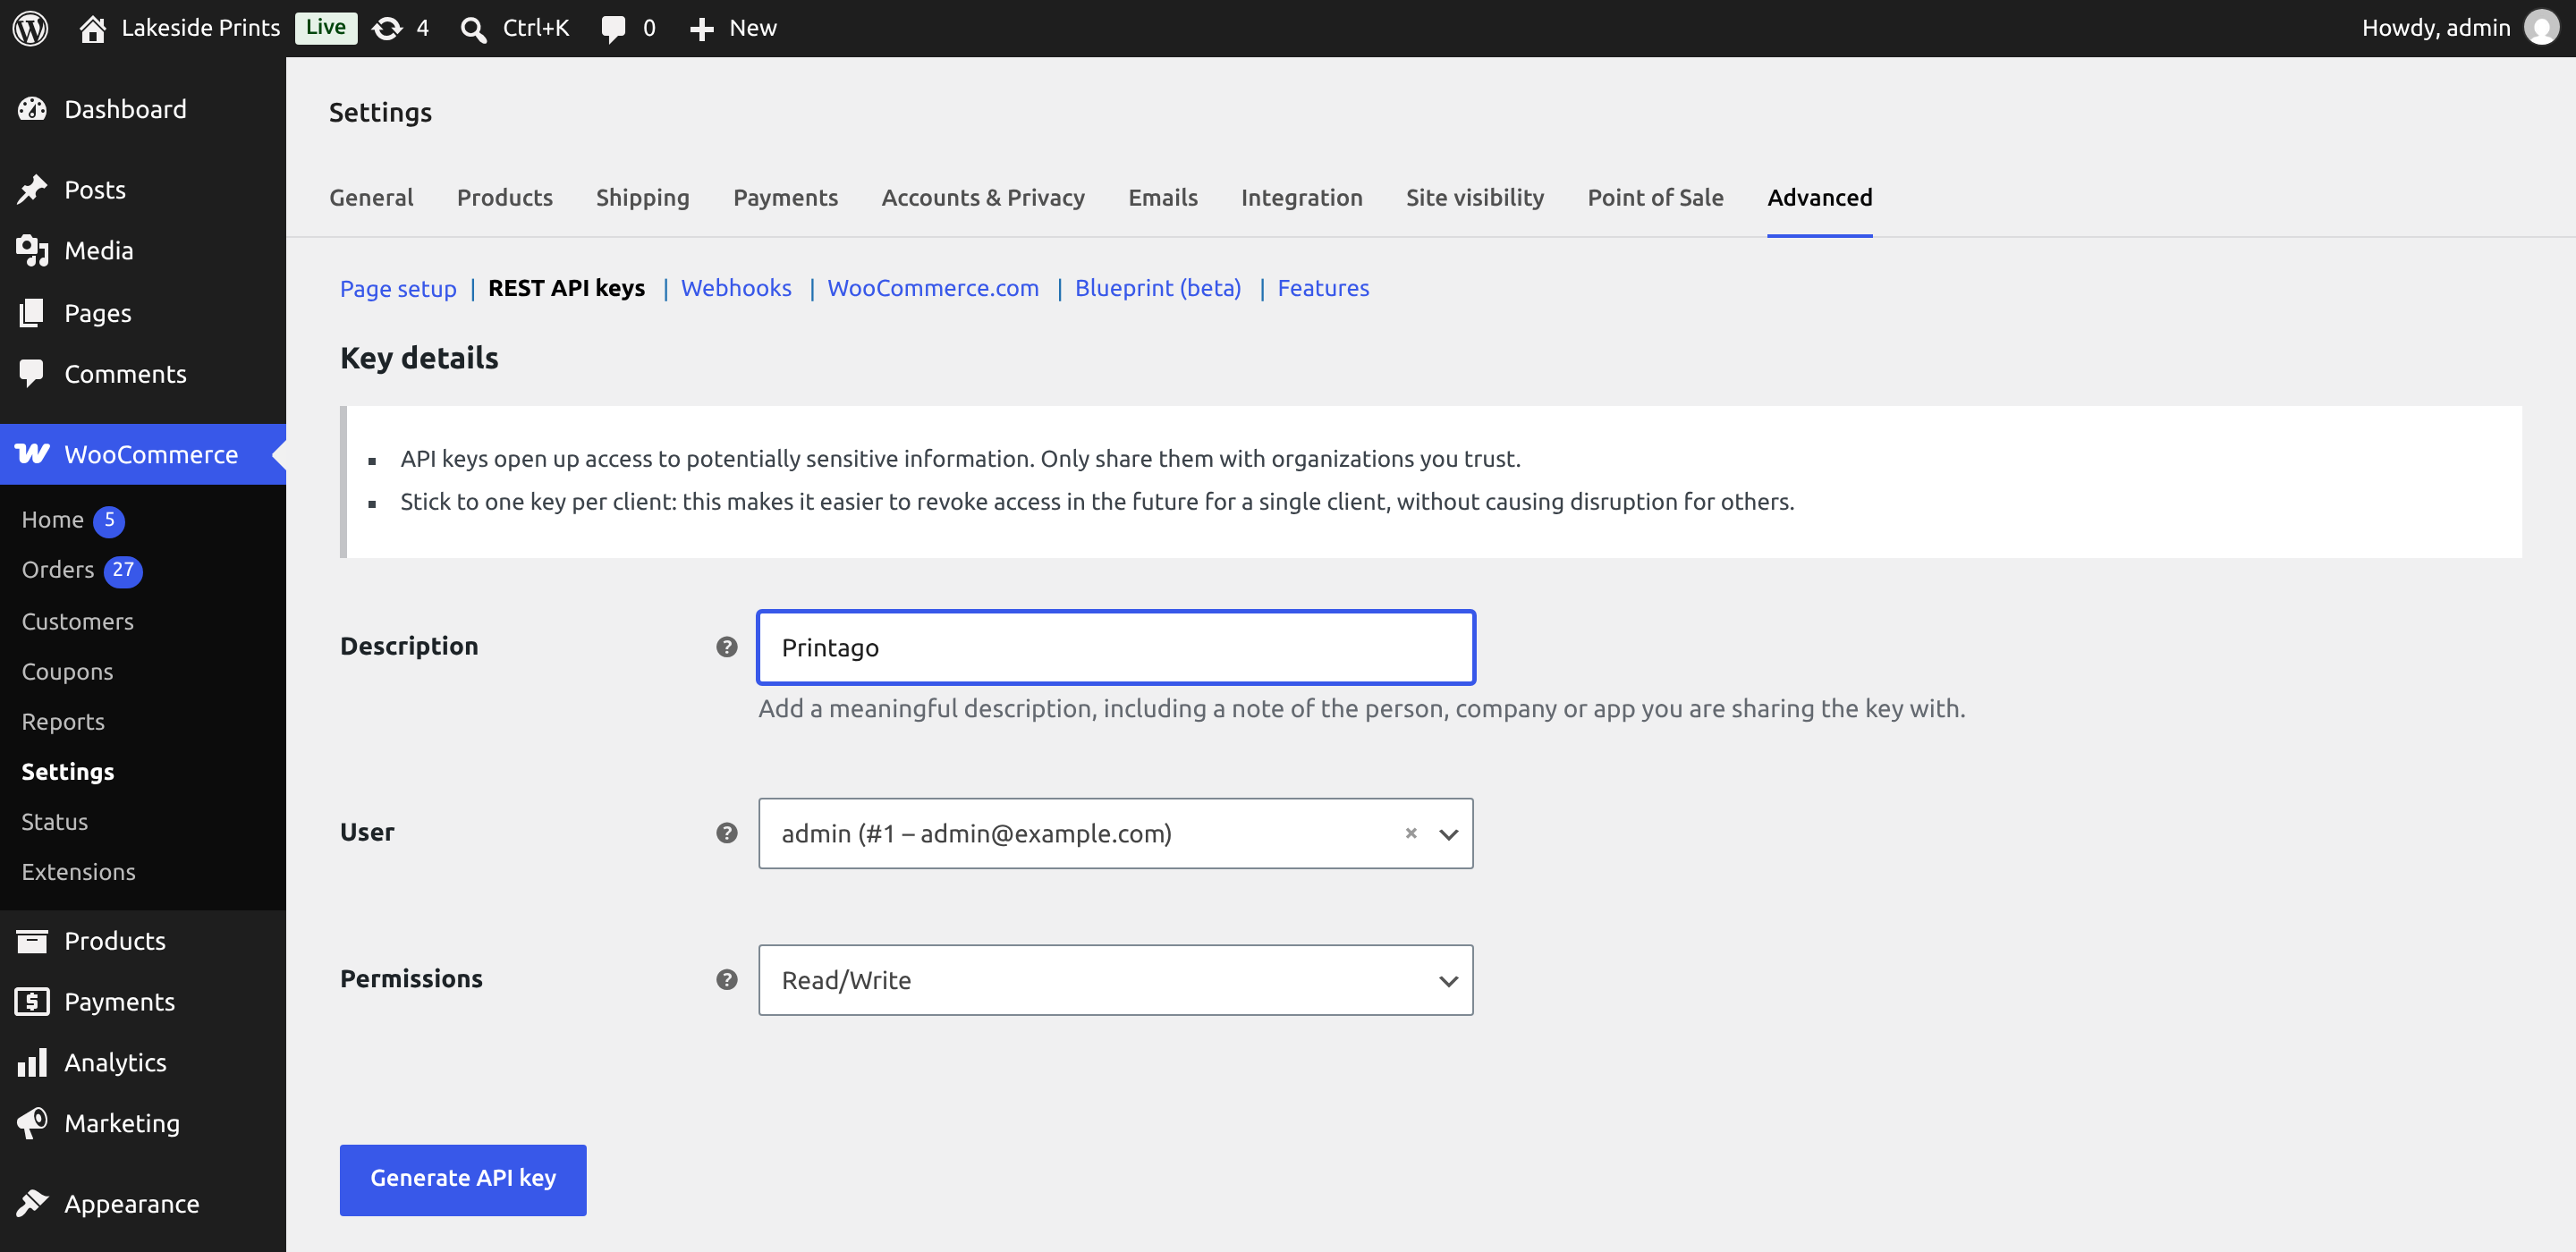
In your WordPress admin, open WooCommerce → Settings → Advanced → REST API and click Add key.
-
Give it a description such as "Printago", choose your admin user, set Permissions to Read/Write, and click Generate API key.
-
In Printago's connect window, click Enter API keys manually (if your host blocks the authorize flow), fill in your store URL, and paste the Consumer key and Consumer secret. Click Connect.
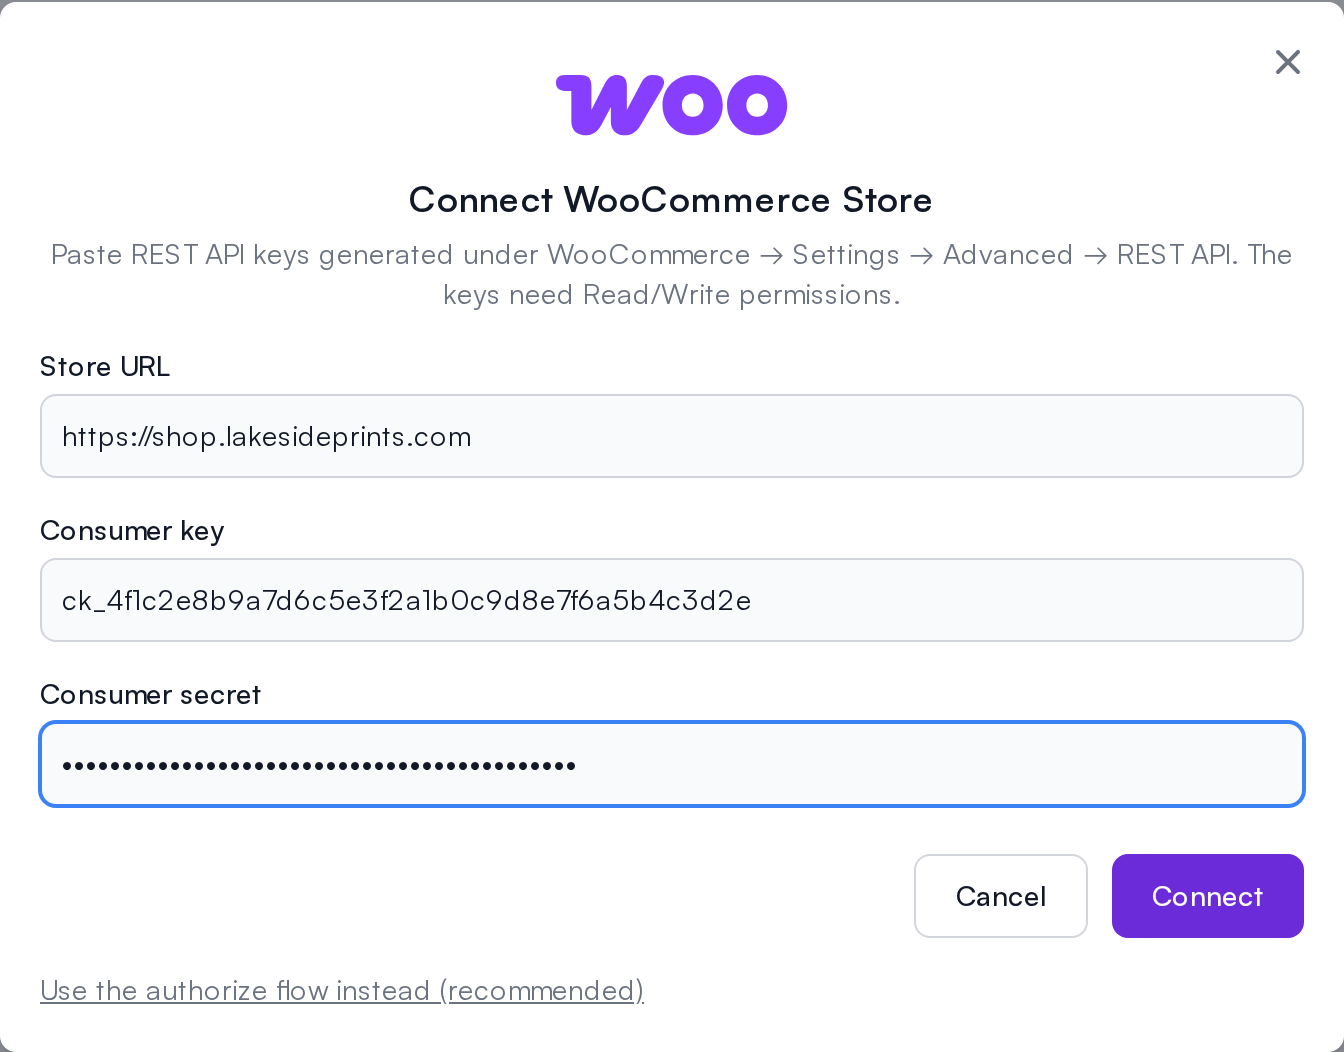
WooCommerce shows the consumer secret only once, so paste it into Printago before leaving the page.
Connection Tab
After connecting, the Connection tab shows the health of your store's link to Printago.
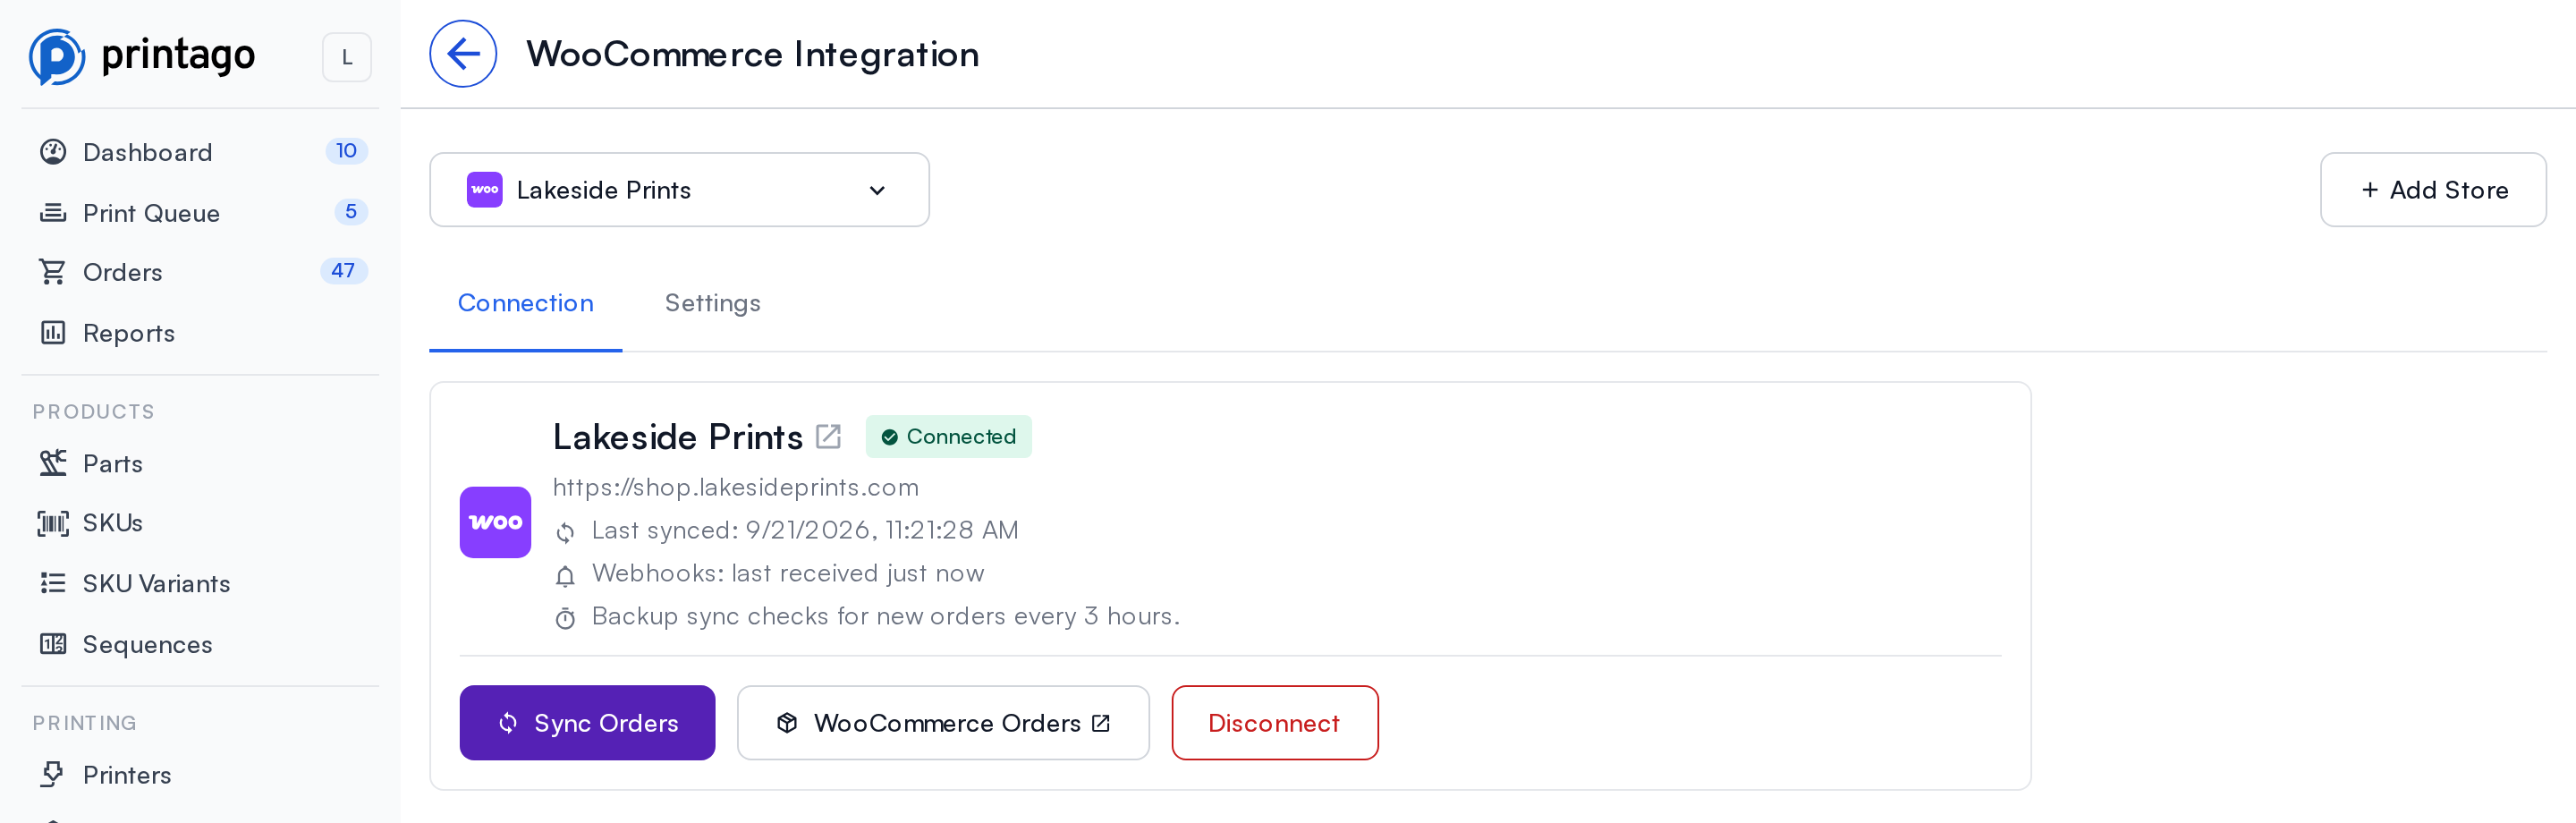
- Store name and URL, with a link to your storefront
- Last synced: when Printago last checked your store for new and changed orders
- Webhooks: when your store last notified Printago about an order. If webhooks could not be set up on your store, a notice appears here instead, and orders keep importing through the backup check
- Backup sync: how often Printago checks your store on its own
Actions
- Sync Orders: check your store for new and changed orders right now
- WooCommerce Orders: open the orders list in your WordPress admin
- Disconnect: remove the store from Printago (see Disconnecting)
Multiple stores
Click Add Store to connect another WooCommerce store. Use the store picker at the top left to switch between them; each store has its own Connection and Settings tabs.
Settings
Open the Settings tab to control what happens when orders arrive. Settings apply to the store selected in the store picker.
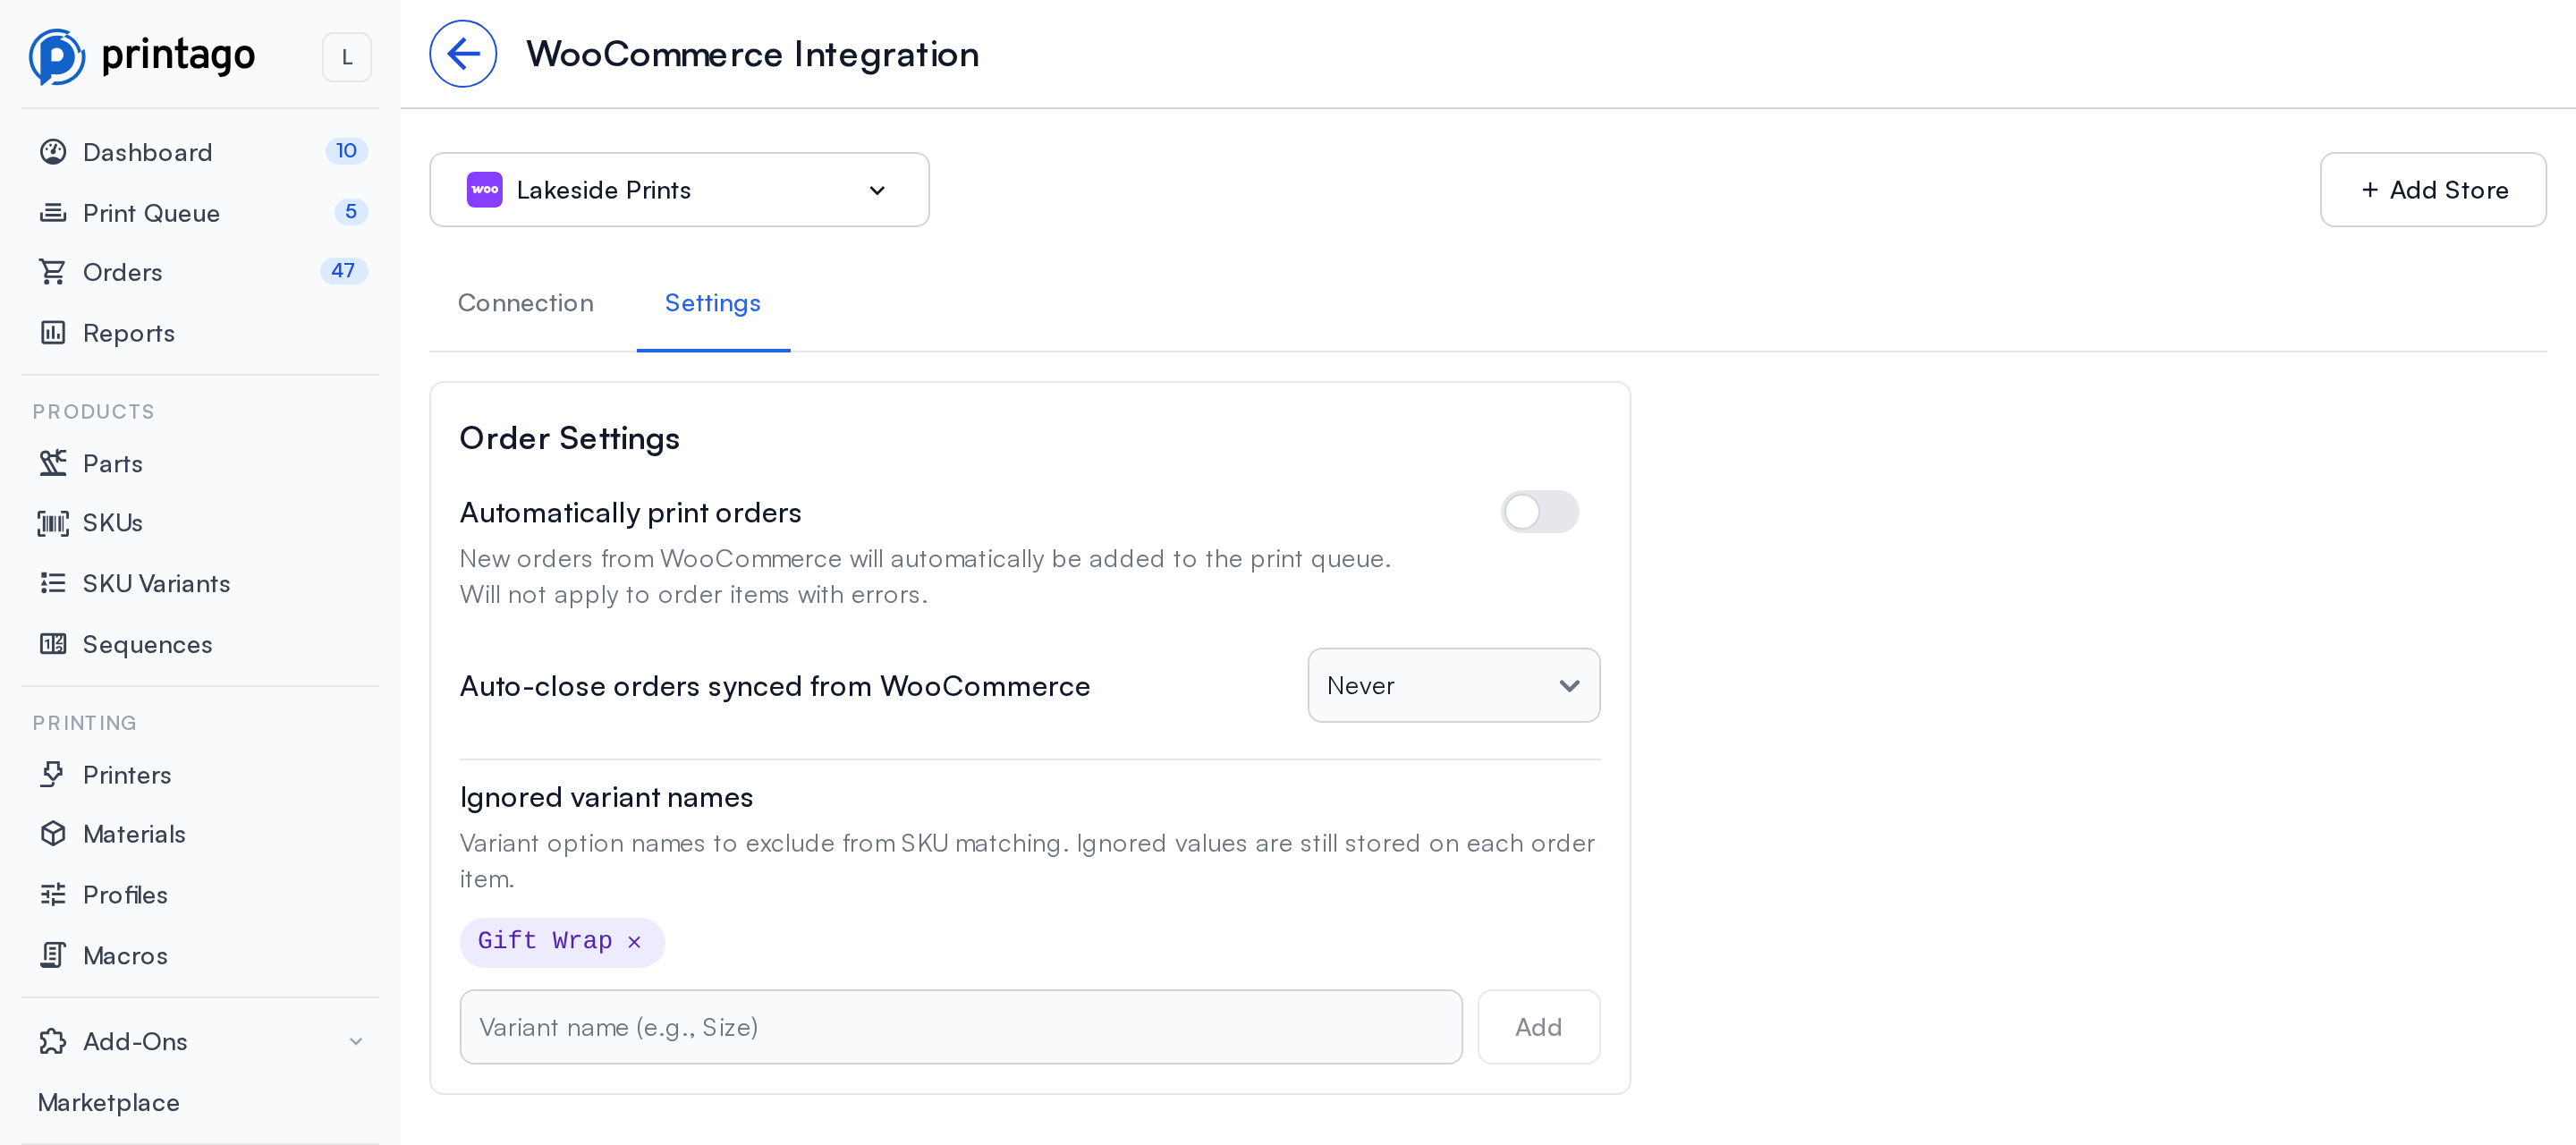
Automatically print orders
When on, every newly imported order is added to the print queue right away. Items that have a problem (for example, a SKU Printago doesn't recognize) are skipped until you fix them.
Auto-close orders synced from WooCommerce
- Never: orders stay open in Printago until you close them
- When completed: Printago closes the order when you mark it Completed in WooCommerce
Ignored variant names
Some options on your WooCommerce products may not affect your 3D printed part, such as gift wrapping or a wood finish. The Ignored variant names setting leaves those option names out of SKU matching so they don't interfere with order resolution.
Ignored options are still stored on each order item for reference; they just aren't used when Printago works out which SKU variant to print.
- Type the option name in the input field and press Enter or click Add
- Remove a name by clicking the × on its tag
- Names match the WooCommerce attribute name (the one your customers see) ignoring capitalization and extra spaces
Example: If your planter listing has Material and Gift Wrap options, but gift wrapping doesn't change what you print, add Gift Wrap to the ignored list. Printago matches orders using only the Material option.
This applies to orders imported after you change it.
How Orders Sync
Which orders import
Printago imports orders once they reach Processing, which in WooCommerce means the customer has paid. Orders that are still Pending payment or On hold (for example, a check you haven't received yet) wait; they import as soon as you move them to Processing.
After import, Printago keeps following the order:
| When the WooCommerce order becomes | Printago |
|---|---|
| Completed | Closes the order, if auto-close is set to When completed |
| Cancelled, Refunded or Failed | Cancels the order and its items |
| Anything else | Leaves the order as it is |
An order is never imported twice, however many times your store reports it.
Real time, with a backup
Your store notifies Printago the moment an order is placed or changes, so orders usually appear within seconds. WordPress sends these notifications through its own scheduler, and some hosts delay or drop them, so Printago also checks your store for new and changed orders every 3 hours. Click Sync Orders on the Connection tab to check immediately.
Orders in Printago
WooCommerce orders appear on your Orders page alongside your other channels. Turn on the Source and Shop columns (column settings, top right of the table) to see which orders came from WooCommerce and which store they came from.
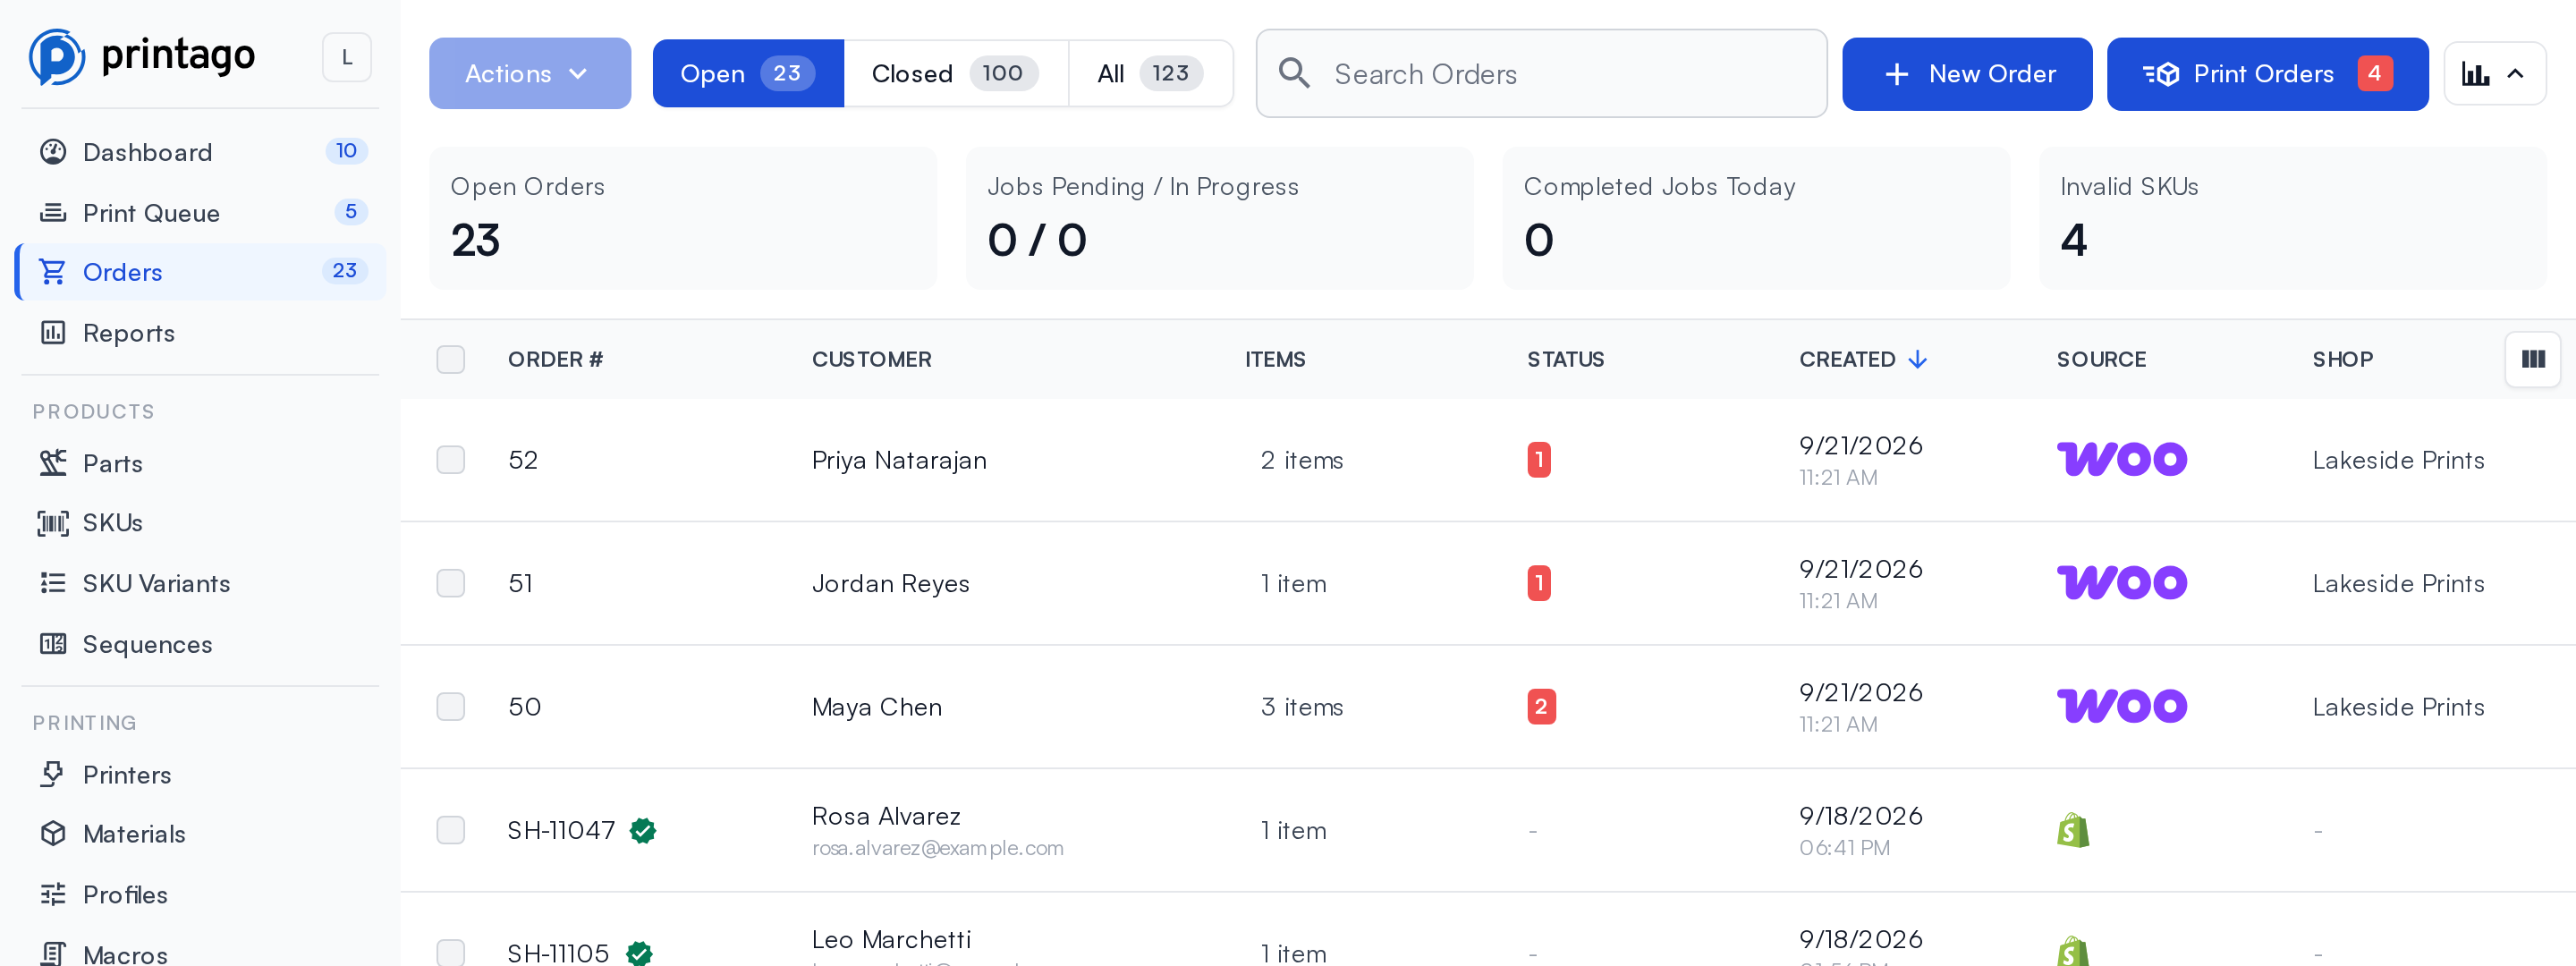
Open an order to see its items, each matched to a Printago SKU, with the WooCommerce store shown as the source.
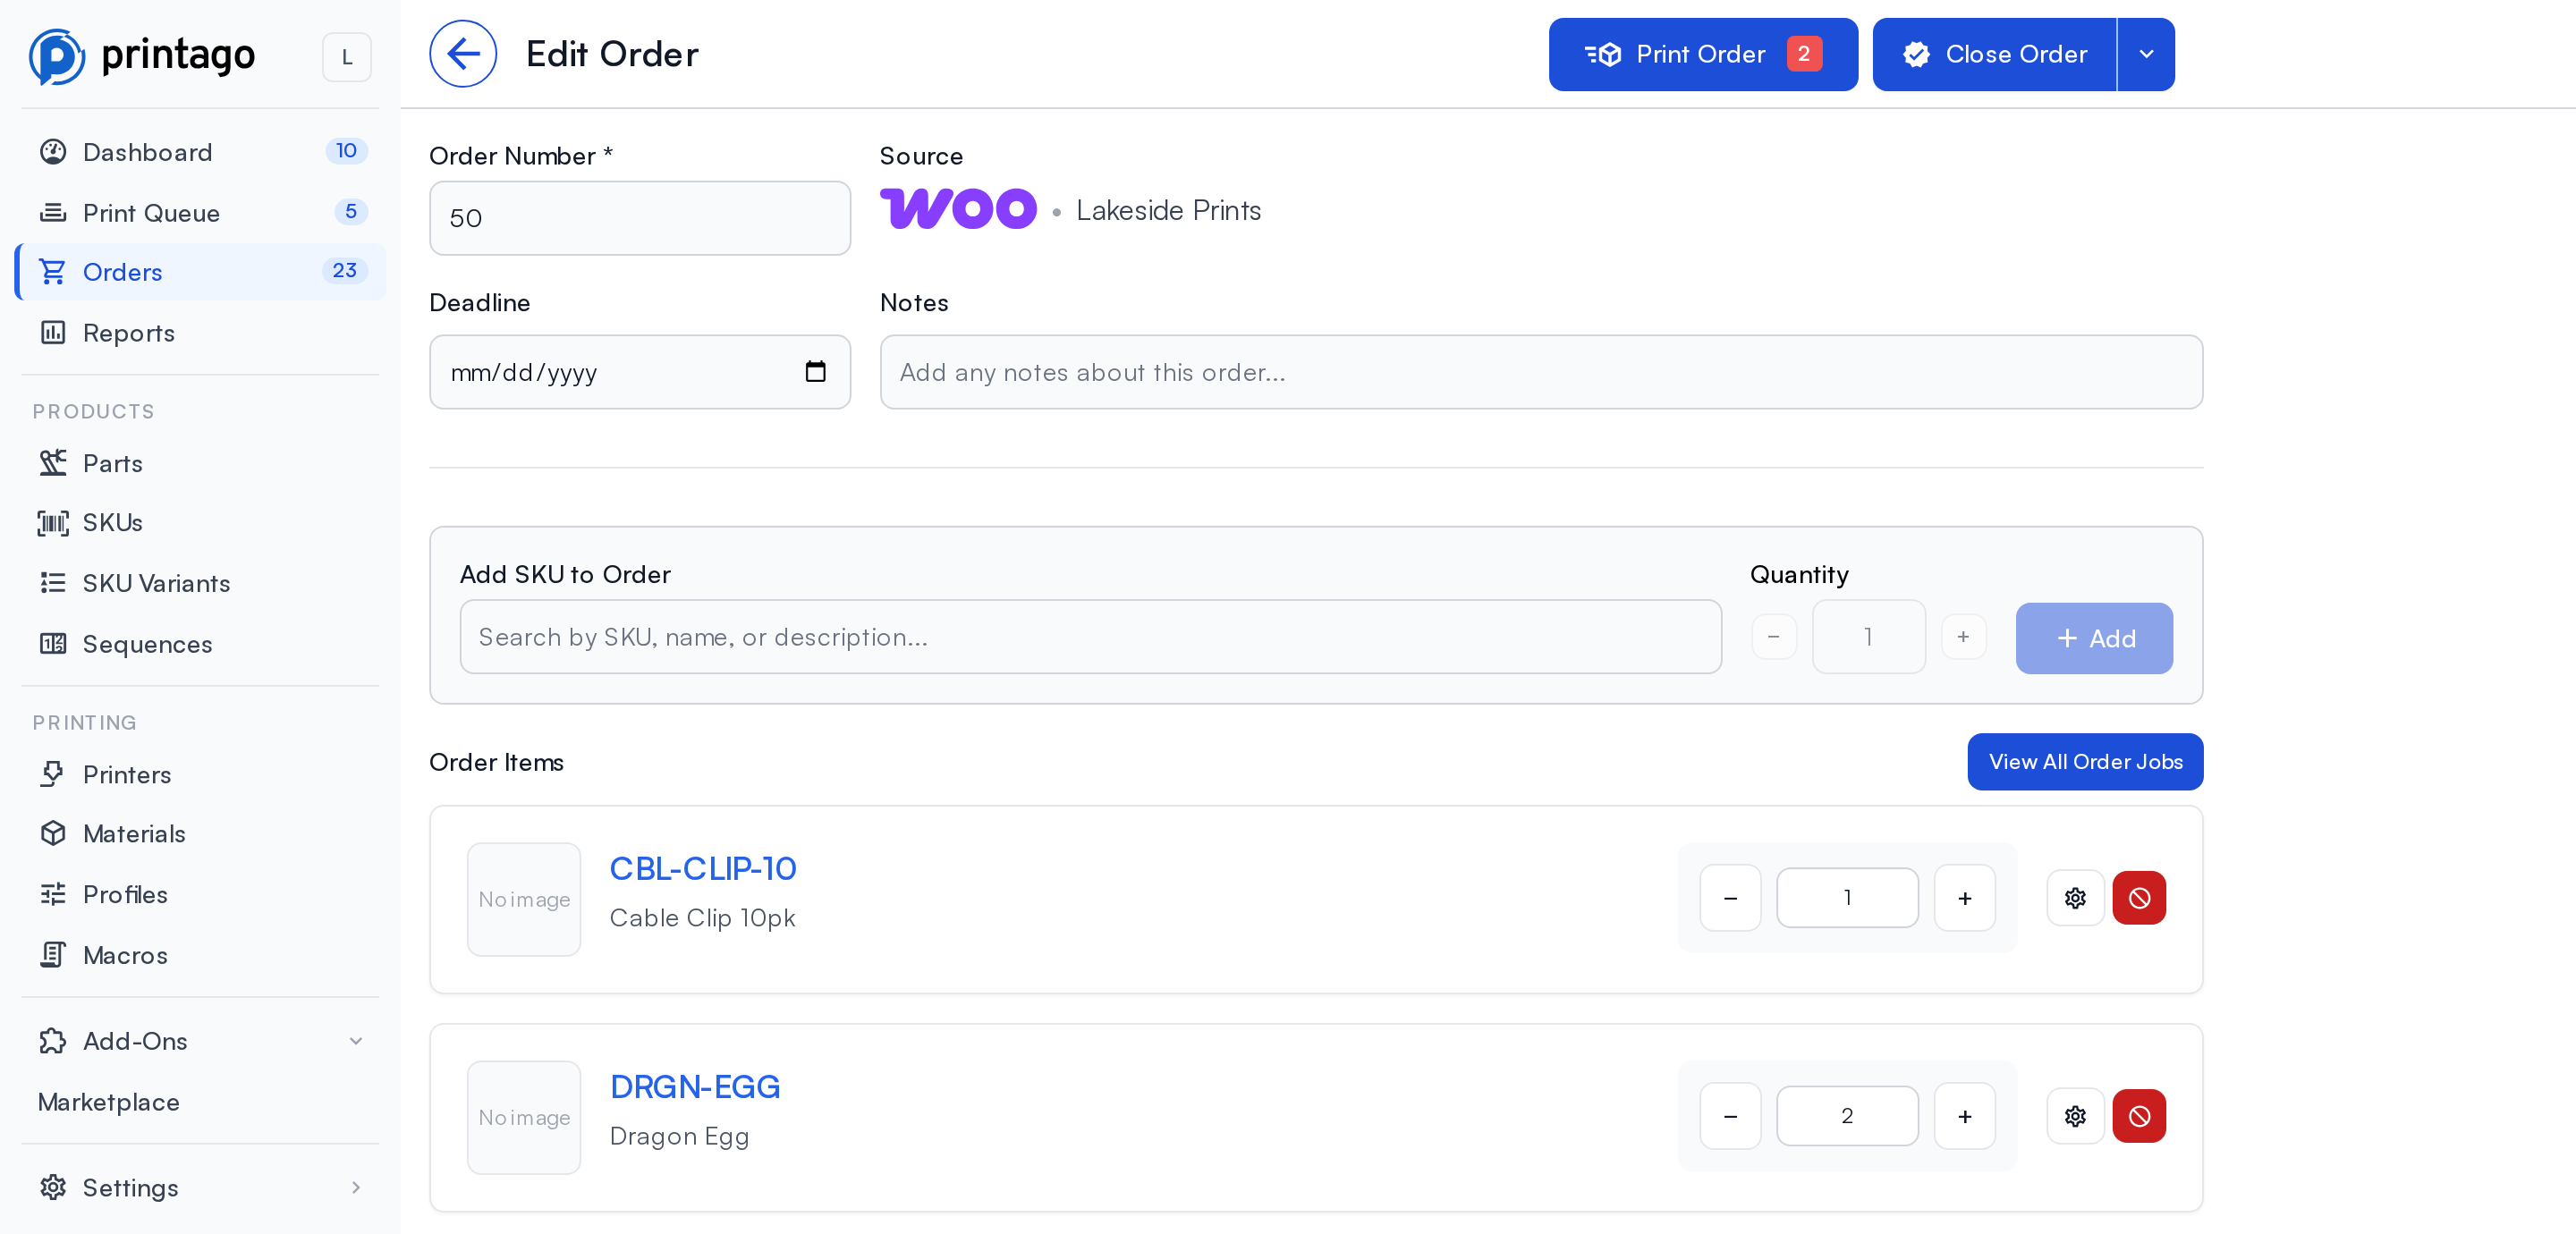
From here it works like any other order: queue it with Print Order, track its jobs, and close it when it ships. See Orders.
SKU Matching
Printago matches each item using the SKU set on the product (or on the variation, for variable products) in WooCommerce:
- Exact match: a Printago SKU with the same code, for example
DRGN-EGG. - Suffix match: if there's no exact match, Printago reads the code as a base SKU plus option suffixes, for example
WIDGET-001-RED-LGforWIDGET-001in Red, Large. See SKU Suffixes.
For variable products, the options the customer picked come across by the name your customers see (such as "Color: Silk Gold"), whether you created the attribute on the product or under Products → Attributes. They match your Printago variants by name or alias; see Name Matching.
Extra fields added by product add-on plugins (engraving text, gift options and the like) come through on the order item alongside the variation options. If one of them doesn't correspond to a variant in Printago, add its name to Ignored variant names.
A product with no SKU in WooCommerce still imports, but its items need a SKU assigned in Printago before they can print. If you add the matching SKU in Printago later, waiting items pick it up automatically.
Disconnecting
Click Disconnect on the Connection tab and confirm. Printago removes its webhooks from your store and deletes the stored keys. Orders already imported stay in Printago.
To also revoke the key on your store's side, delete the Printago key under WooCommerce → Settings → Advanced → REST API.
Troubleshooting
"Could not reach the WooCommerce REST API"
- Check the store URL, including
https:// - Make sure the key has Read/Write permission
- Make sure a security plugin or firewall isn't blocking
/wp-json - Check that permalinks aren't set to "Plain"
The approval window shows an error or never finishes
Your host may block the approval flow. Use API keys instead.
Orders aren't importing
- Check the order's status in WooCommerce. Only Processing orders import; pending and on-hold orders wait
- Click Sync Orders on the Connection tab
- Check the Connection tab for a webhook notice
Webhooks show "none received yet"
That's common on hosts with strict firewalls or a slow WordPress scheduler. Orders still arrive through the backup check every 3 hours, or right away with Sync Orders. If your host runs WordPress's scheduler on a real server cron, webhooks usually start flowing.
Items show "Missing SKU"
- Set a SKU on the WooCommerce product or variation
- Create the matching SKU in Printago, or add the variant suffixes it needs
- Check that variation option names match your Printago variants (or their aliases)
- If an option doesn't affect what you print, add it to Ignored variant names
"This store is already connected"
Each WooCommerce store can be connected once. Disconnect it first to reconnect, for example with new keys.
Technical Details
Authentication
Printago connects with WooCommerce REST API keys, created either by your approval or by you. It never sees your WordPress password. You can revoke the key at any time from WooCommerce → Settings → Advanced → REST API, which stops Printago's access immediately.
Notifications from your store are signed with a secret unique to your connection, and Printago rejects any it can't verify. It treats each one only as a prompt: it reads the order back from your store before acting on it.
Data Privacy
Printago keeps the buyer's name and their state and country, which is enough to identify orders on your dashboard. Email addresses, phone numbers and street addresses are not stored; you fulfill shipping from WooCommerce as usual.
Sync Frequency
- Real time: order webhooks from your store, usually within seconds
- Backup: an automatic check every 3 hours for anything a webhook missed
- Manual: Sync Orders on the Connection tab
Need Help?
WooCommerce is a registered trademark of WooCommerce, Inc. This application uses the WooCommerce REST API but is not endorsed or certified by WooCommerce or Automattic.